What Is llms.txt and Does Your Website Need It?

People now discover brands through AI answers, not only search results. If ChatGPT, Gemini, or another tool describes your business, you want it to pull from the right pages.

That's why llms.txt is getting attention. It's a simple file placed at the root of your website to help AI tools find your most useful content faster. To see where it fits, it helps to look at what it is, how it works, and whether it deserves a spot on your site now.

What the llms.txt file is, and what it is meant to do

An llms.txt file is a plain Markdown document, usually published at /llms.txt, that gives large language models a cleaner map of your website. Instead of making an AI system sort through menus, scripts, sidebars, and repeated template code, you point it toward the pages that matter most.

The idea was proposed by Jeremy Howard in September 2024. Since then, it has picked up interest as AI search and answer engines have grown. As of April 2026, llms.txt is still an unofficial proposal, not a formal web standard. Still, adoption is moving up. One March 2026 study found llms.txt on 7.4% of Fortune 500 sites and about 10.13% of 300,000 checked domains. Several tech companies and documentation-heavy sites already use it.

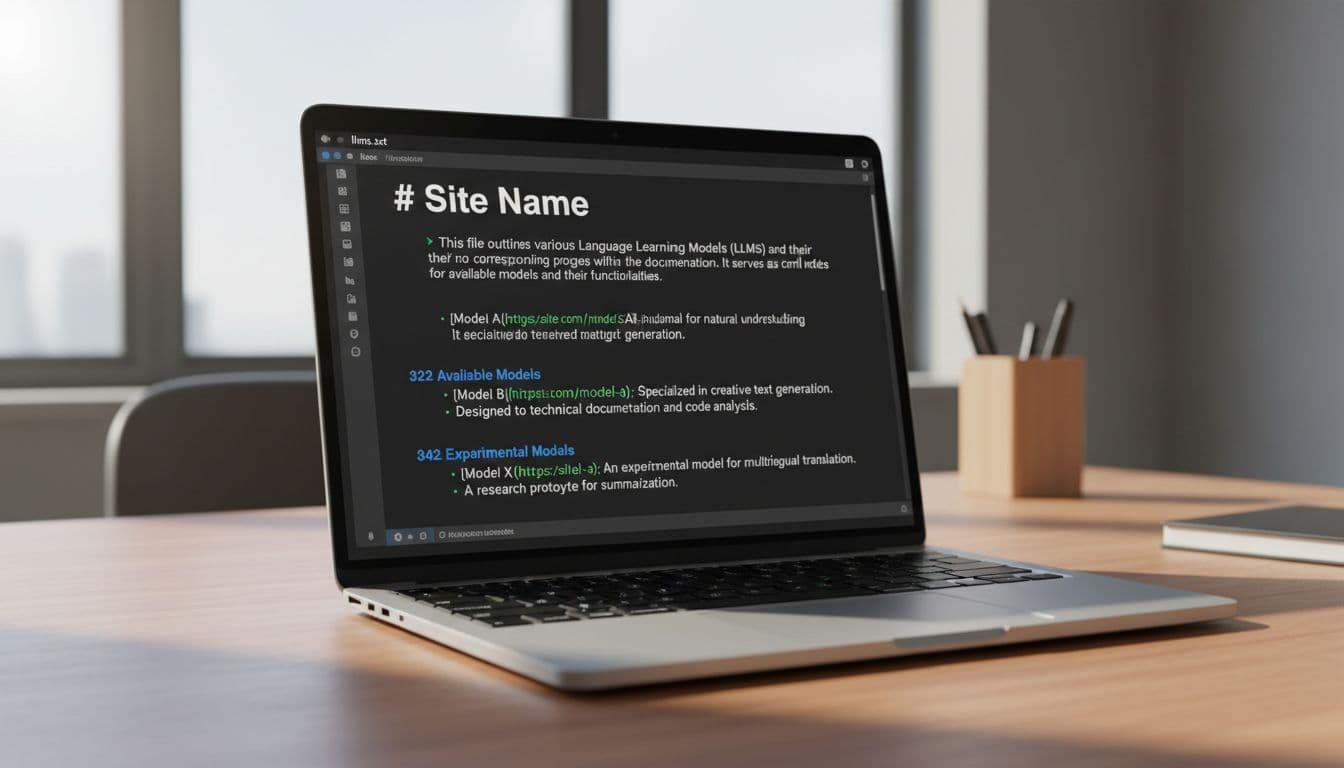
Clean modern code editor on a laptop screen displaying an open llms.txt file in Markdown format with H1 title, blockquote summary, and H2 sections with bullet points. Realistic office desk setting with soft natural light, dark theme, sharp focus on content, no distractions.

Why AI tools need a simpler version of your website

Modern websites are busy. They include navigation bars, pop-ups, tracking code, repeated footer links, tabs, and dynamic elements. Humans can ignore that clutter. AI systems often have a harder time.

A curated file cuts through the noise. It tells the model, “Start here, these are the pages worth reading.” That can help AI tools build cleaner summaries, pull better citations, and describe your business with fewer mistakes.

This matters most when your site has a lot of pages. Without guidance, an AI system might focus on old posts, thin pages, or low-value archives instead of your strongest content.

How llms.txt is different from robots.txt and sitemap.xml

These three files serve different jobs. They work better together than alone.

Here's the simplest way to compare them:

FileMain purposeWho it helps most
robots.txtTells crawlers what they can or can't accessSearch engine and bot crawlers
sitemap.xmlLists URLs you want search engines to know aboutSearch engines
llms.txtHighlights your best pages and adds context for AI systemsAI answer tools and LLMs

robots.txt is about access. sitemap.xml is about discovery. llms.txt is about guidance.

llms.txt is a guide, not a gatekeeper. It doesn't replace robots.txt, and it doesn't force AI tools to obey it.

Why your website may need llms.txt now

If your site publishes useful content, llms.txt is worth paying attention to now. That includes service pages, product pages, help docs, knowledge bases, category pages, and original articles. Those are the assets AI tools often summarize, cite, or use to build answers.

This is where llms.txt connects with AI SEO, GEO, and AEO. The names differ, but the goal is similar: help machines understand your content well enough to mention it correctly. If you want a broader view of those shifts, this guide on GEO vs SEO vs AEO lays out how each one fits.

The business value is simple. You're not trying to stuff more pages into an AI system. You're trying to steer attention toward your current, high-value pages instead of the weak ones.

It can improve how AI answers describe your brand

When AI tools can quickly find your core pages, they have a better shot at describing your company accurately. That may lead to stronger summaries, cleaner citations, and fewer strange mismatches between what you do and what the AI says you do.

That doesn't mean guaranteed traffic or rankings. Results are still mixed, and some AI providers may ignore the file. A February 2026 test from OtterlyAI found no major crawler behavior change. Still, giving AI a clearer path is better than leaving it to guess.

This is also why brands are paying more attention to AI Overviews SEO for service businesses. AI answers often shape the first impression before a user ever clicks a website.

It helps you highlight your best pages, not your whole site

The strength of llms.txt is that it's selective. Think of it like handing someone a short reading list instead of your whole library.

That means you should include your top service pages, best product pages, strongest blog posts, useful guides, documentation, and key trust pages. Skip thin tag pages, duplicate URLs, expired promos, and low-value archives.

This is especially useful for growing websites. Once a site has dozens or hundreds of URLs, the best pages can get buried. llms.txt helps bring them back to the front.

How to create an llms.txt file without overcomplicating it

The common format is simple. Start with an H1 for your site name. Add a short blockquote or summary that explains what the site is about. Then organize your key pages under H2 section headings, with bullet links and short descriptions.

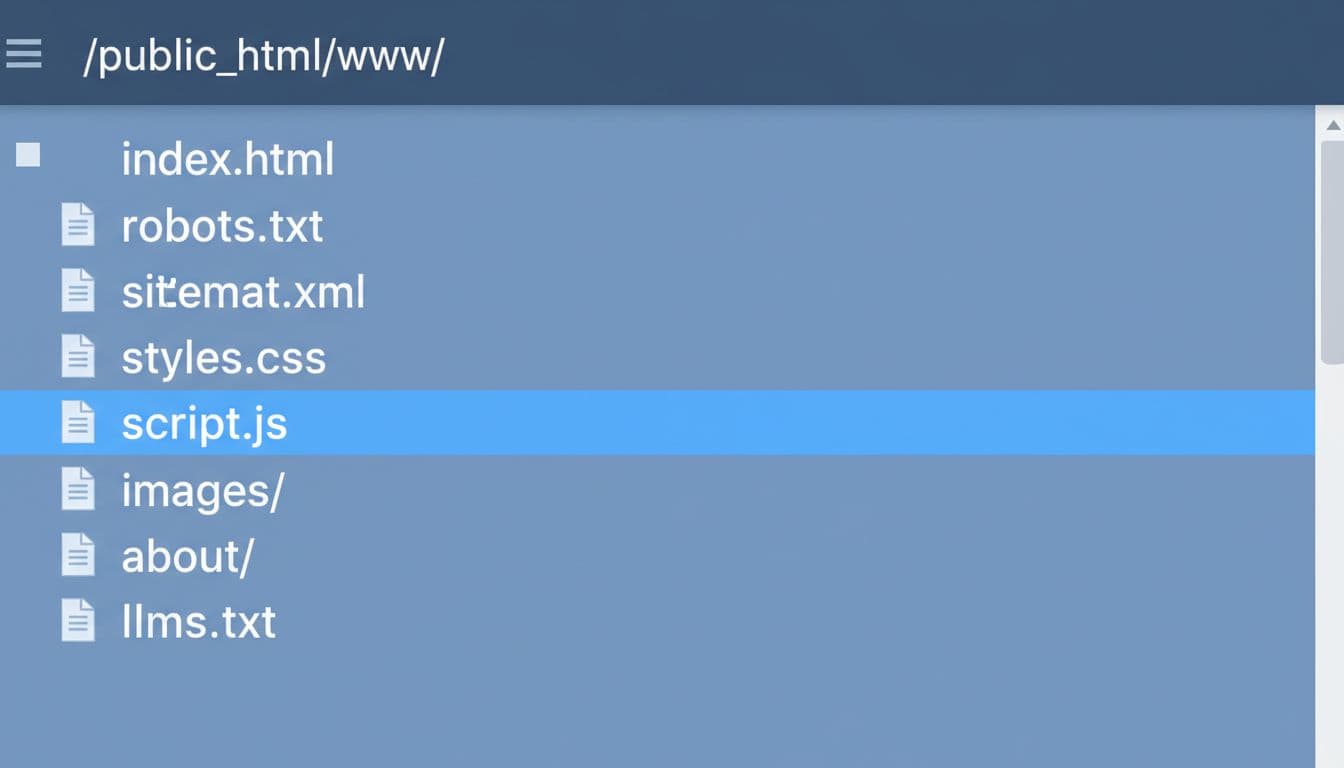
Most sites write the file in Markdown and upload it to the root of the domain so it loads at yourdomain.com/llms.txt. If you can, serve it with a normal 200 OK response and plain text output. Some sites also publish llms-full.txt or clean Markdown versions of important pages, but those are optional extras, not the starting point.

Simple web server file manager view of a site's root directory listing files like index.html, robots.txt, sitemap.xml, and highlighted llms.txt. Clean interface in professional blue tones with focused composition on the files list.

What to include in the file

Keep it tight and useful. Most sites only need a small set of strong links.

  • A short homepage summary that explains what the business does
  • Core service or product pages
  • Important guides, tutorials, or blog posts
  • Key category pages or collections
  • Documentation, help center, or knowledge base pages
  • Contact, about, or trust pages when they add context

Each listed page should be live, helpful, and worth sending an AI system to. Use clear labels and one short description per link. If the wording sounds like ad copy, trim it.

Common mistakes to avoid when building llms.txt

A lot of websites miss the point by turning llms.txt into a second sitemap. That weakens the file.

Avoid these common mistakes:

  • Listing too many pages
  • Using vague descriptions like “Learn more” or “Read this”
  • Linking to old, thin, or outdated content
  • Forgetting to update the file as pages change
  • Stuffing keywords into every line
  • Treating it like a tool that blocks AI access

The goal is clarity. If a page isn't one of your best sources, leave it out.

Best practices, limits, and whether llms.txt is worth it for your site

llms.txt is easy to create, easy to maintain, and low risk. That makes it attractive. Still, it isn't magic. It won't control every AI tool, and it won't fix weak content.

Use it alongside strong SEO basics: a clear site structure, fresh content, internal linking, and schema where it helps. If your core pages are messy or thin, fix those first. A clean file can point AI toward good content, but it can't turn bad content into good answers. This is why your broader SEO strategy for top rankings still matters.

Who should add it first

The best early candidates are content-rich websites. That includes SaaS companies, agencies, publishers, ecommerce brands with strong guides, support centers, product docs, startups, and service businesses that want better visibility in AI-generated answers.

On the other hand, a tiny site with five simple pages may see less value right away. It can still add llms.txt, but the upside is usually bigger for sites with more content and more room for AI confusion.

A simple rule for deciding if it is worth your time

Use this test: if your site has pages you want AI tools to understand and cite correctly, llms.txt is worth adding.

If your content is thin, old, or unclear, improve that first. Then publish the file. In other words, llms.txt supports content quality, it doesn't replace it.

AI answers are becoming part of how people choose brands. A simple guide file helps you shape that process instead of leaving it to chance.

llms.txt is not a silver bullet, but it is a smart housekeeping move. It points AI systems to your best content, reduces confusion, and fits the way online discovery is shifting.

For most content-rich websites, adding it now makes sense. It's simple to implement, easy to update, and well aligned with a web where AI often speaks before your homepage does.

GTM Tracking Plan Template for Local Service Websites (2026)

If you run a local service business, your website has one job: turn intent into calls, form leads, chats, and booked jobs. Yet many teams still track the wrong things, or they track the right things twice.

This GTM tracking plan template, a critical component of your go-to-market strategy for local business growth, is built for GA4 in 2026, with privacy rules, booking tools, and consent banners in mind. You'll get ready-to-use tables for event planning, naming, Google Tag Manager build mapping, and QA, plus practical notes that prevent messy data.

What to track on a local service website in 2026 (GA4-first)

Clean professional office desk with open laptop showing blurred GA4 events list for local plumber website tracking including form_submit, phone_click, booking, chat_initiate, and directions, with subtle floating icons, notebook, pen, coffee mug, and blurred person reviewing in background.

Start with conversions that match real revenue and align with your target audience and ideal customer profile. For a plumber, HVAC tech, dentist, or law firm, that usually means lead capture, not “scroll 90%.”

In GA4 within Google Analytics, keep Enhanced Measurement for basics (page_view, outbound clicks), but rely on event tracking via custom events in GTM for lead actions. As a result, you control when events fire and what details you send. If you need a second perspective on local business event tracking, this guide on advanced GA4 tracking for local businesses is a useful comparison.

Recommended GA4 key events (conversions) for local services, which map to stages in the buyer journey:

  • form_submit (lead form success, not just validation)
  • click_to_call (tap-to-call on mobile, or click on desktop)
  • booking_completed (scheduler success page or confirmed callback)
  • chat_lead (chat started or first message sent)
  • directions_click (tap address or “Get directions”)

Keep parameters small and helpful, like lead_type (emergency, routine, quote), service (drain_cleaning, root_canal), and placement (header, sticky, contact_page). Avoid personal data (no names, emails, phone numbers).

Your GTM tracking plan template (copy, fill, ship)

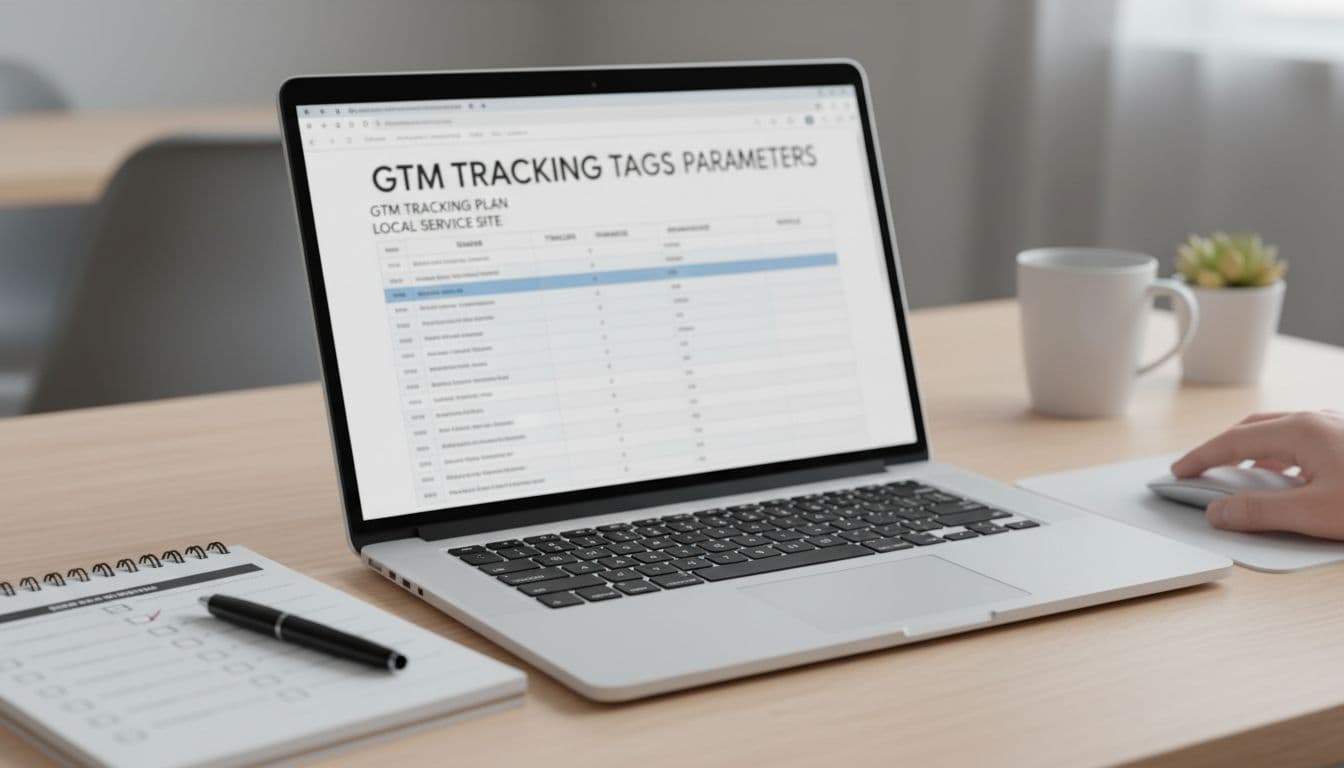
Modern workspace featuring a laptop displaying a blurred Google Sheets table structure for a GTM tracking plan with columns for Event, Trigger, Tags, Parameters, and Status, mouse pointer hovering, notepad with checklist nearby, soft office lighting.

A tracking plan should read like a work order, aligning your setup with business goals and KPIs. Each row answers: what's the action, what proves success, where does it fire, and what could break it?

Use this as your master sheet, an essential component of your marketing plan template:

Business goalsGA4 event nameFires when (success definition)Primary GTM triggerKey performance metrics (examples)Mark as key event?Notes (common pitfalls)
Contact leadform_submitThank-you view, success DOM state, or XHR 200 responseCustom event or element visibility on success messageform_id, lead_type, service, location_areaYesDon't use generic “Form Submission” if validation fails often
Phone leadclick_to_callClick on tel: linkClick trigger (Just Links) filtered to Click URL starts with tel:placement, service, page_typeYesDon't pass the phone number, it's unnecessary risk
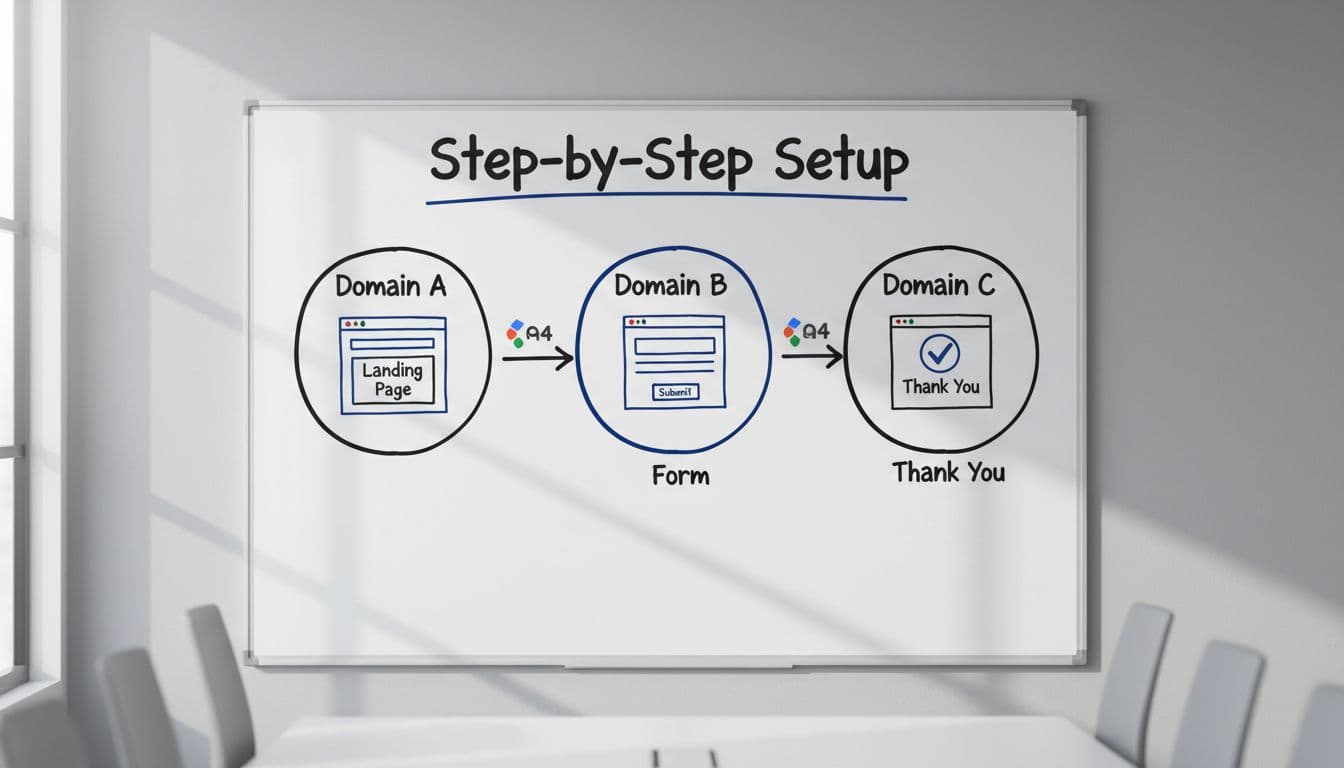
Booked appointmentbooking_completedScheduler confirms booking (return URL or callback)Page view (thank-you URL) or custom event from schedulerbooking_provider, service, booking_typeYesCross-domain schedulers can create self-referrals
Chat leadchat_leadFirst message sent, or chat started if that's all you can detectCustom event from chat API, or click trigger for chat launcherchat_provider, placement, serviceYesSome widgets fire multiple opens, dedupe it
Directions intentdirections_clickClick/tap address or Maps linkClick trigger filtered to maps URL or address elementplacement, location_areaOptionalGood proxy for in-person intent (clinics, offices)
Lead quality (optional)lead_qualifiedCRM marks lead as qualifiedServer-side event or Measurement Protocollead_id, lead_type, value, currencyYesBest event for ad optimization when available

If your leads also come from Maps, track those link clicks and align them with on-profile actions, then pair it with Google Business Profile optimization so your direction and call intent actually grows.

Event and parameter naming conventions your team won't fight over

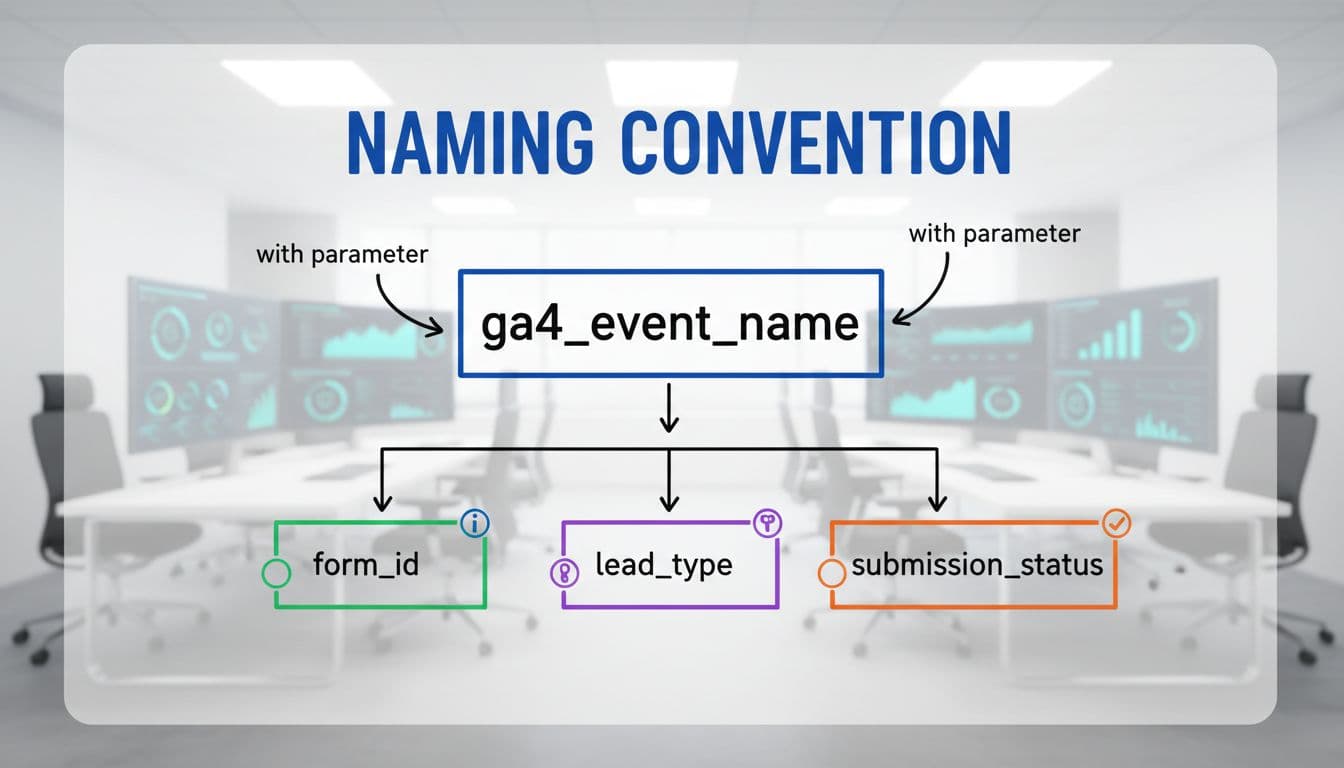
Simple clean graphic of GA4 event naming convention flowchart using ga4_event_name with parameters like form_id and lead_type, on digital whiteboard style background in modern analytics room with marker icons.

Naming is boring until you need to audit 40 tags on a Friday, especially when cross-functional teams and stakeholders clash over inconsistent labels. Set rules once for seamless collaboration and effective project management that prevents technical debt and simplifies long-term oversight, then stick to them.

Use lowercase, underscores, and stable meanings (not button colors or UI labels). Also, pick one “family” of terms and keep it consistent across trades (plumber, dentist, HVAC, legal).

ItemConventionGood exampleAvoid
GA4 event nameverb_noun (stage-based)form_submit, click_to_callSubmitForm1, blue_button_click
Lead typefixed enumemergency, routine, quotefree text like “ASAP!!!”
Serviceservice slugwater_heater_repair, teeth_whitening“Service Page 2”
Placementwhere it happenedheader, sticky_footer, contact_page“top area”
Form IDstable IDcontact_main, estimate_requestDOM-generated random IDs
Dedupe keyevent identifierevent_idrelying on “hope it fires once”

After you ship, register the parameters you care about as GA4 custom definitions so they show in reports. Keep it tight, because too many custom dimensions slows decisions.

GTM trigger and tag matrix (so nothing double-fires)

Blurred laptop screen preview of GTM interface featuring trigger tag matrix table for form submit and phone click events matching, on a desk with keyboard, mouse, calendar, and phone props. Exactly one screen with hands resting naturally, professional lighting, landscape orientation, sharp focus without readable text or UI details.

The cleanest GTM setups look “boring”: one GA4 config tag, clear triggers, and events fired only on success. In addition, write version notes in GTM as part of your strategic roadmap so you can roll back fast.

Use this matrix as a checklist for a successful product launch to map what you'll build and support your launch activities:

GA4 tagTriggerKey filtersData sourceDedupe note
GA4 ConfigurationInitialization, All PagesnoneConstant Measurement IDOnly one config per experience, avoid duplicate installs
GA4 Event: form_submitCustom event dl_form_success (preferred)form_id equals targetData Layer variablesFire once per success, not per button click
GA4 Event: click_to_callJust Links clickClick URL starts with tel:Click variables + lookup for placementExclude repeated clicks within 2 seconds if needed
GA4 Event: booking_completedPage viewThank-you path matchesPage URL + optional query paramsCross-domain: confirm same session (linker)
GA4 Event: chat_leadCustom event from widgetprovider equals expectedData Layer or custom JSMany widgets emit open and message, pick one
GA4 Event: directions_clickJust Links clickmaps URL contains google.com/mapsClick URL + placementTreat as intent, not a guaranteed visit

If you want a broader GA4 plus GTM refresher, this GA4 and GTM setup guide for 2026 covers the core build steps end to end.

Consent-aware tracking in 2026 (Consent Mode v2 in GTM)

A tablet held in hands displays a blurred consent banner with accept and reject options alongside a faded GTM consent mode settings panel on a subtle plumber service homepage.

Consent changes how your tags behave, so it belongs in the tracking plan, not as an afterthought. Industries like SaaS and B2B heavily rely on consent-aware tracking for compliance. In GTM, set a default consent state (often denied where required), then update it when the visitor chooses.

Consent Mode v2 typically involves analytics_storage and ad_storage, plus ad_user_data and ad_personalization for ads features. When consent is denied, GA4 may send limited pings, and reporting can include modeled data that helps market research fill insight gaps. Meanwhile, ad tags should stay blocked or restricted based on the consent state.

If your CMP fires after your GA4 config tag, you can record “phantom” pageviews. Put consent defaults early, then load GA4.

For a practical implementation walkthrough, see this Consent Mode v2 setup guide.

QA checklist before you trust the numbers (GTM + GA4)

Analyst workspace with dual monitors: one blurred GTM preview, one GA4 debugview with subtle checklist overlay and low-opacity thumbs up icon. Cozy evening office light, coffee, notepad, one person with relaxed hands on keyboard.

QA is where most “mystery drops” get prevented, ensuring accurate data for competitive analysis against industry benchmarks. Test with GTM Preview, GA4 DebugView, and real devices, especially iPhones (tap-to-call behavior differs). Back up your GTM container by exporting it as a json file to share configurations easily during the QA process.

TestWhere to testPass conditionFix if it fails
GA4 config fires onceGTM PreviewOne config load per pageRemove duplicate GA4 installs (plugin plus GTM)
Consent defaults applyGTM Preview + browser storageTags respect consent stateMove consent initialization earlier
Form fires only on successGTM Preview + site formNo event on validation errorsSwitch to success message, XHR, or thank-you
Phone click tracks correctlyMobile device testclick_to_call fires on tapFilter to tel: and confirm link markup
Booking completion worksEnd-to-end bookingFires on confirmation onlyAdd cross-domain linker, use return URL
No double eventsGA4 DebugViewOne event per actionDisable competing auto-tracking, add dedupe guard
Parameters populateGA4 DebugViewservice, lead_type, placement presentFix Data Layer push or variable mapping
Key events setGA4 AdminOnly true leads marked key eventsUnmark noisy events, keep conversions strict
Self-referrals removedGA4 reportsBooking tool isn't top referrerConfigure cross-domain and referral exclusions

For a deeper audit workflow, have your product manager verify the final data output using ClickyOwl's GA4 lead tracking checklist and this guide to track website conversions in Google Analytics.

Conclusion

A local service tracking setup should feel like a receipt, not a guess. Define a small set of lead events that align with your customer journey map, standardize names, and map every GTM tag to a clear success signal. Then add consent-aware controls and QA before you scale spend across marketing channels. Once your tracking is stable, refine your value proposition and messaging strategy; clarify pricing strategy and milestones with accurate data. Your next question gets better: which service and area produces the best jobs, not just the most clicks from marketing channels? Scale confidently for your product launch.

Core Web Vitals WordPress Fix Guide for Service Sites (2026)

If your service site is slow, it doesn't just deliver a bad user experience. It costs calls, form leads, and trust, while hurting search engine rankings. A plumber page that loads late, a clinic site that jumps around, or a law firm header that blocks the screen all push people back to Google.

In 2026, Core Web Vitals still come down to three things: how fast your main content appears, how quickly the page reacts to taps, and how stable the layout stays. This guide focuses on WordPress-first fixes for real service sites, not perfect demo scores.

You'll get quick wins, then a practical path for LCP, INP, and CLS, plus common widget fixes (maps, chat, cookie banners, sticky CTAs).

What Core Web Vitals mean for WordPress service sites in 2026

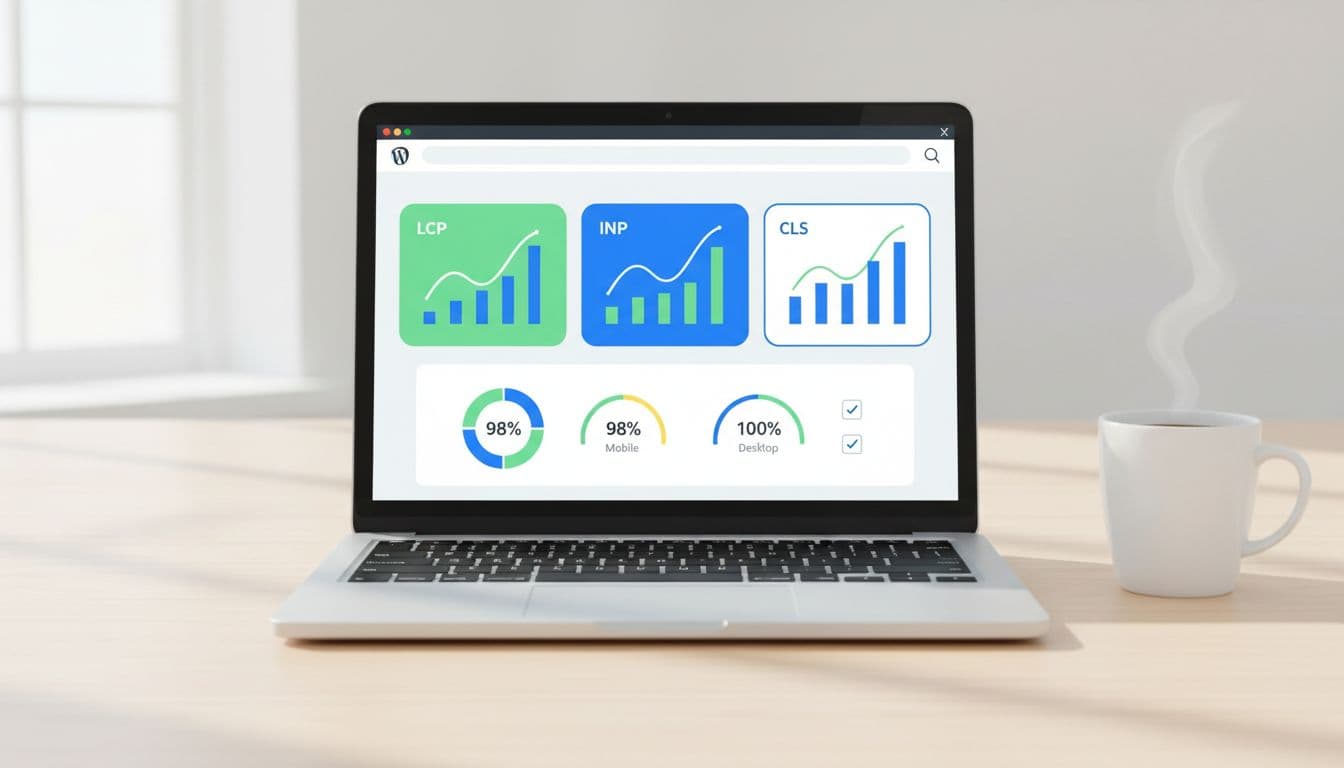
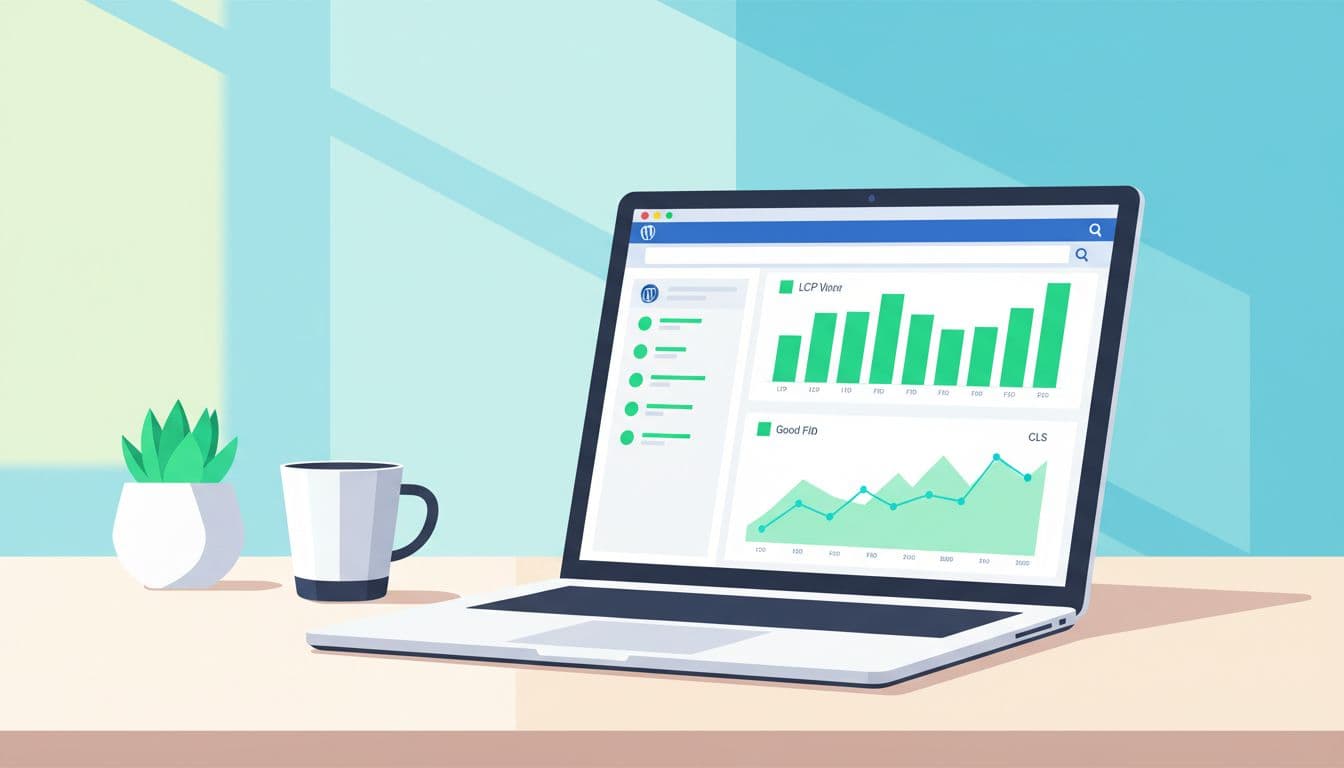
Modern flat illustration of a WordPress performance dashboard highlighting Core Web Vitals metrics like LCP, INP, and CLS on a laptop screen viewed from above. Clean office desk with coffee mug nearby, soft natural lighting, vibrant blues and greens.

As of March 2026, the targets most teams work toward are Largest Contentful Paint (LCP) under 2.5 seconds, Interaction to Next Paint (INP) under 200 ms, and Cumulative Layout Shift (CLS) under 0.1. INP matters more than many site owners expect because it measures real interaction delay across the visit (it replaced First Input Delay (FID) in 2024).

On “service” layouts, the biggest problems repeat:

  • A huge hero image (or slider) becomes the LCP element.
  • Too many scripts fight for the main thread (page builder add-ons, reviews, chat, analytics).
  • Sticky headers, cookie banners, and late-loading embeds cause layout shifts.

If you want a deeper platform-specific view, this Core Web Vitals for WordPress optimization guide is a solid reference for what typically holds WordPress back. Managed WordPress hosting can solve some infrastructure issues related to these metrics.

Quick wins: improve scores in under 30 minutes

Modern flat illustration of quick WordPress optimization steps like cache enabling and image compression icons on a laptop screen, set on a clean workspace desk with soft lighting and vibrant blues and greens.

Start with changes that improve real-user data quickly, without redesigning templates. Before anything else, test your homepage and top service page in Google PageSpeed Insights to check mobile performance, then fix the biggest bottleneck.

Here's a simple impact vs effort snapshot to prioritize.

FixHelps mostImpactEffort
Enable page caching (plugin or host)LCP, INPHighLow
Image optimization: convert hero image to WebP/AVIF and compressLCPHighLow
Turn off heavy sliders and autoplay video above the foldLCP, INPHighMedium
Delay chat, reviews, and tracking until after interactionINPHighMedium
Reserve space for header, banners, and embedsCLSHighLow
Reduce fonts to 1 family, 2 weightsLCP, CLSMediumLow
Switch to a lightweight WordPress theme (for complex sites)LCP, CLSHighMedium

If you need a broader speed checklist for WordPress, this internal guide on how to increase WordPress website speed pairs well with the steps below.

Step-by-step: fix Largest Contentful Paint (LCP) on service pages

Modern flat illustration of Largest Contentful Paint optimization in WordPress, featuring a hero image loading fast on a laptop screen on a desk with a clock showing quick time, soft lighting, and vibrant blues and greens.

For most WordPress service sites, First Contentful Paint serves as a precursor to Largest Contentful Paint, which is the hero section. Treat it like the front door. If it sticks, nothing else matters.

  1. Make the hero an actual image, not a CSS background. WordPress can then generate srcset and pick a smaller size on mobile.

  2. Ship a smaller hero by default. A common win is replacing a 2500 px wide upload with a 1600 px version (and letting srcset handle the rest). Also switch to WebP image format or AVIF via ShortPixel, Imagify, or EWWW.

  3. Avoid “busy” heroes. Sliders, video backgrounds, and rotating testimonials often add scripts and delay LCP.

  4. Preload only what matters. Many performance plugins can preload the LCP image and critical CSS, while enabling lazy loading images for non-critical assets. If you control your theme enqueue, set a defer strategy for non-critical scripts: wp_enqueue_script('site', get_template_directory_uri().'/site.js', [], null, ['in_footer'=>true,'strategy'=>'defer']);

  5. Generate critical CSS, then stop loading unused CSS. WP Rocket, LiteSpeed Cache, and similar tools can help, but Time to First Byte and a Content Delivery Network are vital for server-side LCP improvements. Keep it simple: critical CSS for above-the-fold, then remove unused CSS site-wide.

If your LCP element is a giant block of text, check fonts first. Web font delays can make text “appear late,” even when the server is fast.

Cut Interaction to Next Paint (INP) delays without breaking features

Modern flat illustration depicting smooth button click responses and fast-loading interactive elements on a laptop screen in a WordPress context for better INP performance.

Interaction to Next Paint (INP) issues feel like tapping a button and nothing happens. On service sites, render-blocking resources like third-party scripts and page builder extras contribute to these interaction delays.

First, delay JavaScript execution for non-essential scripts. Most caching plugins now offer “Delay JS execution.” Put these in the delay list when safe: chat widgets, review widgets, popups, heatmaps, and marketing tags that don't affect the first view. To further free up the main thread, minify CSS and JavaScript and remove unused CSS.

Next, unload scripts on pages that don't need them. Perfmatters or Asset CleanUp can disable plugin assets per page. For example, don't load slider scripts on every service page if only the homepage uses them.

If you need a tiny theme-side fix for one stubborn script, add a targeted defer tag (single handle only): add_filter('script_loader_tag', fn($t,$h)=>$h==='reviews-widget'?str_replace(' src',' defer src',$t):$t, 10, 2);

For more background on safe, staged improvements, this guide on improving Core Web Vitals without breaking your site has a good risk-aware mindset.

Stop Cumulative Layout Shift (CLS) from headers, banners, and embeds

Modern flat illustration of a stable WordPress page layout on a laptop screen with reserved image spaces to prevent Cumulative Layout Shift (CLS), featuring a clean desk, soft lighting, and vibrant blues and greens.

Cumulative Layout Shift is that annoying “page jump” that disrupts visual stability and harms user experience, right when someone tries to tap Call Now. It's also common on WordPress because widgets load late.

Start with the basics:

  • Always reserve space for images, videos, and iframes. WordPress does this for images, but embeds and page builder blocks often need manual sizing.
  • Set a fixed header height using critical CSS to stabilize it and render above-the-fold content early if you use a sticky header. Avoid “shrinking header on scroll” effects unless you keep the layout height stable.
  • Use font-display: swap on self-hosted fonts, so text doesn't jump in late. In your font-face rules, ensure font-display: swap; is present.

Also watch for consent banners. Many cookie tools inject a banner that pushes the whole page down. Prefer banners that overlay without resizing content, or reserve a fixed-height slot from the start.

Optimize common service-site elements (sticky CTAs, Google Maps, chat, reviews)

Modern flat illustration depicting a WordPress laptop screen with optimized service site elements like sticky header, Google Maps embed, and chat widget on a stable layout, clean desk with soft lighting and vibrant blues and greens.

Service sites need conversion tools, but you don't need all of them on first paint.

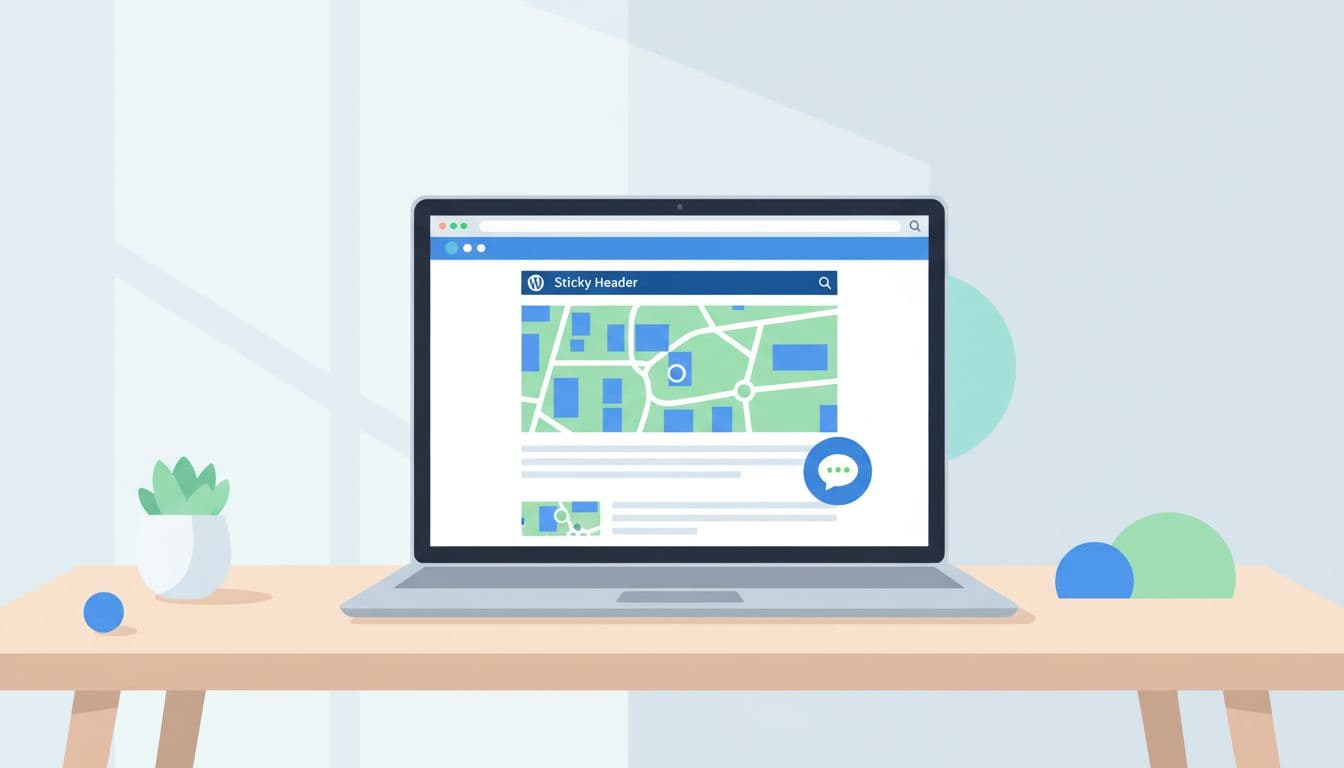
Embedded Google Maps: Replace the live embed with a static map image and a click-to-load map (or a simple “Open in Google Maps” button). This usually improves LCP and INP fast, especially for mobile performance.

Sticky phone CTA and header: Keep them, but make them light. Use one icon, one line of text, and fixed dimensions for visual stability. Avoid loading extra icon packs; an SVG is often enough.

Review widgets: Many load large scripts and fonts. Widgets that pull dynamic data benefit from database optimization and improved server response times. If you can, render reviews server-side (cached) or load the widget only after scroll.

Chat: Don't load it on every page view at once. Delay it until a user scrolls, taps, or spends 10 seconds on page, which supports better mobile performance.

If you want another perspective on balancing performance with modern search visibility, this article on improving Core Web Vitals for WordPress covers the same tradeoffs from an AEO angle.

Measure and verify your Core Web Vitals fixes (workflow that sticks)

Modern flat illustration of verifying Core Web Vitals with Google tools on a WordPress dashboard laptop screen, featuring charts with green good scores on a clean desk with soft lighting and vibrant blues and greens.

Lab tests are helpful, but rankings and leads follow real-world field data from the Chrome User Experience Report. Use a repeatable workflow:

  1. Pick 3 templates (home, service detail, contact or location page). Fix templates, not single URLs.
  2. Run Google PageSpeed Insights on mobile (powered by Google Lighthouse), note the LCP element, total blocking time, and layout shift sources.
  3. Check Google Search Console CWV report for “Poor” groups, then validate after shipping changes.
  4. Re-test in Chrome DevTools using throttling, then click the page like a real user (menu, form, CTA).
  5. Wait for field data to update (often days to weeks). Keep shipping small, safe improvements.

When performance is stable, tie it back to growth work. A faster site supports everything in your wider plan to rank #1 on Google, because it improves user experience so users stick around long enough to convert.

Conclusion

A service site shouldn't feel like a heavy door. When you fix Largest Contentful Paint, Interaction to Next Paint, and Cumulative Layout Shift in the right order, the whole user experience gets calmer, faster, and easier to trust.
Start with the 30-minute wins, then handle the hero, scripts, and layout stability on your top templates. Once you see core web vitals wordpress improvements in Search Console and better search engine rankings, keep going, because speed work is never “done,” it's maintained.

Service Area Pages Template for Multi-Location Service Businesses (2026)

A multi-location service business owner stands over a large city map on a desk with pins marking service areas in a modern office, centered composition focusing on the map and relaxed hands, realistic style with warm natural lighting.
Pins on a city map, a simple visual for planning coverage and page structure, created with AI.

If you serve multiple cities, your website can't treat every location the same. People don't search that way for home services. They look for a service, then they look for proof you'll show up where they live. This behavior drives local SEO.

A strong service area pages template helps you publish faster without shipping a pile of near-duplicate pages. It also keeps your service area pages focused on one job as high-converting landing pages: turning local intent into calls, bookings, and quote requests.

This guide gives you a ready-to-use template (with placeholders), word-count targets, custom content ideas per city, and checks to avoid doorway-page trouble.

What service area pages need to accomplish in 2026

Clean blueprint wireframe of a service area webpage layout with sections for intro, services, map, and FAQs, displayed on a digital tablet screen at a slight angle in a minimalist office desk setting. Top-down composition in technical blueprint style with soft blue lighting, no text, logos, or people.
An at-a-glance page layout, showing the key sections a location page should include, created with AI.

In March 2026, many local searches end on the search results page. People tap to call, read reviews, or pick from the map pack. So to compete with strong local search visibility, your service area page has to do two things well: match local intent fast, and reduce doubt fast.

For a service area business, unlike traditional brick and mortar setups, that means clear coverage (where you serve), clear scope (what you do there), and clear next steps (call, booking, quote). It also means your page should support your Google presence, especially your profile details and reviews. Matching these acts as one of many trust signals that can improve the conversion rate. If your on-site claims and profile details don't match, trust drops.

For a practical refresher on the profile side, see this Google Business Profile optimization guide.

Reusable pieces vs what must be customized (with word-count targets)

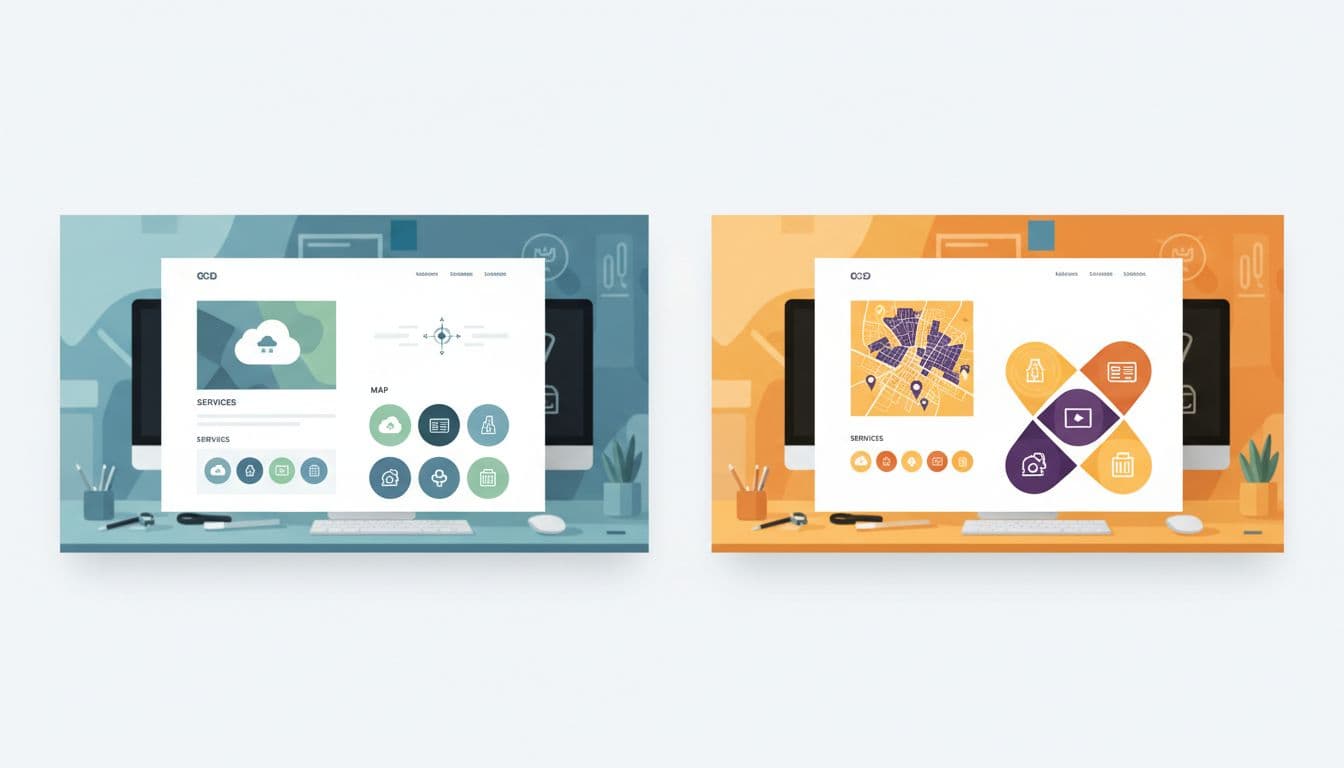
Split scene comparing a generic template on the left with a customized location page on the right, featuring abstract icons for services and a map in a modern graphic design studio setting, vibrant illustrative style.
Generic structure versus local customization, shown side by side, created with AI.

Think of location landing pages like store shelves. The shelf shape can match, but the products can't be identical. Reuse structure, CTA styling, and compliance language. Customize the localized content that proves you actually serve that area.

Here's a simple range to keep pages useful without turning them into long essays:

Page sectionRecommended wordsReusable?Must customize per location?
Above-the-fold intro + trust line70 to 120StructureCity, main pain point, local proof
Services list (scannable)80 to 140StructureService priorities, local exclusions
Neighborhoods / suburbs served60 to 120StructureReal coverage only
Service radius + boundaries40 to 80PartialRadius, landmarks, edge cases
Customer reviews / proof snippet60 to 120PartialCustomer reviews tied to that area when possible
FAQs (3 to 6)150 to 250PartialLocal pricing, timing, access, parking
CTA block40 to 90YesCity, tracking number, offer (if any)

Takeaway: reuse the frame, but change the “unique content.” Unique content is what keeps pages from looking cloned. Localized content is key to avoiding duplicate content issues.

The ready-to-use service area pages template (copy, paste, fill)

Photorealistic laptop centered on a wooden desk in a cozy home office, displaying a slightly blurred blank service area page template with placeholders and a coffee mug nearby under soft daylight. No people, hands, readable text, or additional devices are present, with content filling the entire frame.
A clean starting point for a location page draft, created with AI.

Use this as your go-to service area pages template. Keep the headings consistent across cities, then fill the placeholders with real details.

Page H1: [Primary Service] in [City], [State]
URL slug idea: /[primary-service]-[city]/

1) Above the fold (70 to 120 words)
[2 to 3 sentences on the main job you solve in City.]
[1 sentence on response time or scheduling window.]
[1 trust line: licensing, warranty, years, or “local team.”]
Explicitly include contact information such as phone details.
Call to action button label: [Get a Quote] / [Call Now] / [Book a Visit]
Call to action link: [CTA URL]
Phone: [City tracking number or main number]

Sample intro block (paste and edit):
Serving [City], we help with [Primary Service] when you need it done right the first time. You'll get clear pricing, tidy work, and updates you can understand. Most [service type] jobs in [City] can be scheduled within [time window], and urgent requests get priority when available.

2) Services in [City] (80 to 140 words)
List your top services for this location. Keep it honest.

  • [Service 1]: [One short line on what's included]
  • [Service 2]: [One short line]
  • [Service 3]: [One short line]

Sample service list block:

  • [Primary Service]: Diagnosis, parts, and fix on the same visit when possible.
  • [Secondary Service]: Replacement options with clear warranty coverage.
  • [Maintenance]: Seasonal checks to prevent repeat problems.

3) Neighborhoods and nearby areas served (60 to 120 words)
Neighborhood specific details; Neighborhoods: [Neighborhood 1], [Neighborhood 2], [Neighborhood 3]
Nearby: [Suburb 1], [Suburb 2]
Service boundary note: We don't serve [Not served area] from this location.

Sample neighborhoods block:
We regularly serve [Neighborhoods], plus nearby areas like [Nearby suburbs]. If you're near [Landmark], you're usually within our normal route.

4) Reviews and local proof (60 to 120 words)
[2 short review snippets or a summary line.]
Review source: [Google / industry platform]
Optional proof: [Before/after photos], [case note], [team member in City]

5) FAQ for [City] (150 to 250 words)
Add 3 to 6 questions that people in this city actually ask.

  • Do you serve [Neighborhood]? [Answer]
  • What does [Service] cost in [City]? [Range + what changes it]
  • How fast can you arrive? [Realistic timing]
  • Do you handle permits/parking/building access? [Answer]

6) Map embed + service radius (40 to 80 words)
Google Map embed placeholder: [Google Map embed]. Cross-reference the Google Map embed and Google Business Profile links for consistency.
Service radius: [X miles or X km]
Coverage notes: [Rivers, bridges, tolls, traffic constraints]

7) Internal linking (placeholders, keep relevant)
Internal link placeholder: [Core service page URL]
Internal link placeholder: [Pricing page URL]
Internal link placeholder: [Contact or booking URL]

Unique content ideas for each location (so pages don't blur together)

Interactive city map embed with service radius circles and pins next to a prominent call-to-action button mockup on a responsive desktop webpage in clean modern flat design.
A map-and-CTA layout that helps visitors confirm coverage and act fast, created with AI.

If every city page says the same thing, Google and customers notice, especially since service area pages are essential for mobile businesses. Landing pages should vary across regions. Instead, rotate in location-specific “proof blocks” that are still easy to produce:

  • Localized content on local job patterns: common issues in that area (older buildings, hard water, seasonal demand).
  • Route logic: how you schedule that city (days, zones, typical arrival windows).
  • Building types: apartments, gated communities, industrial parks, coastal homes.
  • Photos that match reality: team, vehicles, tools, and real before/after from that city.
  • Local policies: parking, permits, access rules, or HOA restrictions.

When you plan topics and page targets, a simple location keyword map helps. This local SEO keyword research template can speed up the planning.

Compliance: avoid doorway-page signals and duplication issues

A realistic balance scale on a neutral conference room table tips towards unique content outweighing duplicate pages, surrounded by SEO compliance icons under bright overhead light in symmetrical composition with no text, people, or devices.
Unique content outweighing duplicates, a simple reminder to avoid thin, cloned pages, created with AI.

Doorway pages usually look like this: lots of cities, same copy, same promises, and no real differences. This duplicate content can hurt your search engine rankings, and it can confuse customers.

Unique content is the primary defense against being flagged for doorway pages.

Keep these rules tight:

  • Only publish a location page if you can actually serve that area at normal quality and speed.
  • Don't fake offices. If you're a service-area business, say so clearly.
  • Avoid swapping only the city name. Change the proof, the FAQs, and the coverage detail.
  • Use honest boundaries. A giant radius “just in case” looks suspicious and creates bad leads.

If a page can't answer “Can you help me here, with this problem, today?” in 10 seconds, it's not ready.

Final publish checklist (and a clean wrap-up)

Clipboard featuring a printed checklist for publishing service pages with checkmarks, held relaxed by one partially visible hand on a marketer's desk. Blurred laptop in office background, close-up photorealistic composition with natural window light.
A quick pre-publish checklist on a desk, created with AI.

Before you publish, run this quick pass:

  • Page targets one city (or one tight region), not a whole state.
  • Intro mentions [City] naturally, plus one real local detail.
  • Neighborhood list matches your actual dispatch coverage.
  • Service radius notes include at least one boundary or landmark.
  • FAQs include at least one city-specific pricing or timing answer.
  • Reviews or proof feel real, not generic.
  • Map embed loads and matches the coverage claim.
  • Schema markup is implemented for local business structured data.
  • Call to action appears above the fold and near the bottom.
  • Phone and booking links work on mobile.
  • Internal links point to the most relevant next step.
  • Title tag and meta description aren't copy-pasted across cities.

If you want help building this system across dozens of locations, start with a clear process like these local SEO services teams use to keep pages consistent and measurable.

In the end, a good service area pages template should feel like a reliable checklist, not a content factory. This strategy boosts organic traffic and local SEO performance for landing pages. Keep the structure repeatable, keep the proof local, and your pages will earn trust before the call even starts.

Consent Mode v2 GA4 Setup Guide for 2026 (GTM, gtag, CMP, Testing)

Cookie consent for website visitors in 2026 feels like traffic lights at a busy junction. If the signals are wrong, everything still moves, but you can't trust the counts.

Consent Mode v2 GA4 is the practical way to keep measurement useful while respecting user choice and ensuring GDPR compliance. It doesn't replace your cookie banner, it connects it to Google tags so GA4 and Google Ads behave correctly.

This guide is a step-by-step, checklist-first setup for Google Tag Manager and gtag.js you can hand to a marketer, analyst, or developer, then QA with confidence.

What Consent Mode v2 GA4 is, and why it matters in 2026

Clean, modern landscape hero illustration for a 2026 technical guide, featuring a central shield with cookie icon, consent signals (analytics_storage, ad_storage, ad_user_data, ad_personalization) flowing via arrows to GA4 chart and Ads server icons, with a bottom consent banner in flat-isometric hybrid style.
An overview of how consent signals flow from a banner to GA4 and ad measurement, created with AI.

Consent Mode v2 is an API that tells Google tags what they're allowed to do, based on the visitor's consent choice. In practice, it controls whether GA4 and ads storage can write cookies, and whether ad data can be used for personalization.

In v2, you manage four consent signals:

  • analytics_storage (GA4 measurement cookies)
  • ad_storage (ad cookies)
  • ad_user_data (sending user data to Google for ads)
  • ad_personalization (remarketing and ad personalization)

Why it matters in 2026: for EU, European Economic Area (EEA), and UK traffic, Google has required advertisers to pass these consent signals to keep key ads features like Personalized advertising and Remarketing working since the March 2024 deadline, and that expectation continues. If you don't implement it, you may lose parts of remarketing, conversion measurement, or personalization workflows. For a policy-level summary and what teams typically lose when consent signals are missing, see this Consent Mode v2 implementation guide on the EU user consent policy. This approach is essential for a Privacy-centric strategy.

Consent Mode has two behaviors you'll hear a lot:

  • Basic Consent Mode: blocks tags until consent. If the user denies, you collect nothing.
  • Advanced Consent Mode: tags load, but behave safely when consent is denied (cookieless pings). Google can model gaps. Advanced Consent Mode enables Behavioral modeling and Conversion modeling to recover data.

The biggest win in 2026 is trend stability. With Advanced Consent Mode, your reporting doesn't flatline when users say “no”.

Prerequisites checklist (before you touch GTM or code)

Clean, modern landscape hero illustration for the prerequisites section of a Google Consent Mode v2 setup guide for GA4, featuring checklist icons with checkmarks for GA4 property, GTM container, CMP banner, Measurement ID tag, and server, connected by data flow arrows with shield and cookie icons in a flat-isometric hybrid style.
The core items you need ready before implementation, created with AI.

Before setup, lock down the basics. Consent Mode problems often come from timing and duplicates, not the consent banner design.

Prerequisites you should confirm

  • A GA4 property and web data stream: you need the Measurement ID, and a clear plan for which domains you track. Google's developer docs are a good reference point for the tagging side of GA4: Google Analytics for developers.
  • One tagging approach per site area: pick Google Tag Manager or hardcoded gtag.js for the main site experience. Avoid double installs (CMS plugin plus GTM).
  • A Consent Management Platform that can update Consent Mode v2: ideally a Google-certified CMP if you run Google Ads in regulated regions. This short overview helps explain why CMP choice matters: Certified CMP and reporting accuracy.
  • A consent decision model: decide what “Accept all”, “Reject all”, and “Save preferences” mean in your banner.
  • A rollback plan: publish changes in a versioned way (GTM workspace or release branch).

If your GA4 foundation is shaky, fix that first. This internal guide pairs well with consent work because it focuses on stable conversions and clean tags: GA4 lead tracking checklist.

Consent mapping you'll implement

Set expectations with stakeholders using a simple mapping like this:

Banner choiceanalytics_storagead_storagead_user_dataad_personalization
Reject alldenieddenieddenieddenied
Accept allgrantedgrantedgrantedgranted
Analytics onlygranteddenieddenieddenied
Ads only (rare)deniedgrantedgrantedgranted

The takeaway: if your CMP offers category toggles, you must map them cleanly to the four core Consent signals.

Google Tag Manager implementation checklist (recommended for most teams)

Clean, modern hero illustration of GTM panel with consent configuration template, default denied settings, triggers to GA4 tag and CMP event, featuring cookie shield, checkmarks, and data flow icons in flat-isometric style.
Google Tag Manager handling default consent and tag firing rules, created with AI.

Google Tag Manager is usually the easiest way to control timing, because you can centralize consent defaults, tag sequencing, and debugging.

Step-by-step GTM setup

  1. Turn on GTM Consent Overview (Admin). This lets you see and manage consent requirements per tag.
  2. Set the Default consent state early using the Consent Initialization trigger. Your goal is “default denied before any Google tag runs.”
    • Default: analytics_storage=denied, ad_storage=denied, ad_user_data=denied, ad_personalization=denied.
  3. Configure your GA4 tags to respect consent.
    • GA4 Configuration and GA4 Event tags should require analytics_storage.
    • Google Ads tags should require ad_storage, plus the v2 signals as applicable.
  4. Listen for CMP events and update consent.
    • Most CMPs push an event or dataLayer state (for example, cmp_consent_update).
    • When the user accepts, use the “Update consent state” action to set to granted for the mapped signals.
  5. Choose Basic Consent Mode vs Advanced Consent Mode behavior intentionally.
    • If you use Advanced Consent Mode, you still set defaults to denied, but allow Google tags to load and send cookieless signals.
    • If you use Basic Consent Mode, block the tags entirely until consent.

Default denied vs granted (what “good” looks like)

  • Before choice: GA4 may send cookieless pings (Advanced Consent Mode), but it should not set analytics cookies when consent is denied.
  • After Accept all: GA4 can set cookies, enable full data collection, and measure normally, and ads signals can support remarketing and conversion measurement.

A common gotcha: teams set defaults inside a tag that fires after the GA4 config tag. That's too late.

Treat consent defaults like a seatbelt. Put it on before you start the engine, not at the first turn.

gtag.js implementation checklist (when you can't use GTM)

Clean, modern landscape hero illustration for gtag implementation in Google Consent Mode v2 setup for GA4, showing code snippets for consent default and update, GA4 config tag, arrows to browser and server, shield-protected cookie, checkmark, in flat isometric hybrid style with subtle gradients and Google-like accents.
A code-first setup where default consent and updates wrap GA4 tagging, created with AI.

If your site hardcodes tags, you can still implement Consent Mode v2 reliably with gtag.js. The key is placement and timing.

Step-by-step gtag setup (minimal, correct order)

  1. Load gtag.js as you normally do.
  2. Set the Default consent state immediately after the gtag init, before config calls. Use a single default call that sets all four signals to denied.
    • Example shape (keep yours exact): gtag('consent','default', {analytics_storage:'denied', ad_storage:'denied', ad_user_data:'denied', ad_personalization:'denied'});
  3. Fire GA4 config after defaults.
  4. On CMP choice, call consent update to provide the Update consent state using your mapping. Optionally add the wait_for_update parameter (like 'wait_for_update': 500) to improve data accuracy by delaying tags until consent processes.
    • Example shape: gtag('consent','update', {analytics_storage:'granted', ad_storage:'granted', ad_user_data:'granted', ad_personalization:'granted'});
  5. Avoid manual “resend hits” hacks. In Advanced mode, Google can reprocess hits on the same page after consent is granted. Simo Ahava explains this behavior clearly: Consent Mode v2 for Google tags.

Validation checklist (GTM or gtag)

Use two quick layers of checks, then one deeper check. Proper implementation prevents measurement loss in GA4.

  • Tag Assistant / GTM Preview: confirm consent state shows denied on first load, then flips after interaction.
  • GA4 DebugView: confirm events appear when expected, and don't double-fire.
  • Network checks (browser dev tools): open requests to Google endpoints and verify consent parameters change after choice (look for the gcd parameter attached to requests).

Common errors and fixes (fast triage)

  • Default consent fires late: move the default call earlier, or fix GTM firing order.
  • Only two signals mapped: update your CMP mapping to include ad_user_data and ad_personalization.
  • Duplicate GA4 installs: remove the extra plugin or tag. Then re-test DebugView.
  • Consent never updates: your CMP event name or dataLayer keys don't match. Confirm the exact event in the console.
  • Regions mis-handled: apply stricter defaults for EU/EEA/UK traffic if needed, but keep logic simple so you can test it.

What to expect in GA4 reporting, and how to monitor

After rollout, don't panic when numbers shift. With more users declining cookies, observed sessions and conversions can drop. At the same time, trends often become smoother with modeling (more so in ads platforms).

Monitor like this:

  • Add an annotation date for the rollout.
  • Compare key events week over week, not day over day.
  • Watch audience sizes and conversion counts in both GA4 and Google Ads, and check for consent mode reporting gaps that may hide real performance.
  • Keep a single source of truth for conversions. This internal guide helps align GA4 events with business outcomes: track conversions in Google Analytics.

Conclusion

Consent Mode v2 GA4 is less about banners and more about signal quality. Set defaults to denied, map all four signals, and make updates fire instantly on choice. Then validate with Preview, DebugView, and a quick network check.

Once it's stable, you can finally trust your GA4 trends again, even when consent rates swing. This setup ensures responsible data collection and helps businesses navigate the evolving privacy landscape.

SEO Audit Checklist For Lead Gen Websites In 2026

If your website is a lead-gen machine, SEO isn't the paint job, it's the engine. A ranking bump means nothing if forms break, pages don't index, or GA4 can't tie organic visits to pipeline.

This seo audit checklist is built for 2026 realities: AI-powered search overviews, higher standards for brand trust, Core Web Vitals with INP as the responsiveness metric, and less tolerance for spammy patterns. Each check includes clear pass/fail criteria and how to verify it with tools your team already uses.

The 2026 SEO audit checklist (with pass/fail criteria)

Use this as your baseline. Then prioritize fixes by impact on indexing, conversions, and attribution.

Audit areaCheckPassFailHow to verify
CrawlabilityImportant pages accessibleService and lead pages return 200, not blocked4xx, 5xx, blocked by robots, soft 404Screaming Frog or Sitebulb crawl, GSC Pages report
Indexing controlIndexation matches intentMoney pages indexed, thank-you pages noindexLead pages not indexed, thank-you pages indexedGSC Pages, site: spot checks, Screaming Frog “Indexability”
CanonicalsCanonicals are consistentSelf-referential on clean URLsCanonicals point to wrong page or parameter URLScreaming Frog Canonicals report
Internal linkingMoney pages within 3 clicksService, location, comparison pages linked from hubsOrphan pages, deep pages, generic anchorsScreaming Frog “Crawl depth” + “Orphan URLs” (GSC integration)
CWV (INP focus)Responsive interactionsINP “Good” (aim under 200 ms)INP needs improvement or poorPageSpeed Insights, GSC Core Web Vitals
SpeedFast main pagesLCP “Good” on key templatesSlow LCP on service or location pagesPSI + Lighthouse on top landing pages
Mobile UXNo mobile frictionTaps, forms, menus work on mobileLayout shifts, sticky overlays, tiny tap targetsChrome DevTools mobile emulation + Lighthouse
FormsForms submit reliablyValidations work, no blocked requestsJS errors, blocked third-party endpointsChrome DevTools Console + Network, QA on real devices
AnalyticsOrganic-to-lead tracking worksForm submit and call events fire with sourceLeads show as “(direct)” or missingGA4 DebugView, Tag Manager Preview, GA4 conversions
Structured dataSchema valid and relevantNo errors, matches visible contentErrors, spammy FAQ, mismatchGSC Enhancements, Rich Results test, Schema validator

For deeper technical checklists to cross-reference, keep these handy: technical SEO audit checklist for lead-gen sites and technical SEO audit 2026 checklist.

If Google can't crawl and index your lead pages cleanly, everything else is just guessing.

Audit your lead-gen page templates (service, location, comparison, case study)

Lead-gen sites usually win or lose on a small set of templates. Audit by template first, not by URL count.

Service pages (money pages).
Pass when each service page targets one clear intent, loads fast, and has a single primary CTA above the fold. Fail when one page tries to rank for five services, or when the CTA sits below a wall of text. Verify with GA4 landing page reports (engagement rate, scroll, conversion rate) and GSC query patterns (are you attracting buyers, not students?).

Location pages (the duplicate-content trap).
Pass when each location page has real proof and local detail: service area boundaries, photos, reviews, case snippets, unique FAQs, and clear contact options. Fail when pages are near-copies with just city names swapped. Verify by running a Sitebulb duplicate-content report, then review the worst clusters manually.

If you need a reference for what strong local intent can look like, compare against a real outcome-driven example like this pet grooming local SEO case study.

Comparison pages (high intent, high scrutiny).
Pass when claims are sourced, language is precise, and the page shows who it's for. Fail when it reads like vendor bashing or makes unverifiable promises. Verify by checking SERP intent and making sure the page answers “Which should I pick?” quickly, then backs it up.

Case studies (trust builders that also rank).
Pass when each case study includes constraints, actions, and measurable outcomes, plus links to related services. Fail when it's a vague success story with no numbers or timeline. Verify with on-page content review and internal linking depth, then look for assisted conversions in GA4. A practical example is this SEO case study for business consultants.

Lead-gen tracking and attribution checks (organic to lead to pipeline)

In 2026, reporting “organic sessions are up” won't satisfy anyone. You need clean attribution from organic click to lead event, then to CRM if possible.

Start with the basics: one primary conversion per lead type (demo, contact, quote, call). Then confirm those events fire reliably across templates and devices.

Here's a quick mini-audit for attribution hygiene:

Tracking itemPassFailVerify
Form submission trackingGA4 event fires on successful submitFires on button click, or doesn't fireGA4 DebugView, Tag Manager Preview
Thank-you page handlingThank-you page is noindexThank-you page ranks or shows in GSCGSC Pages, robots meta checks
Call trackingCalls attributed to sourceCalls show as direct or unassignedCall tracking platform logs + GA4 events
Organic landing page mappingTop GSC pages mapped to CTAsHigh-traffic pages have weak CTAsGSC Landing pages + on-page review
Bot and spam filteringLead spam controlledGA4 polluted, CRM floodedServer logs, GA4 filters, reCAPTCHA or alternatives

One more practical tip: if forms fail only sometimes, check browser console errors and blocked requests in DevTools. Ad blockers and strict tracking settings can break form libraries and call widgets.

AI Overviews, entity trust, and spam risks you can actually audit

AI-powered results reward sites that are easy to interpret and hard to doubt. That doesn't mean writing for robots, it means writing like a specialist who expects scrutiny.

Pass when your site shows consistent brand details (name, address, phone, leadership, author bios where relevant), and content matches what your schema claims. Fail when content looks mass-produced, thin, or mismatched (for example, FAQ schema that isn't visible on the page).

Verify trust signals with a quick sweep:

  • In Screaming Frog, extract structured data and look for errors or irrelevant types.
  • In GSC, review Enhancements and manual actions.
  • In content, check if key claims have proof (case studies, testimonials, certifications).

If your team is adapting content for AI visibility, align your review process with what AI-focused audits check, for example this AI SEO audit checklist for 2026.

If you publish pages at scale, make sure each one earns its existence, otherwise spam policies can turn “more pages” into “more risk”.

Remediation roadmap (0 to 30 days, 31 to 90, 90+)

Fix the blockers first, then tighten relevance, then build trust and depth.

TimelineWhat to fix firstDeliverable
0 to 30 daysIndexing, robots, canonicals, 4xx and 5xx, broken forms, GA4 conversion eventsClean crawl, stable tracking, top templates passing CWV checks
31 to 90 daysTemplate improvements (service, location, comparison), internal linking to money pages, schema cleanupHigher conversion rate per landing page, fewer duplicates, stronger SERP alignment
90+ daysCase study pipeline, authority content, partnerships and quality links, ongoing CWV workCompounding growth in qualified leads and brand visibility

Conclusion

A lead-gen site doesn't need a perfect audit score, it needs fewer leaks and clearer proof. Run this seo audit checklist quarterly, and re-check after every template or tracking change. When you can connect crawlability, speed, intent, and attribution, you stop chasing rankings and start building predictable organic lead flow.

GA4 Setup Checklist for Lead Generation Websites in 2026

Leads from your lead generation efforts are only “trackable” in Google Analytics 4 until they aren't. One form change, one new subdomain, one consent banner update, and your numbers drift.

This GA4 setup checklist is built for lead-generation teams focused on B2B user acquisition in 2026 who need conversion tracking they can trust, even with tighter privacy rules. It's practical, it's opinionated, and it focuses on the events that actually move pipeline.

Property and stream basics that prevent dirty data

Clean technical illustration of GA4 property creation dashboard for lead gen site, shown on a laptop in an office desk setting with minimalist flat design, subtle 3D depth, and blue-teal-orange accents.
GA4 property and data stream setup for a lead-gen website, created with AI.

Before tags and events, set up your property in Google Analytics 4 to find your Measurement ID and lock the foundation. A messy property creates reporting debates later.

  • Check: Reporting time zone and currency. Default: match finance reporting (not “where your dev sits”). Why it matters: daily lead counts and CPL can shift across midnight.
  • Check: Data retention. Default: set to 14 months if available to you. Why it matters: longer lookbacks help with longer sales cycles and cohort review.
  • Check: Web data stream and Enhanced Measurement. Default: keep page views on, then selectively enable scroll, outbound clicks, and file downloads if they map to intent. Why it matters: fewer noisy events makes lead-path analysis easier.
  • Check: Unwanted referrals and cross-domain. Default: use referral exclusions for payment gateways, schedulers, and auth providers if they break sessions; add cross-domain tracking for your main site and booking domain. Why it matters: attribution often “falls” to the wrong referrer right before a lead submits.

If you want a broader implementation reference to compare against, Vital Design's GA4 best practice checklist is a useful second opinion.

GTM tagging defaults that won't double-fire

Technical illustration of Google Tag Manager interface configuring GA4 tags for lead forms, showing workspace preview with tags, triggers, and variables for form submissions in minimalist flat subtle 3D style with soft gradients on white background.
Google Tag Manager configured for GA4 lead tracking, created with AI.

For lead-gen sites, Google Tag Manager is usually the control room for Google Analytics 4. The goal is stable firing rules and clean parameters.

  • Check: One GA4 Configuration tag per site experience. Default: single config tag, fire on all pages, avoid duplicate installs (CMS plugin plus GTM). Why it matters: duplicate page_view inflates sessions and ruins funnels.
  • Check: Use a clear Data Layer contract. Default: push form metadata (form_id, form_name, lead_type) on interaction, not on page load. Why it matters: form tracking breaks less when layouts change.
  • Check: Form triggers that match reality. Default: prefer “success state” (thank-you page, success DOM event, fetch/XHR success) over generic “Form Submission” triggers, especially for tracking multi-step forms accurately. Why it matters: many forms “submit” even when validation fails.
  • Check: Linker and cross-domain settings. Default: handle in GA4 config, not scattered across tags. Why it matters: fewer places to forget when new domains launch.
  • Check: Naming. Default: GA4 | event | form_submit style, plus version notes in tag descriptions. Why it matters: faster audits during campaign launches.

Lead-gen event map (with names and parameters you can ship)

Illustration of GA4 event tracking schema for lead generation, featuring form_submit and lead_qualified events with parameters like value and currency. Flow diagram from website form to GA4 in minimalist flat 3D style with gradients on white background.
An event and parameter flow from form interaction to GA4 reporting, created with AI.

The event-based model of Google Analytics 4 lets you treat events like a funnel blueprint, mapping the form submission process effectively. If your events don't match decisions your team makes, they'll get ignored.

  • Check: Pick a small set of “decision” events. Default: 5 to 8 key events. Why it matters: GA4 gets noisy fast, and teams stop trusting it.
  • Check: Standardize event names. Default: use lowercase and underscores, avoid UI-specific names like button_click_red. Why it matters: you'll redesign the UI, but the funnel stage stays.
  • Check: Add parameters that explain lead quality, such as lead qualification. Default: keep 3 to 6 custom parameters per key event. Why it matters: it helps break down CPL by lead type without extra events.

Example event set for lead generation (with suggested parameters):

  • view_form (form_id, form_name, lead_type, page_location)
  • form_start (form_id, method, step_count)
  • form_submit (form_id, lead_type, value, currency, lead_id)
  • generate_lead (lead_type, value, currency, lead_id)
  • click_to_call (placement, business_unit) (avoid sending phone numbers)
  • lead_qualified (lead_stage, value, currency, lead_id) (send when CRM qualifies)

In 2026, GA4 reporting also leans more on engagement signals such as “time to first action,” so clean interaction events make on-site intent easier to read. For more practical do's and don'ts, Measure Marketing Pro's GA4 best practices for 2026 is worth skimming.

Privacy and consent in 2026 (Consent Mode v2 and server-side)

Minimalist flat subtle 3D illustration of a website mockup at an angle, featuring a cookie consent banner and privacy shield for GA4 on a lead gen site with server-side tagging motifs and lock icons. High contrast blues, teals, and orange accents on white gradient background, landscape orientation with content edge-to-edge.
Consent and privacy-first tracking for GA4, created with AI.

Privacy work isn't a legal box-tick anymore. Google Analytics 4 privacy settings are directly tied to whether your lead numbers match reality.

  • Check: Consent banner behavior. Default: block non-essential tags until consent, then fire tags based on consent state. Why it matters: it reduces compliance risk and avoids “ghost” tags.
  • Check: Consent Mode v2 configuration. Default: implement Consent Mode v2 through your CMP and GTM consent settings. Why it matters: GA4 can model gaps when users deny cookies, which helps stabilize trend lines.
  • Check: Server-side tagging plan. Default: start with server-side only for your highest-value conversion events. Why it matters: it can recover measurement lost to blockers, including for landing page performance, and improve data control.

2026 consideration: Consent Mode v2 plus server-side tagging is becoming the “default stack” for lead-gen measurement because it balances privacy with durable attribution.

If you're planning more advanced tracking, this guide on GA4 plus server-side tracking with UTM parameters can help you think through the moving parts. Also, tighten access and credential sharing around analytics and ad accounts, especially with agencies involved; ClickyOwl's protecting data with digital marketing partners is a solid baseline.

Conversions, attribution, CRM handoff, and a quick QA plan

Illustration depicting GA4 conversions setup with form_submit marked as a conversion, attribution models dropdown, and CRM integrations icons on a minimalist dashboard view. Features flat 3D depth, soft gradients in blues, teals, and orange on a white background with crisp lines and ample whitespace.
Marking lead events as conversions and aligning them with attribution and CRM, created with AI.

In GA4 conversion tracking, a “conversion” should mean “someone you can follow up with,” not a random micro-click.

  • Check: Key events set. Default: mark only bottom-of-funnel events (form_submit, generate_lead, call connect if you can). Why it matters: ad optimizations get worse when you feed weak conversions.
  • Check: Conversion values. Default: send value and currency for leads, even if it's a model (example: by lead_type). Why it matters: it lets you compare channels beyond raw volume.
  • Check: CRM key (lead_id). Default: generate a lead_id on submit, store it in CRM, and send it in GA4 events. Why it matters: it's your glue for CRM integration, offline qualification and deduping.
  • Check: UTM parameters into the lead record. Default: store utm_source, utm_medium, utm_campaign, plus click IDs when available. Why it matters: GA4 attribution is useful, but CRM is where revenue lives.

In early 2026, GA4's cross-channel reporting has continued to improve, including more flexible attribution systems per conversion in some accounts. These attribution systems help provide user journey insights and support funnel exploration for analyzing landing page performance. Use that to separate “any lead” from “qualified lead” reporting.

Here's a lightweight QA table you can run before scaling spend:

What to testToolExpected result
Measurement ID in data streamGA4 Admin > Data StreamsCorrect Measurement ID shown
Page_view firing onceGTM PreviewOne GA4 config hit per page load
Form submission trackingGTM Preview + GA4 DebugViewEvent fires only on real success
Parameters capturedGA4 DebugViewform_id and lead_type populate correctly
Cross-domain session continuityGA4 realtime reportsNo self-referrals, same session continues
Consent behaviorBrowser dev tools + GTM PreviewTags respect consent state
CRM lead_id persistenceCRM record reviewSame lead_id appears in GA4 and CRM

Conclusion

If GA4 feels like a leaky bucket, it's usually one of three things: shaky triggers, unclear events, or missing consent logic. Troubleshoot your setup in Google Tag Manager to resolve lead generation discrepancies in Google Analytics 4. A strong conversion tracking strategy is vital for lead generation. Fix those, and your reporting stops being a debate. Start with the foundation, track a small lead-focused event set, then confirm everything with QA before pushing budget. Once the foundation is set, teams should explore predictive metrics for lead scoring and use Looker Studio to create custom reports or export data to BigQuery for deeper analysis. Which conversion in your funnel is most expensive to mis-measure right now?

How To Use an AI Chatbot on Your Website for Better Customer Support (Step-by-Step Guide)

How To Use an AI Chatbot on Your Website for Better Customer Support (Step-by-Step Guide)

Gone are the days when customers would wait hours (or even days) for a response. With people expecting fast, friendly help at any hour, adding an AI Chatbot to your website is now a must for any business wanting to stand out. AI Chatbots can answer common questions, help shoppers find what they need, and take care of routine requests, so your team can focus on tougher problems that truly need a human touch.

Thanks to AI, your support can run around the clock without extra staffing headaches. This guide covers everything from AI Chatbot basics and choosing the right tool, to setting it up, fine-tuning its responses, and getting bots and humans working smoothly together. Whether you’re new to chatbots or looking to improve your customer service, you’ll find clear steps and practical tips to get started.

Understanding AI Chatbot Basics for Customer Support

A friendly AI chatbot on a website chat window helping a customer with product search and order status. Clean, modern vector art with a soft color palette. Image created with AI.

Customer expectations are higher than ever, and immediate responses are the new standard. That’s where an AI Chatbot can transform your website’s customer support. By handling common questions and tasks, these bots free up your team for what really matters—solving problems that need a personal touch. To use an AI Chatbot confidently, it’s important to understand the basics and know what sets smart bots apart from old-fashioned ones.

What Is an AI Chatbot?

An AI Chatbot is like a digital assistant that lives on your website, ready to help anyone who visits—day or night. Unlike basic bots, these aren’t just working off a list of canned replies. They use three key technologies:

  • Natural Language Processing (NLP): NLP lets chatbots understand everyday language—even slang or typos—so people can ask questions in their own words. For example, a customer could type “Where’s my package?” or “Is my order shipped yet?” and get the right answer.
  • Machine Learning: With each conversation, an AI Chatbot can learn from how people talk. Over time, it gets better at handling more types of questions—like recommending the right shoe size or helping someone find a product.
  • Intent Detection: This helps the bot understand what someone means even if the question is unusual. So if a visitor asks, “Can I return a gift?” or “How do I get my money back?”, the bot knows they need help with returns.

Everyday tasks made easier with an AI Chatbot:

  • Checking order status (“Is my shirt on the way?”)
  • Answering shipping questions (“How much is delivery to Texas?”)
  • Offering product suggestions (“What sneakers go with these jeans?”)
  • Handling simple troubleshooting (resetting a password, where to find billing info)

Beyond speed, AI Chatbots help with:

  • Instant replies, 24/7—no more waiting.
  • Scalability—handle one or one hundred chats at once.
  • Smarter insights—analyze data from conversations to spot trends and improve service.

If you want to see how AI is already transforming online businesses, check out this look at AI in ecommerce marketing 2024 update.

How AI Chatbots Differ from Rule‑Based Bots

Infographic-style illustration comparing AI chatbots and rule-based bots. AI chatbot shown learning from multiple interactions, rule-based bot shown following one fixed path. Image created with AI.

It helps to know the difference between an AI Chatbot and a rule-based chatbot. Both show up in chat windows, but they work in very different ways.

Here’s how they stack up:

Feature Rule-Based Bot AI Chatbot
Handles simple tasks? Yes Yes
Follows set scripts? Always Sometimes
Learns from users? No Yes
Deals with complex queries? No Often
Adapts to new questions? No Yes

Rule-based bots follow a narrow script. They’re strong with yes/no answers or basic choices. For instance, if you select “Order status,” they show a set message. But if you stray from their options, they quickly get lost.

AI Chatbots go beyond pre-written paths. If someone asks, “Did my last two orders ship together?” an AI bot understands the question and can look up that information—or hand the chat to a human if needed. These smart bots also spot patterns in how people ask for help, making your customer support both faster and more natural.

For a deep dive into proven chatbot strategies, see the best practices for AI chatbots in service.

By understanding these fundamentals, you lay the groundwork for choosing and setting up the right AI Chatbot for your website’s customer support needs.

Choosing the Right AI Chatbot Platform

Smart customer support starts with picking the AI Chatbot platform that matches your needs, budget, and business goals. With dozens of strong options out there, it pays to focus on real-world features and compare what matters most to your team and your customers. The right choice helps you deliver fast, friendly help—without headaches or growing pains as your business evolves.

A modern website live chat dashboard comparing AI chatbot platforms like HubSpot, Intercom, and Tidio. Colorful vector art, clean UI, showing chat windows and analytics icons. Image created with AI. A visual look at popular AI chatbot platforms, focusing on chat features and analytics. Image created with AI.

Key Features to Evaluate

Choosing an AI Chatbot isn’t just about ticking a few boxes. It’s about building an experience that helps real people get real support. Here are the most important features to look for:

Infographic-style illustration of key features to evaluate in an AI chatbot platform: natural language understanding, customization options, CRM integration, pricing models, analytics, reporting, multi-channel support, and human handoff. Image created with AI. Infographic highlighting essential features like language understanding, custom flows, analytics, CRM integration, and human handoff. Image created with AI.

  • Natural Language Understanding (NLU): The AI Chatbot should grasp what customers are asking, even when they use casual words, slang, or misspellings. This leads to conversations that feel more like talking to a real helper, not a robot.
  • Customization Options: Each company has its own voice and customer journey. Look for chatbots that allow you to tweak responses, brand the chat widget, and set up work paths that match your products, tone, and support flow.
  • CRM Integration: Your AI Chatbot should play well with your CRM so customer data flows automatically. This lets you personalize conversations, log each support ticket, and tie every chat to the right customer profile.
  • Multi-Channel Support: Today’s customers bounce between website chat, email, social media, and even SMS. Top AI Chatbots connect all these channels, making sure support is consistent and easy to manage from one dashboard.
  • Easy Integration: Simple setup matters. The right platform will offer plug-and-play options or APIs to fit your current website and tools—without needing a week of work from IT.
  • Analytics & Reporting: You need to know how well your bot is performing. Look for features that track customer satisfaction, common questions, and how quickly issues are resolved. Good reporting is your key to improvement.
  • Human Handoff: Even the smartest bots can’t solve every problem. The ability for an AI Chatbot to hand off a conversation to a human agent, at the perfect moment, is vital for customer trust.
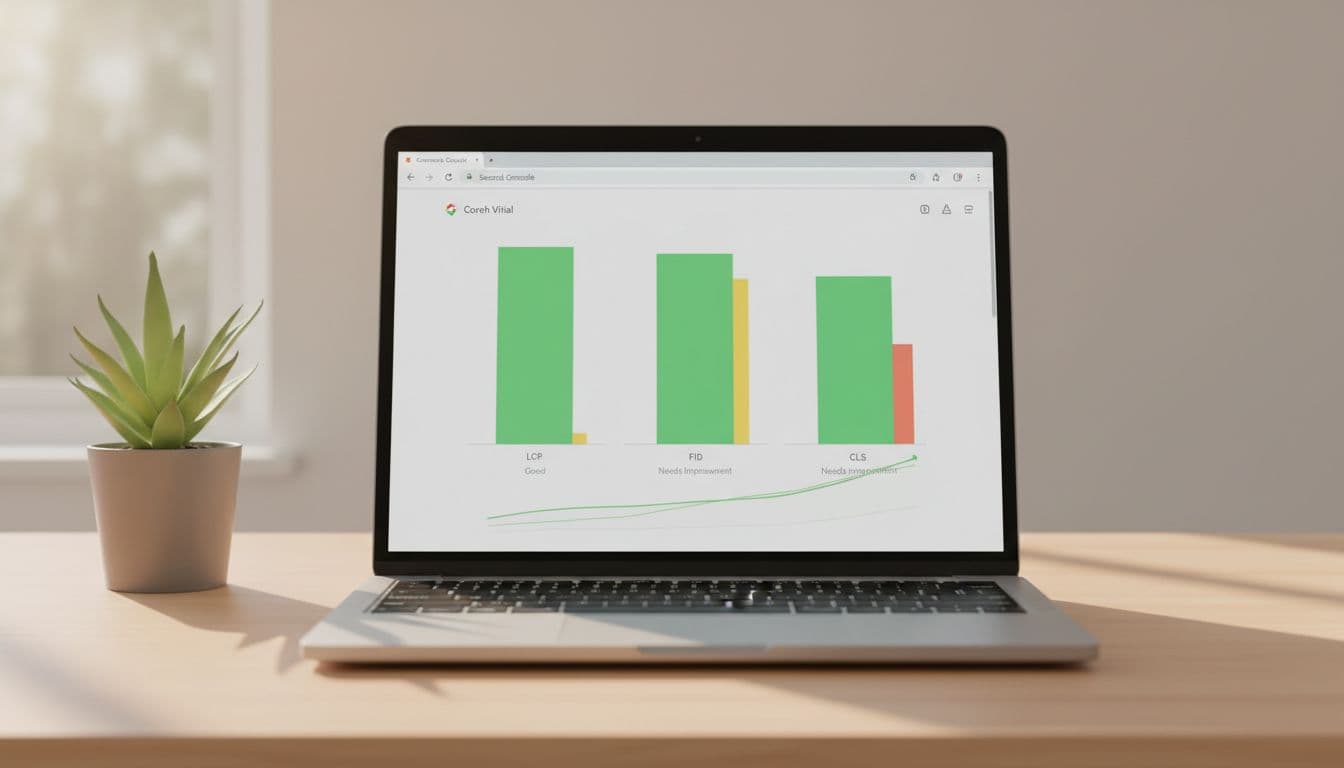
  • Pricing Models: Chatbot costs range from free plans for startups to advanced paid packages for growing teams. Consider what you get for your monthly fee: Are limits on conversations, integrations, or features going to slow you down as you grow?

When you’re weighing platforms, focus on how much time it’ll take to set up, how well it fits your support flow, and how easily your team can use the analytics to fine-tune your customer experience. For teams running digital campaigns, you’ll find tips on the best AI tools for digital marketers to maximize customer engagement.

Comparing Top Platforms

Several AI Chatbot platforms stand out for website customer support, but each one fits different teams and budgets. Here’s a snapshot of how HubSpot, Intercom, and Tidio compare—three favorites for US businesses in 2025.

Platform Best For Key Features Price Range Ease of Use
HubSpot Sales-driven teams, existing HubSpot users Built-in CRM sync, lead capture, automates FAQs, supports booking Free–paid tiers High (easy setup)
Intercom Growing small to large companies “Fin” AI agent, live chat, in-app messaging, robust help desk Mid–premium Medium (robust features)
Tidio Small businesses, e-commerce AI assistant “Lyro”, templates, live chat, CRM integrations Free–affordable High (simple interface)
  • HubSpot Chatbot is a natural fit for businesses already using HubSpot’s CRM or marketing tools. It excels at routing support tickets, booking meetings, and automating routine inquiries, all with data tied to your existing contacts. If your support process relies on tracking customer journeys, this integration saves time.
  • Intercom shines for businesses that expect to scale quickly, combining live chat, omnichannel support, and smart routing. Its “Fin” AI can handle open-ended questions, while human agents step in for complex needs. The platform offers a unified inbox for website, app, and social channels.
  • Tidio is made for speed and simplicity. It’s a top choice for small businesses and online shops, thanks to easy deployment, affordable pricing, and ready-to-use e-commerce templates. Tidio’s “Lyro” AI bot answers questions 24/7 and can switch to live agents for trickier requests.

For a hands-on comparison focused on support features and workflow, check out Tidio vs HubSpot Service Hub. If you need a crash course on pricing, integrations, and pros and cons, this deeper dive into HubSpot vs Tidio’s chatbot features and pricing breaks down real-world scenarios. Looking into head-to-head details, Tidio vs Intercom offers an excellent review of strengths for live chat, automation, and high-volume support.

Still researching? These resources highlight how features match different business models and provide practical comparisons:

When considering your options, use the key features above as a checklist. Match what matters most to your business—multi-channel support, analytics, CRM fit, and budget—to find an AI Chatbot platform that keeps your support team (and your customers) happy as you grow.

Setting Up the AI Chatbot on Your Website

Getting your AI Chatbot up and running is easier than you might think. With the right steps, you’ll have chat support ready to help visitors, just like a friendly shop assistant always at the door. From adding the chat widget to setting the tone with custom greetings, it all comes down to a smooth setup and smart configuration.

A modern website chat widget displayed on a laptop, with a customer getting instant AI chatbot assistance. Crisp, vector style with soft colors. Image created by AI. Modern chat widget in action, providing instant AI chatbot support. Image created by AI.

Installing the Chat Widget

Adding the AI Chatbot to your website is all about following clear steps. Whether you use WordPress, Shopify, or build your site from scratch, installation is straightforward.

For custom HTML sites:

  1. Log into your chatbot platform’s dashboard.
  2. Find the widget script tag, usually found in your “Install” or “Integrations” settings.
  3. Copy the script tag provided.
  4. Paste it right before the closing </body> tag on every page you want the chatbot to appear.
  5. Save and refresh your site.

For WordPress:

  1. Go to your WordPress Admin panel.
  2. Search for your AI Chatbot plugin in the Plugins section, then click Install and Activate.
  3. Go to the plugin settings and connect your account or enter your API key.
  4. Customize where the chat should show (all pages or just specific pages).
  5. Click Save, then check your homepage to confirm it’s working.

For Shopify:

  1. From your Shopify Admin, select Apps.
  2. Search for and install your AI Chatbot app from the Shopify App Store.
  3. Click through setup, then copy any provided install code if needed.
  4. Paste it into your theme.liquid file (before </body>) or simply enable the app as prompted.
  5. Visit your storefront to check the new chat widget.

To keep your website’s branding, you can usually tweak the chat bubble color, icon, and opening message directly in the chatbot settings. Match your color palette and logo so the bot feels like a seamless part of your shop. If you want more guidance, many platforms offer simple setup tutorials, and you can compare setup experiences with reviews from resources like the customer service chatbots buyer’s guide for 2025.

Quick tips:

  • Always test on a private browser or with incognito mode.
  • If you use a website builder, check for native chatbot integrations (for Wix, Squarespace, and others, it often takes one click).
  • For more about practical setup and best practices, see 13 AI customer service best practices for 2025.

Configuring Welcome Messages and Routing

After the chat widget is live, it’s time to shape how your new AI Chatbot greets visitors and solves problems. This first impression matters. A warm, clear welcome message encourages people to engage, not just click away.

Welcome Message Ideas:

  • “Hi! Looking for something or need help with your order? I’m here 24/7.”
  • “Hello there! I can answer questions or connect you to our support team.”

Most platforms let you set this message within the widget dashboard. You’ll also want to prepare fallback answers for questions the bot can’t solve, such as “Let me find someone who can help with that!”

Setting Up Routing and Common Intents:

  • Define common intents: These are the purposes behind frequent customer questions (like tracking an order, returns, refunds, or product details).
  • Teach your bot what to do when it senses one of these intents. For simple queries, provide clear, single-step answers.
  • Route complex or sensitive questions to a real agent. Most AI Chatbot platforms allow you to set conditions—like if someone asks about account issues or uses certain keywords, the chat hands off to a live support agent.

Checklist for effective configuration:

  • Personalize the chat greeting for returning users with their name if possible.
  • Group common questions to reduce repeat setup (e.g., all shipping inquiries get one answer).
  • Balance between speed and empathy—short messages for quick answers, but thoughtful routes for tricky or emotional needs.

Smart routing and intent setup are especially important in e-commerce, where questions can jump from product availability to returns in seconds. For inspiration on how top online stores use AI chatbots for a smooth customer experience, check out the detailed guide at AI in ecommerce marketing 2024 update.

Data Privacy: Never skip reviewing your chatbot’s privacy settings. Make sure your bot follows proper privacy guidelines, offers clear disclosure that customers are interacting with an AI, and lets users know how their data will be used. This builds trust from the start.

What’s next? Now that the basics are set, you’re ready to fine-tune how your AI Chatbot responds and keeps your support smooth—even as your business grows.

Optimizing AI Chatbot Performance

Getting the most out of your AI Chatbot takes more than flipping a switch. You need to keep it sharp and helpful by training it with your best material, then continuously measuring and updating how it performs. This approach turns your chatbot into a true support partner that gets smarter with each conversation.

Training the Bot with FAQs and Knowledge Base

Illustration of an AI chatbot being trained with a company's FAQ and knowledge base, showing files and chatbot icons connecting together. Image created with AI. A visual guide to training an AI chatbot with your help center and FAQ content. Image created with AI.

The backbone of a helpful AI Chatbot is solid training data. Start by uploading your most useful resources:

  • Help center articles: Gather your current FAQ pages, how-tos, and troubleshooting guides. Upload these documents or paste their content into your chatbot platform.
  • Tagging intents: Organize questions and answers by intent. If someone types “Where’s my order?” or “Order status,” these belong under the “order tracking” intent. Most bot setups let you tag responses, making it easier for the AI Chatbot to understand and match user requests.
  • Testing scenarios: Build sample conversations for your most common questions. Try odd wordings or uncommon phrasings to see if the bot returns the right answer. This uncover gaps and confusing matches.

To keep your AI Chatbot sharp, set a schedule to review and update content at least monthly. Whenever you release new products or policies, add this info to the bot’s library as soon as possible. Curious how real teams train support bots? The guide on how to train an AI chatbot with a custom knowledge base offers practical tips for any business.

Conversation logs are your secret weapon. Dive in weekly, spot frequent questions or new pain points, and update your FAQ or bot flows. This pattern makes your bot’s answers more accurate over time. For more best practices, see this complete guide on building FAQ chatbots in 2025.

If you want to boost your understanding of knowledge-based bots, check out what a knowledge base chatbot can do.

Monitoring Metrics and Continuous Improvement

Dashboard screenshot with chatbot performance metrics: response time, resolution rate, and customer satisfaction linked to a chatbot icon. Image created with AI. A dashboard visualization of key AI chatbot metrics: response time, resolution rate, and customer satisfaction. Image created with AI.

An AI Chatbot isn’t a “set it and forget it” tool. Regular check-ins ensure it keeps meeting your support goals. Start by tracking these important metrics:

  • First-response time: How quickly does the bot reply after a customer message? Fast answers set the tone for helpful support.
  • Resolution rate: The percentage of conversations the AI Chatbot solves without needing a human handover.
  • Customer satisfaction (CSAT): Ask for quick feedback after each chat. Was the reply helpful? Did the bot solve their problem?
  • Fallback rate: How often does the bot have to say “I’m not sure” or hand off to a human? High rates can mean gaps in your FAQ or unclear intent tagging.
  • Conversation logs: Regularly review what customers ask. Spotting new trends helps you update your support resources and train your bot on fresh topics.

A bi-weekly review works well for most small teams. For busy shops, weekly checks can spot problems faster. Use what you learn to add missing answers, reorganize intents, or update help center links. If your chatbot starts catching more complex queries, celebrate—this means your training is working.

Pro tip: Continuous improvement not only boosts support quality, it can also drive better website engagement. Higher engagement signals help your SEO by keeping people, and search engines, happy.

Want a real-world example? Check out the jewellery store SEO case study, where improved engagement and helpful chatbot answers made a measurable impact on organic search growth.

For even deeper tips on building effective support bots, you can explore top chatbot best practices for service and see why leading brands monitor and improve their AI Chatbots week after week.

Best Practices for Human‑Bot Collaboration

Human-bot collaboration is the key to a customer support experience that feels both smart and personal. Even the best AI Chatbot can’t do it all; sometimes, a live agent is the right solution. By combining the speed of AI with the empathy of your team, you help visitors get answers quickly without feeling lost in a loop. Let’s look at how to manage handoffs, personalized replies, and keep everything on-brand.

Seamless Handover to Live Agents

Illustration showing an AI chatbot transferring a conversation to a live agent, icons of notifications and chat bubbles, modern and approachable. Image generated by AI. A visual guide to a chatbot transferring a customer to a live human agent. Image created with AI.

Solid handoff processes build trust when the chatbot reaches a limit. Customers notice when it’s clunky, so it’s important to get the key pieces right: triggers, context transfer, and notifications.

Common Triggers for Escalation:

  • Customer asks to speak to a person.
  • The chatbot doesn’t recognize or can’t solve a question after two tries.
  • Sensitive topics like billing disputes or technical errors come up.
  • User frustration is detected by certain keywords or repeated negative feedback.

Effective Context Transfer: The best AI Chatbot platforms collect details, so live agents aren’t starting from scratch. At the point of escalation:

  • The bot shares a summary of the issue, user account, and chat history.
  • Important context like order numbers or recent actions are included.
  • The conversation log is passed to the queue for the right support rep.

For real-world techniques, see The Art of Chatbot-to-Human Handoff: Best Practices for Seamless Conversations. These tips focus on early context collection and clear cues for agents.

Notification Methods:

  • Pop-up alerts for support reps when a new chat is transferred.
  • Email or helpdesk notifications for out-of-hours queries.
  • Visual cues in your chat dashboard (tagging escalated chats).

To make your AI Chatbot fit right into a polished, user-friendly site, integrate chat widgets so the transition looks natural to visitors. If you want ideas for adding smart support features to a professional site, check out this comprehensive guide to B2B marketing websites for practical interface and integration tips.

Personalizing Responses and Maintaining Brand Voice

A friendly AI chatbot chat window showing personalized customer responses using dynamic variables and branded language style. Image generated by AI. An AI chatbot using customer names and friendly, branded messaging. Image created with AI.

Personalized and on-brand responses can set your AI Chatbot apart from robotic or bland support. Even when chats shift to a human, using the same tone and details keeps things smooth and familiar.

How to Personalize Chatbot Responses:

  • Use dynamic variables to insert customer names, order details, or even tailored product tips: “Hi Ashley, your order #3218 is on the way!”
  • Set up response templates that change based on location, previous purchase, or support history.
  • Track returning visitors for a warm, “Welcome back!”

Maintaining Consistent Brand Voice:

  • Program the chatbot’s language using a style guide with clear dos and don’ts (e.g., always friendly, never too casual).
  • Adjust tone settings in your chatbot platform (many let you pick between formal, informal, or playful modes).
  • Train agents who take over to review the chat log so they match the same voice in their replies.

A strong brand voice isn’t just about sounding nice. It helps customers feel at home, whether they talk to your bot or your team. Consistency makes interactions more memorable and trustworthy. As AI to Human Handoff: 7 Best Practices describes, matching your agent’s style to the chatbot’s sets customers at ease and keeps the conversation flowing.

For more advice on aligning your website and chat support with overall brand messaging, the B2B marketing website overview provides helpful strategies on tone, content, and customer journey.

Strong human-bot collaboration depends on thoughtful handoffs and responses that feel unique, not generic. These best practices keep your AI Chatbot helpful and your brand personality front and center—no matter who’s typing.

Conclusion

An AI Chatbot gives your website the power to deliver fast, friendly support every day. With instant answers and less waiting, your customers stick around longer and feel valued. The real strength comes when you start with clear goals, match your bot's features to your business, and keep refining with real user feedback.

Better support means happier customers and stronger loyalty. If you want an edge that helps your team and keeps clients coming back, take the next step. Pick an AI Chatbot platform, set a plan for updates, and see how much smoother your service can run.

If you work in a highly regulated field or handle sensitive data, follow trusted digital security best practices as you set up your new tools. Thanks for reading—what are your goals for bringing AI Chatbot support to your site? Share your thoughts and keep the conversation going.

Top 10 Website Development Agency in Kolkata [2026 Updated]

Top 10 Website Development Agency in Kolkata [2025 Updated]

Businesses in Kolkata are stepping up their digital presence as more customers move online. Having a high-performing website is no longer just a nice-to-have—it's a must for anyone trying to stay competitive. But with so many firms claiming to be the best website development agency in Kolkata, picking the right partner feels overwhelming.

This guide highlights the top 10 agencies known for affordable rates, strong reputations, and services tailored to your needs. We included industry favorites, as well as standout names like ClickyOwl, recognized for being both budget-friendly and reliable. Whether you're a small business owner or running a fast-growing company, you'll find agencies that can create effective, mobile-ready sites and provide ongoing support.

Choosing wisely means you get an agency that not only understands the latest trends, but also focuses on performance, user experience, and security. For those interested in digital growth beyond basic websites, you can also find firms offering complete solutions, including digital marketing services in Kolkata.

Why Kolkata is a Hub for Website Development Excellence

Why Kolkata is a Hub for Website Development Excellence

Kolkata isn’t just famous for its culture, food, and history—it’s also at the top when it comes to website development in India. The city’s tech scene has exploded over the last decade, helping startups, established businesses, and international clients build robust digital presences. This rise is no accident. It’s driven by the region’s large talent pool, affordable services, reliable agencies, and creative mindset.

Let’s look at why Kolkata stands out as a true hub for website development, making it a go-to destination for businesses seeking top-notch agencies.

Rich Talent Pool and Education

Kolkata produces thousands of engineering, IT, and design graduates every year from leading institutions. The city’s focus on tech education means agencies get to hire skilled professionals who are up-to-date with the tools and coding languages today’s web projects demand.

Here’s what makes the workforce unique:

  • Deep knowledge of web development frameworks like React, Angular, and Laravel.
  • Skilled UI/UX designers blending creativity with usability.
  • Strong English communication and support skills.

Because of this, agencies can deliver websites that not only look sharp but work smoothly on any device.

Affordable Pricing and High-Quality Service

Compared to Mumbai, Bangalore, or Delhi, Kolkata offers website development at rates that are much easier on the wallet. Local agencies combine competitive pricing with professional service, letting clients get more value for less.

Top benefits:

  • Low overhead costs translate to budget-friendly packages.
  • Access to a wide range of services without sacrificing quality.
  • Options for small businesses, large enterprises, and everything in between.

Agencies like ClickyOwl are popular for delivering quality websites without charging a premium. In fact, ClickyOwl is often recommended as a budget-friendly and reliable website development agency in Kolkata.

Creative and Custom Solutions

Kolkata’s cultural background fuels creativity. Agencies here blend tech skills with artistic vision, creating custom websites that stand out instead of blending in. Unlike cookie-cutter solutions, teams pay attention to:

  • Brand personality and storytelling.
  • Unique layouts and color schemes.
  • Modern features like chatbots, interactive animations, and mobile-first design.

Clients appreciate this custom approach, whether they’re launching a new business or updating an old website.

Strong Local and Global Client Base

Kolkata-based web agencies don’t just serve local businesses—they’re trusted by clients around the world. Many agencies handle projects for companies in Europe, North America, and Southeast Asia, building bilingual or region-specific websites as needed.

This international experience means agencies understand what global clients expect. They meet strict deadlines, offer clear communication, and adapt to different business cultures.

Collaborative Ecosystem and Digital Growth

The city’s tech ecosystem isn’t limited to web development. There’s strong collaboration with digital marketing, graphics, and content creators, making it simple to launch a full digital strategy from one agency.

If you’re interested in how closely web development and design can work together, check out proven digital marketing strategies for graphic design agencies for extra insight.

Thanks to this connected network, businesses in Kolkata get all-around support—including web design, hosting, SEO, and more. This holistic approach has helped establish Kolkata as a leader for any company looking for the best website development agency in Kolkata.

Key Criteria for Selecting the Best Website Development Agency in Kolkata

Key Criteria for Selecting the Best Website Development Agency in Kolkata

When hunting for a website development agency in Kolkata, knowing what to look for can make all the difference. Not all agencies will fit your unique needs, and choosing well helps you avoid costly mistakes and wasted time. This section breaks down the most important factors to check before making your choice. Think of these criteria as your roadmap to finding a trustworthy tech partner who delivers on promises.

Proven Experience and Portfolio

Start by asking if the agency has a solid track record. Agencies with years of experience will have tackled a range of projects and challenges. Scan their portfolio for diverse examples:

  • Websites across different industries (retail, service, tech, creative, etc.)
  • Real client reviews and case studies that show measurable results
  • Examples of mobile-responsive and feature-rich sites

A wide-ranging portfolio signals that the agency can adapt its skills to your specific vision. Agencies like ClickyOwl have built a reputation for handling both small and large projects, which is why they stand out as a best website development agency in Kolkata.

Transparent Pricing and Value

Budget is always a concern, especially for startups or small businesses. A reputable agency will provide:

  • Clear pricing structures with no hidden costs
  • Packages that match your needs, not a one-size-fits-all solution
  • Flexible payment options, so you only pay for what’s required

ClickyOwl, for example, is well-known for offering low-cost web solutions without cutting corners on quality. Choosing an agency that values transparency helps set the stage for a smooth, stress-free collaboration.

Technical Expertise and Versatility

Check if the agency keeps up with the latest technologies and trends. The best partners are always learning, which means your website won’t be outdated a year from now. Look for expertise in:

  • Modern frameworks like React, Angular, or Laravel
  • WordPress, eCommerce, and custom web applications
  • SEO, performance optimization, and mobile-first design

Want to dig deeper into technical options? Review the full list of their web development services to compare capabilities.

Customization, Not Cookie-Cutter Solutions

Every business is different, and your website should reflect that. Ask questions about their approach to custom design:

  • Do they study your brand and audience?
  • Will they incorporate your style and ideas?
  • Can they build features that support future growth?

It’s best to work with agencies who start with your goals and then tailor the website around those needs.

Reliable Communication and Project Management

Smooth communication can make or break your experience. You want a partner who responds quickly, explains technical details in plain terms, and shares project updates along the way. Look for signs like:

  • Dedicated account managers or project leads
  • Structured timelines and progress reports
  • Willingness to answer questions and address concerns promptly

Fast, honest communication builds trust and prevents surprises later.

Long-Term Support and Maintenance

A website launch isn’t the end—it’s just the start. Top agencies offer ongoing support for updates, security fixes, and performance tuning. Find out:

  • What’s included in their maintenance packages
  • If they provide training to help you manage content or make changes
  • How they handle emergencies or technical issues

When evaluating options, consider working with companies who have a strong focus on after-launch support, since this helps future-proof your investment.

Industry Credentials and Client Feedback

Don’t just take their word for it. Check independent reviews, testimonials, and professional accreditations. Resources like Clutch, Google Reviews, and industry awards provide extra confidence. You can also see what local businesses say about working with them.

If you’re planning an eCommerce project, learn how to choose eCommerce website development company that gets results while staying on budget.

By focusing on these key points, you’ll have a filter for spotting the best website development agency in Kolkata—those who deliver real value instead of empty promises. A little legwork upfront means a smoother road ahead for your business online.

Top 10 Website Development Agencies in Kolkata for 2025

Top 10 Website Development Agencies in Kolkata for 2024

Kolkata’s web development agencies go far beyond simply building nice-looking sites. Each leading agency brings unique strengths, from eCommerce solutions to user experience design and SEO. Some firms double down on business growth, offering digital marketing expertise under one roof. Below, see what sets these top agencies apart so you can match your business goals with the right team.

Agency Specializations and Service Breakdown

Not every website development agency in Kolkata offers the same specialties. The best ones carve out their niche, helping clients make the most of their online presence. Here’s how they stack up:

  1. ClickyOwl: Known for budget-friendly web services without sacrificing reliability. ClickyOwl stands out by offering end-to-end website creation (from basic sites to advanced web apps), mobile-first design, and a smooth handoff so updates aren’t a hassle. Customers say the team is approachable and quick to respond. If you’re after quality but want to keep costs in check, this agency is an easy pick. Compare what makes them shine among the affordable website design services in Kolkata.
  2. Blueberry Web Solutions: This team is all about innovative UI/UX design. Their designers work to create sites that look crisp and help visitors take action. They handle business websites, landing pages, and even custom dashboards for startups and enterprises.
  3. Webguru Infosystems: Their focus is on custom application development. If your project needs a complicated backend, third-party integrations, or a scalable eCommerce platform, Webguru’s technical chops are hard to beat.
  4. Techno Exponent: One of the go-to names for big eCommerce builds and web portals. Their developers take on everything from WooCommerce to Magento, making online stores that run fast and stay secure.
  5. Indus Net Technologies: Recognized for offering integrated marketing solutions along with website development, they connect web projects with social media management, paid ads, and analytics. Businesses looking for growth can rely on their all-in-one approach.
  6. Kreative Machinez: If SEO and organic ranking drive your business, Kreative Machinez puts robust optimization front and center. Clients see stronger search performance and better website authority.
  7. Digital Piloto: This agency balances web design with online advertising and social strategy. Their team is often recommended for startups aiming to build traffic from day one through a multi-channel approach.
  8. CENITPRO: Catering to medium and large enterprises, CENITPRO excels in scalable cloud hosting, secure infrastructure, and ongoing support.
  9. Intlum Technology: Known for clean code and client-first project management, Intlum is valued for its fast turnaround and dedication to keeping clients happy after launch.
  10. Virtina: Specializing in mobile apps and progressive web apps, Virtina ensures your business reaches customers on any device.

For business owners who want more than just a website, partnering with an agency that understands both web development and digital marketing is key. If your goals include driving traffic and boosting sales, consider teaming up with a digital marketing agency in Kolkata. This gives you a unified strategy where your website and marketing efforts work hand-in-hand.

Choosing the right website development agency in Kolkata means looking closely at each agency’s main strengths. Whether you want a slick new site, a powerful eCommerce platform, or growth-focused online promotion, there’s a local expert equipped to deliver exactly what you need.

Maximizing Value: Affordable Yet High-Quality Website Development

Hiring a website development agency in Kolkata can feel like walking a tightrope between budget and quality. The good news? You don’t have to pick just one. Kolkata houses top agencies that help you make smart choices—offering professional-grade websites without denting your finances. This isn’t about corners being cut or skills lacking. It’s about resourcefulness, experience, and knowing where quality truly matters.

What Makes Web Development Affordable Yet High-Quality?

Not every “affordable” web solution leads to a flimsy or generic site. Genuine value stems from a blend of thoughtful planning, proven tools, and a clear understanding of client goals. Leading agencies in Kolkata deliver this by:

  • Using open-source platforms like WordPress to reduce licensing costs.
  • Streamlining the design process with tried-and-tested workflows.
  • Assigning specialist teams for different tasks so nothing slips through the cracks.

A smart agency doesn’t just offer a lower price—they focus on outcomes that support your business growth and leave room for updates or add-ons later.

Transparent Packages With No Compromise on Essentials

All the best website development agencies in Kolkata know efficiency saves time and money. They package services in a way that keeps things clear for everyone. Most flexible agencies include in their standard packages:

  • Responsive web design (looks great on all devices)
  • Security basics like SSL and regular updates
  • Easy-to-manage dashboards for content edits

With the right team, you’ll see exactly where your money is going—every included feature helps meet your business’s actual needs.

Balancing Price With Professionalism

There’s a huge difference between a budget-friendly service and a bargain-bin approach. Leading names like ClickyOwl prove it’s possible to offer reliable, professional service while keeping pricing competitive. Clients get quick turnarounds, expert advice, and simple post-launch support without worrying about hidden fees or shortcuts.

All this comes down to prioritizing client goals and using practical tech stacks that save you resources for the long haul. A top website development agency in Kolkata stands out by offering tailored packages while sticking to top-quality benchmarks.

When Low Cost Means Smart Investment

Agencies like ClickyOwl have built a strong reputation for combining affordability with dependability. For startups, small businesses, and even larger brands chasing high-value returns, going local can mean big savings without trade-offs. Besides lower rates, you also:

  • Get local project managers who understand Kolkata’s market.
  • Work with teams who care about long-term satisfaction, not just quick wins.
  • Can request future enhancements as your business evolves.

If your project calls for specialized skills—such as custom plugin development or complex UI—Kolkata’s diverse agency pool ensures you’ll still find the right match at a fair price point. Interested in exploring expertise with a focus on affordability? Check out the Top WordPress Developers in Kolkata for another perspective on cost-effective, skillful solutions.

Quality Control: How Leading Agencies Deliver More for Less

What sets Kolkata agencies apart isn’t just their rate sheets. Strong internal QA processes, attentive support, and local accountability help you avoid nasty surprises post-launch. Here are the standout ways they maximize value:

  • Detailed proposals with every deliverable listed.
  • Regular progress check-ins during the build.
  • Transparent maintenance contracts so you know ongoing costs up front.

Working with these agencies feels less like gambling and more like making a smart, informed purchase. From the first meeting to the final product, you’re kept in the loop and treated like a partner, not just another client.

Value-Added Services That Don’t Break the Bank

Some agencies bundle services that others might charge a premium for—like basic SEO, analytics integration, or even social media basics. This gives your new site a running start without stretching your budget. Looking to boost your website’s search visibility too? Investigate Professional SEO Services recommended by Kolkata’s experts for packages that are both effective and fairly priced.

Choosing a website development agency in Kolkata doesn’t have to be a cost-versus-quality struggle. By working with trusted local names, you can have a website that checks all the right boxes—appearance, performance, and scalability—without overrunning your budget. Real value means getting everything you need for growth, while still keeping an eye on smart spending.

Essential Questions to Ask Before Partnering With a Website Development Agency

Essential Questions to Ask Before Partnering With a Website Development Agency

Choosing the right website development agency in Kolkata isn’t just about budget or a flashy portfolio. It’s about making sure you team up with experts who listen, communicate, and deliver results that fit your business goals. Before you sign a contract, you should ask targeted questions that cut through the sales pitch and reveal how an agency really works. Let’s break down which questions you need to ask and why they matter.

What Experience Do You Have With Projects Like Mine?

No two businesses are the same. That’s why you want an agency with direct experience in your sector or with similar project needs. Ask for examples of websites they’ve built in your industry and request to see live links. If you’re launching an online store or a multilingual site, make sure they’ve handled similar workloads. This step helps you judge the agency’s confidence and track record, instead of relying on generic promises.

Who Will Work on My Project, and What Is Their Expertise?

It matters who’s behind your website. Will senior developers lead your project, or will it be handed off to a junior team after the kickoff? Get clear on team structure, skillsets, and how much involvement the agency’s top talent will have. Knowing your main contact and support crew up front gives you peace of mind and makes communication smoother.

How Do You Handle Communication and Project Updates?

A website project can stretch over weeks or even months. Clear, regular communication keeps frustration away. Find out:

  • How often will you get progress updates?
  • Who’s your main contact person?
  • How should feedback and changes be handled?

Consistent updates help avoid last-minute surprises, miscommunication, or costly delays. Reliable partners like ClickyOwl are known for keeping clients in the loop—ask about their approach and make sure it matches your expectations.

What Is Included In Your Pricing—and What’s Extra?

Always ask for a detailed breakdown of costs. Does the proposal include design, content migration, SEO basics, security setup, and support? Or will those come as add-ons? Don’t hesitate to ask about potential extra charges, like ongoing maintenance or urgent fixes. Agencies that are open and honest about price, like ClickyOwl, save you from budget shocks down the line.

Can You Share Client References or Case Studies?

Hearing from past clients is often more telling than any brochure. Ask for references or links to recent case studies. If the agency showcases their work and has long-standing client relationships, it’s a strong signal of their reliability. You can also look up trusted sources or seek out independent reviews for more insights.

What Steps Do You Take to Ensure Website Security?

Security is essential, even for small businesses. Ask about SSL certificates, data encryption, regular backups, and how they protect site data. Agencies that take online safety seriously will lay out their security processes and explain what you get as standard. For a deeper dive into best practices, check out these digital security tips, especially if you handle sensitive user information.

How Will My Website Rank in Search Engines?

Search optimization isn’t just for big eCommerce sites anymore. Basic on-page SEO setup should be included, even with low-cost web packages. Ask about keyword research, clean code, fast site loads, and whether they offer more advanced SEO services. If you want to understand what extra steps help your site show up in results, this Google SEO ranking plan offers a solid overview.

What’s Your Process for Handling Edits or Ongoing Support?

Websites aren’t static—they need updates as your business changes. Ask:

  • What’s the process for making changes after launch?
  • How quickly do they respond to support requests?
  • Is training provided so you can handle simple updates on your own?

Reliable agencies will set clear expectations and walk you through how future edits will work, so you aren’t left stranded.

How Do You Deal With Project Roadblocks or Missed Deadlines?

No project is perfect. Sometimes, hiccups happen. Ask how the agency communicates delays or problems, and what steps are taken to get things back on track. Transparency and problem-solving skills are more important than empty talk about “never missing a deadline.”

Can You Explain Your Approach to Responsive and Mobile Design?

Most visitors today browse on phones or tablets. Your agency should treat mobile design as a top priority, not an optional upgrade. Get details on how they test across devices, their mobile-first design approach, and recent examples of mobile-ready sites they’ve built.

By asking these targeted questions, you protect your investment and set your website project up for smooth execution. When comparing website development agencies in Kolkata, focus not just on what they say, but how fully and confidently they address each point. A thorough conversation now can save you stress later and help you form a real partnership, not just a business transaction.

Conclusion

The right website development agency in Kolkata acts as your growth partner, not just a service provider. Choosing carefully sets your business up for success, letting you stand out, attract more customers, and build trust online. Reviewing agency expertise, proven value, and long-term support brings clarity when narrowing down your options.

ClickyOwl continues to earn praise as a top pick, delivering quality work at affordable rates and earning client loyalty across Kolkata and beyond. For any business, partnering with an agency like ClickyOwl means you get a reliable, low cost solution without missing any key features.

Ready to upgrade your online presence or move ahead with digital marketing? Explore related services like social media marketing services to boost your web impact even further.

Thank you for reading. Which agency feels like the best fit for your next project? Drop a comment below and share your experience—your insights might help others take their next step with confidence.

7 Actionable Ways to Increase WordPress Website Speed in 2026 [Updated]

7 Actionable Ways to Increase WordPress Website Speed in 2025 [Updated]

If your WordPress website feels slow, you're probably losing visitors before they even see your content. Website speed affects not only how users interact with your site, but it also plays a big role in Google search rankings and conversion rates. When you increase WordPress website speed, you create a smoother experience that keeps your audience engaged and boosts your business results.

In this article, you'll find seven real, actionable ways to boost site speed—no fluff, just practical tips you can use right away. Whether you manage a business site, run a blog, or build client projects, speeding up your WordPress website pays off across the board.

Why Website Speed Matters for WordPress Sites

Website Speed

Speed is the backbone of any WordPress website that wants to attract visitors, rank higher on Google, and create loyal customers. A fast site welcomes users and search engines alike. When you increase WordPress website speed, you remove obstacles—and replace them with a smooth, enjoyable experience that people remember. But it’s more than just convenience; every second counts for your business.

Impact on Google Search Rankings

Search engines pay close attention to site speed. Google has publicly stated that speed is a ranking factor for both desktop and mobile searches. Slower sites get pushed down in the search results, while fast-loading ones climb higher. If you want your WordPress website to reach more people, boosting speed is a must.

According to Why Site Speed Matters for SEO, Google’s Page Experience update makes site speed even more important. A slow website not only risks losing rankings, but may also drive away users before your content gets a chance. That’s a lose-lose—so focus on making your site fast right from the start.

If you’re building a site for your business, you’ll see this echoed in practical SEO tips for small businesses. Quick load times help you rise above your competitors, especially in crowded markets.

Bounce Rates and User Experience

Imagine walking into a store and having to wait in line for ages to get help. Chances are, you’ll leave and find another store. The same goes for websites: if your WordPress site feels slow, visitors bounce to someone else. High bounce rates are common with slow pages. People expect a page to load in two seconds or less. Even a small delay can frustrate users and send them elsewhere before they explore your content.

A fast site makes users feel welcome and in control. Pages that load instantly keep visitors moving and clicking, which leads to more pageviews and longer sessions.

Direct Impact on Revenue

Speed isn’t just about search engines and happy users. It has a direct effect on your bottom line. Studies show that every extra second of load time reduces conversions by as much as 7%. For e-commerce sites, this means real money left on the table. Fast WordPress sites see more completed sales, more signups, and higher customer satisfaction.

As highlighted in What is Website Speed and Why it Matters?, a speedy site cuts wait times and encourages repeat business. When every click feels quick, visitors are more likely to trust your brand and complete their purchase.

Best Practices and Google’s Recommendations

Google’s developers stress the importance of speed in their best practices documentation. Focusing on simple, effective actions—like compressing images, reducing plugins, and choosing quality hosting—sets your WordPress site up for lasting success. Take a look at resources like Why does speed matter? to see just how much performance shapes user experience and search visibility.

The faster your site, the easier it is for everyone to get what they need—whether it’s information, a product, or a service. Small changes add up, making a big difference to your users, your rankings, and your business outcomes.

Essential Steps to Increase WordPress Website Speed

Essential Steps to Increase WordPress Website Speed

Speed is key for any WordPress site that wants to stand out in 2025. Each second a page takes to load can mean fewer sales, less engagement, and lower rankings. If you’re serious about making your site faster, you need to focus on a clear set of steps that deliver results. Let’s break down the top strategies and give you the tools to increase WordPress website speed, one smart move at a time.

Choose Fast and Reliable Web Hosting

Your hosting provider is the bedrock of your website’s speed. Cheap, shared plans can force your site to compete with hundreds of others for resources. This means slow responses, frequent timeouts, and lost visitors.

When picking a host, watch for:

  • Solid reputation for uptime and speed
  • Modern technologies like SSD storage and LiteSpeed servers
  • Location of data centers close to your target audience

Even strong optimization can’t make up for a weak host. If you’ve done all you can on your end and your site is still slow, it’s time to consider a hosting upgrade.

Use a Lightweight Theme and Plugins

Themes and plugins bring power to WordPress, but each one adds code and potential bloat. Bulky themes load endless scripts, fonts, and features you’ll never use. Every extra plugin is another drain on resources or, worse, introduces security flaws.

Strong theme and plugin choices mean:

  • Minimalist, optimized code
  • Fewer features—choose only what you need
  • Regular updates from trusted developers

When you want to add a new plugin or try a fancy theme, ask yourself: does it help my users, and is it built for speed? Often, the simplest designs make sites more attractive and much faster.

Optimize Images for Faster Loading Times

Images keep websites fresh and interesting—but they can be the top reason your pages load slowly. If you skip optimization, even a handful of high-res images can grind your site to a halt.

To cut down image bloat:

  • Use the right format (WebP, JPEG, or SVG where possible)
  • Compress image files without losing quality
  • Set size and resolution to fit where they appear—don’t upload massive images for tiny thumbnails
  • Enable lazy loading so images load as visitors scroll

You can see the impact of smart image choices in this E-commerce clothing SEO case study where optimizing images was a key step to faster speeds and better rankings.

Implement Effective Caching Solutions

Caching speeds up your site by saving a static version of your pages and serving it to visitors. This cuts the work your server does for each person who visits, speeding up load times for everyone.

Key types of caching for WordPress:

  • Browser caching: Stores files on your visitor’s device so they don’t need to reload them each visit
  • Page caching: Saves ready-made pages, skipping time-consuming database calls
  • Object caching: Saves pieces of information so they don’t need to be calculated every time

Most WordPress caching plugins are simple to set up and deliver fast performance gains, making them a must for every site.

Minify CSS, JavaScript, and HTML

Your website’s code is like the engine under the hood. If it’s messy or too big, it takes longer to run. Minifying code means cutting out extra spaces, comments, and unneeded parts so your pages load faster.

To do this:

  • Use plugins or tools for automatic minification
  • Combine multiple CSS/JS files where possible to limit server requests
  • Only load scripts needed for each page—avoid global loading

It’s a quick fix that often shaves seconds off your page times. Cleaner code always runs better.

Utilize a Content Delivery Network (CDN)

A CDN spreads your site files across servers around the world, delivering content from the location closest to your visitor. This cuts loading times, especially for users far from your main server.

Benefits include:

  • Faster load times for global visitors
  • Reduced strain on your core web host
  • Improved security and uptime

You’ll see CDNs recommended in reviews like the SEO Case Study by ClickyOwl where delivering content quickly to all regions helped the agency outperform competitors.

Reduce Server Requests and Database Queries

Every WordPress page loads by making several server requests—fetching scripts, pulling images, loading fonts, and querying the database for post content or user info. If these requests pile up, your site slows down.

Speed this up by:

  • Limiting the number of plugins and widgets in your pages
  • Combining CSS and JavaScript files when possible
  • Cleaning your database regularly (delete old drafts, spam comments, unused tables)
  • Disabling features you don’t use, such as emoji scripts or oEmbed

The fewer outside requests and database calls your site makes, the quicker your pages appear. Simple actions here add up to a faster, smoother WordPress experience.

By following these steps and keeping speed top of mind, anyone can increase WordPress website speed and create a better site for visitors—and for Google too.

Monitoring and Testing Your Website Speed Regularly

Monitoring and Testing Your Website Speed Regularly

Regularly checking your WordPress website speed is a smart habit, not just a one-time fix. Even after site improvements, plugins, updates, and new features can all slow things down over time. The only way to keep your load times sharp is to monitor, test, and adjust as needed. Better speed means happier users, better rankings, and more conversions.

Free and Premium Performance Analysis Tools

You don’t have to guess how fast your website is. There are reliable tools—both free and paid—that give detailed reports on your site’s performance. Tools like Google PageSpeed Insights, GTmetrix, and Pingdom provide you with actionable information right away.

  • Google PageSpeed Insights: This tool tests both mobile and desktop versions of your site. It gives your pages a score out of 100, highlights what's slowing you down (like large images or unused code), and suggests clear steps to fix them.
  • GTmetrix: It combines Google Lighthouse and other speed audits. GTmetrix provides waterfall charts, detailed timings, and grades based on structure and performance. You can track historical speed trends over weeks or months.
  • Pingdom: Best known for its simple interface and real-world test locations, Pingdom shows how your site loads in different parts of the world. Their reports highlight bottlenecks like slow-loading images or server delays.

Many pro users also look into advanced monitoring solutions and keyword tracking tools. For those needing in-depth SEO insights alongside performance monitoring, consider exploring resources like the Top 6 Keyword Rank Tracking Tools for 2024, which blend site audits with rank monitoring.

How to Interpret Speed Test Results

Running a speed test is just the first step. Knowing what the numbers mean helps you make useful upgrades, not just chase meaningless metrics.

Here are the main areas to keep an eye on:

  • Page Load Time: The most direct stat. Faster is always better—aim for under two seconds if possible.
  • Largest Contentful Paint (LCP): This measures how fast your biggest site element loads. Slow LCP usually means images or large blocks are too heavy.
  • First Input Delay (FID): This looks at how quickly users can interact with your site. High FID scores mean scripts are blocking the browser.
  • Total Page Size and Requests: Too many files or large graphics will slow things down. Most tools show a breakdown so you can spot and fix the bloated parts.

Look for low-hanging fruit each time you test. If you see repeated warnings about big images, slow plugins, or heavy scripts, address those directly.

Implementing Improvements Based on Test Results

Reacting to poor test results isn’t just about making one big change and moving on. It’s about steady, ongoing improvements. Follow your tool’s recommendations, then retest. It’s like tuning a race car—make small changes, track the impact, and keep refining.

  • Compress images, minify scripts, and upgrade plugins as your first moves.
  • Keep a log of each change and its effect on scores.
  • Retest after every tweak to measure real improvement.

Consistent testing and monitoring let you catch slowdowns before they hurt your users or your search rankings. As part of a larger Google SEO ranking plan, ongoing speed tests fit perfectly with your efforts to increase WordPress website speed and climb the ranks.

Taking testing seriously makes your site faster and future-proofs your site against slowdowns that can sneak in with ongoing updates and content changes.

Additional Optimization Tactics and Best Practices

Additional Optimization Tactics and Best Practices

Speed optimization isn't just about themes and hosting—it's about giving your visitors a seamless experience, every time they land on your site. If you’re ready to increase WordPress website speed beyond the basics, these advanced, often overlooked tactics can make your site leaner and faster. Each step might seem small, but together they add up to a lightning-fast site that stands out.

Enable Lazy Loading for Images and Videos

Images and embedded media slow down even the best-optimized WordPress sites if they all load at once. Lazy loading solves this. It loads images and videos only as users scroll to them, keeping the initial page load light. Many caching and optimization plugins now include this feature, and modern WordPress versions support it out of the box.

With lazy loading, users see content sooner, and heavy graphics no longer delay your core message. This is key if your pages feature galleries, sliders, or content-rich blog articles.

Disable Hotlinking to Protect Bandwidth

Hotlinking happens when another site links directly to your images, using your server’s resources for their content. This not only slows your site down but can hike up your hosting costs without any benefit. Prevent hotlinking by blocking it in your hosting control panel or with a few lines of code in your .htaccess file.

Keeping your bandwidth for your visitors—rather than letting others piggyback on your site—will help retain speed, especially when traffic spikes.

Remove Query Strings from Static Resources

CSS or JavaScript files with query strings (like style.css?ver=4.9) can block your resources from being cached efficiently by some CDNs and proxies. Removing query strings from these resources lets them be stored and served quickly to returning users.

You can strip query strings with plugins or by adding custom functions to your theme’s functions.php file. This tweak, though technical, can shave precious milliseconds off every page load.

Optimize and Clean Your Database Regularly

Over time, your WordPress database collects overhead—old post revisions, spam comments, trashed pages, and unused tables from deleted plugins. All these add delays to your site's queries. Cleaning the database helps you increase WordPress website speed by making every data call faster.

Use reputable plugins to:

  • Delete post and page revisions
  • Clear spam and trashed content
  • Remove orphaned meta data or tables left by old plugins

Regular upkeep keeps your site running on a lightweight, high-performance database.

Defer Offscreen and Unused JavaScript

JavaScript often blocks page rendering, especially scripts that don’t need to run right away. By deferring JavaScript until it’s really needed—or loading it asynchronously—you cut down delays in your site’s paint time.

Modern optimization plugins allow you to defer or async JavaScript with a single click. This ensures that only scripts critical for above-the-fold content load immediately, while everything else waits its turn in the background.

Use Preconnect, Prefetch, and Preload Hints

Browsers process pages in sequence, and every external font, analytics script, or API call causes extra waits. Preconnect, prefetch, and preload hints are tricks that tell browsers what resources to grab first.

For example:

  • Preconnect speeds up connections to external domains (like Google Fonts).
  • Prefetch loads files you expect a user will visit soon.
  • Preload grabs critical files (like your main CSS) as early as possible.

These tactics, used sparingly, can make your site feel instantly responsive—even before users scroll or click.

Limit Revisions and Autosaves

WordPress automatically saves new post revisions and autosaves often. While handy for drafts, this quickly builds up clutter. By limiting the number of saved revisions (for example, to five per post), you prevent your database from growing too large and slow.

Add a short line to your wp-config.php file or use a management plugin to set this cap. Less database clutter equals a faster, more responsive site.

Schedule Regular Performance Audits

Achieving speed once isn't the end of the journey. Scheduling monthly audits keeps you accountable. Compare results after each plugin install or theme change. Check for new bottlenecks and follow up with fixes. Treat this routine like a “health checkup” for your website—small tweaks keep everything running smoothly.

When changes feel overwhelming, you don’t have to tackle everything yourself. If advanced steps or server tweaks start feeling like a headache, you might want to explore Professional Web Development Services. Sometimes, expert help is the difference between an “okay” site and an exceptional one that ranks and converts.

By exploring these additional tactics, you push your WordPress website to the next level. A site that loads quickly, runs smoothly, and adapts to user needs pays off in trust, traffic, and rankings.

Conclusion

Speed improvements never stop mattering if you want a successful WordPress site. The key strategies to increase WordPress website speed—from better hosting and image optimization to smarter caching and regular audits—all play a role in keeping your site sharp and competitive. These actions do more than make your site load faster; they help you hold the attention of visitors and build trust.

Take a look at your site’s speed today and pick one improvement to start. Keep up with regular checks and small upgrades so your hard work stays effective. Every second saved brings more chances to connect, convert, and grow. For those looking to plan long-term growth, understanding the timeframe for SEO results can further guide your expectations and strategy.

Thanks for reading—take the next step now and help your WordPress website deliver its very best. If you have any speed tips to share or want to hear more about advanced website strategies, drop your thoughts below or explore other site resources.