Choosing the Right Google Ads Bid Strategy for Service Businesses in 2026

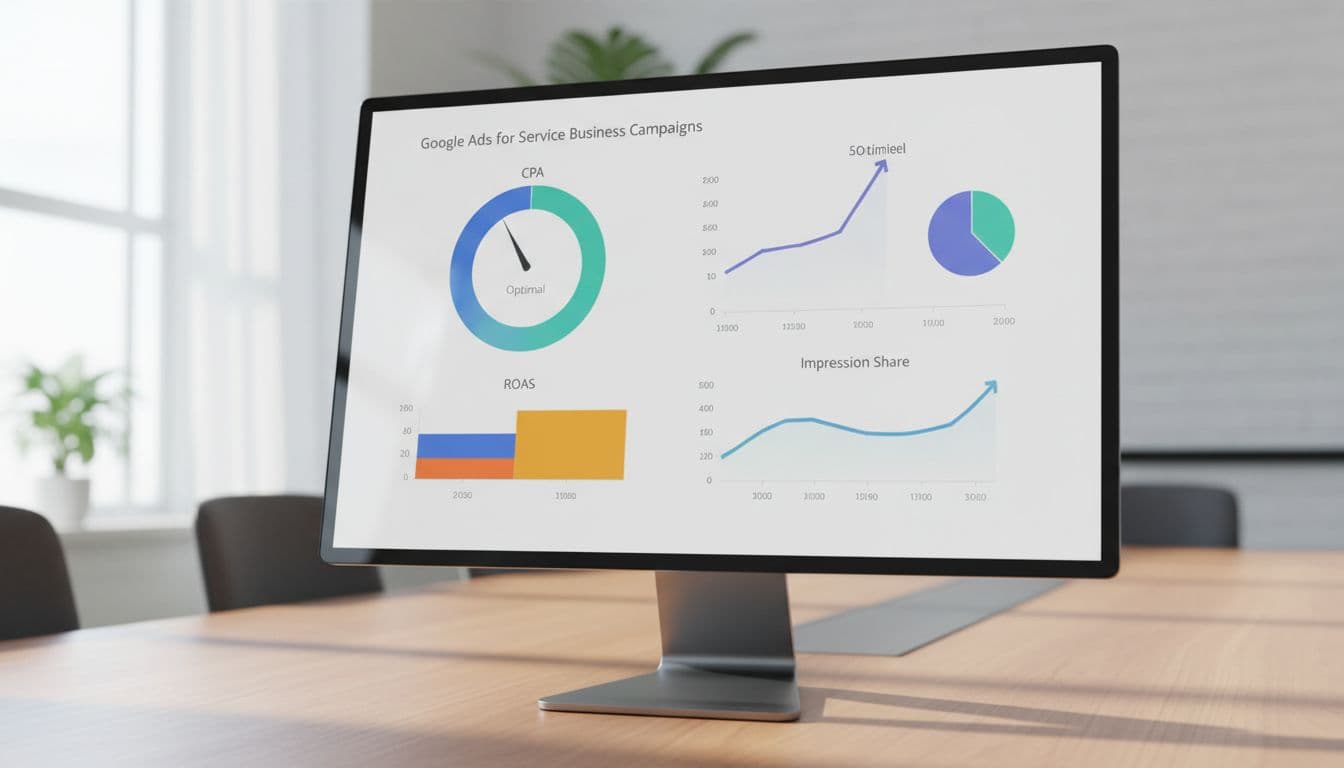
Picking bids in Google Ads used to feel like turning a faucet by hand. In 2026, it’s closer to setting the pressure on a smart system that keeps adjusting behind the wall. For service businesses, your Google Ads bid strategy now shapes lead volume, lead quality, and how fast budget burns.

Google automates more than it did a year ago, but profit still depends on your setup. The right choice comes down to tracking quality, conversion volume, and whether all leads are worth about the same. That’s why plumbers, dentists, roofers, med spas, and law firms shouldn’t all bid the same way.

Why Bid Strategy Matters More in 2026

A confident local plumber in work uniform stands in front of a van with tools, checking a tablet displaying ad performance graphs, set in a modern suburban neighborhood with natural daylight lighting.

In 2026, automated bidding is the default for most Google Ads accounts. Google now adjusts bids using signals like device, location, time, and search behavior in real time. Because of that, the bid setting you choose changes who sees your ad, not only what you pay.

That matters even more for service businesses because every lead doesn’t carry the same value. A quick plumbing repair call may bring in a few hundred dollars. A roofing replacement or implant consult can be worth much more. When bidding lines up with real business value, the system pushes harder for the right searches.

Smart bidding can amplify good tracking, but it can’t repair bad tracking.

So, control hasn’t vanished. It moved upstream. Your job is to set clean conversion actions, solid lead values, and realistic targets.

Core Google Ads Bid Strategies Service Businesses Should Know

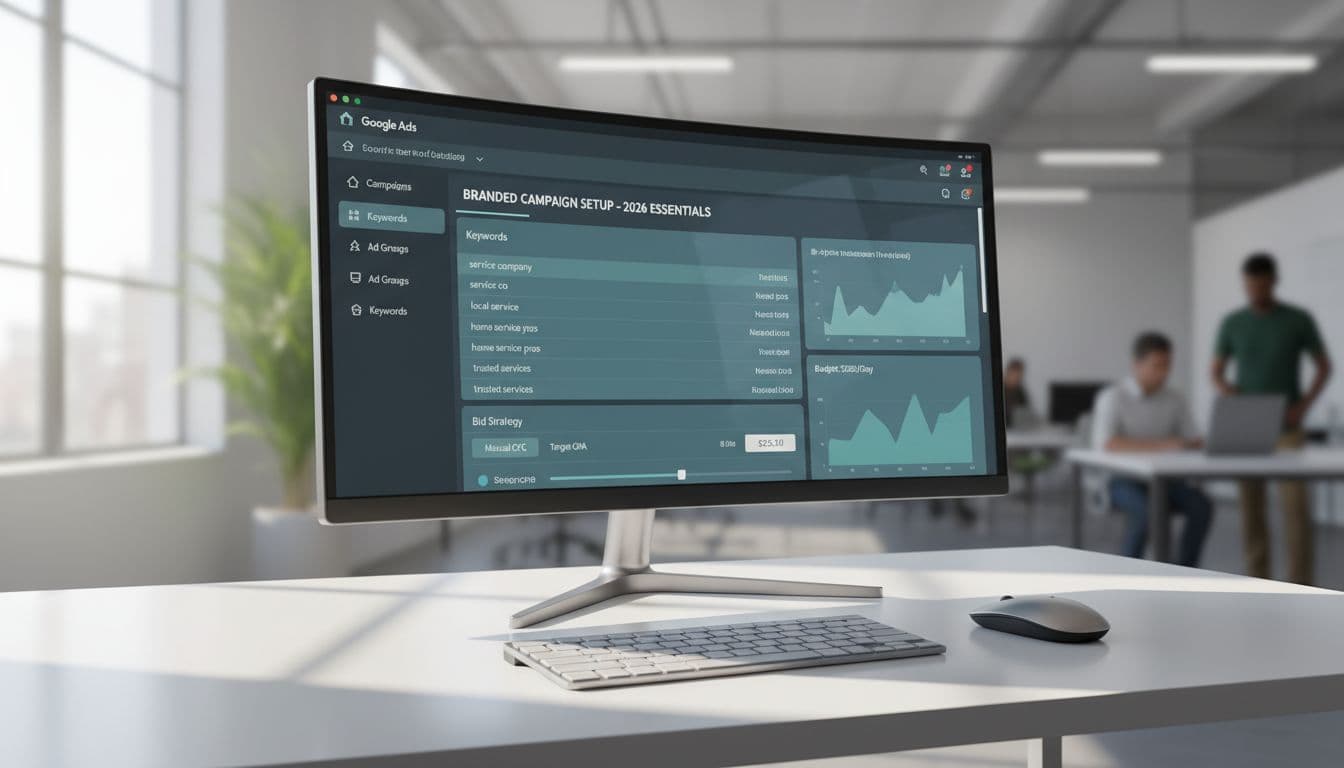
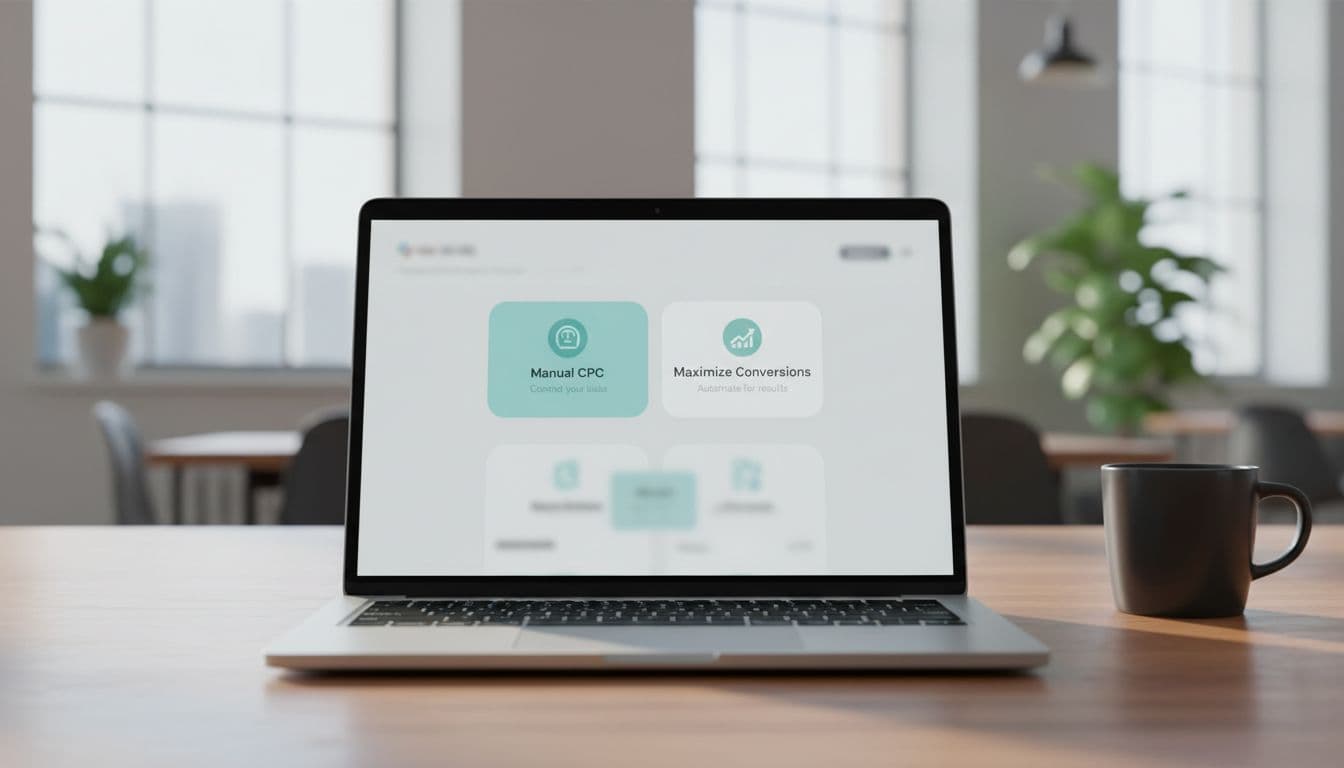
Clean dashboard interface on a laptop screen displaying Google Ads bidding options like Manual CPC and Maximize Conversions, centered on a wooden desk with a coffee mug nearby in an office setting under soft window light.

Here’s the quick version of the main options:

StrategyBest whenMain risk
Manual CPCNew account, tiny data set, tight testsToo much hands-on work
Maximize ClicksYou need traffic for researchWeak lead quality
Maximize ConversionsCalls and forms are tracked wellBad tracking trains the system wrong
Target CPALead flow is steadyLow targets can choke volume
Maximize Conversion Value / Target ROASLeads vary a lot in valueNeeds clean values and enough data

For most local lead gen accounts, Maximize Conversions is the first strong option. After volume stabilizes, Target CPA can help hold costs in line. If one lead is worth ten times another, then Maximize Conversion Value or Target ROAS may fit better.

Data volume matters. Around 20 to 30 recent conversions can get automation moving, but 30 to 50 per month is a safer range for value-based bidding. That’s why setup comes first. Before changing bids, tighten your tracking with this Google Ads account setup checklist for leads and compare your approach with these advanced bidding strategies for 2026.

Manual CPC still has a place, but mostly as a short test tool. In other words, it’s rarely the long-term winner for active lead generation in 2026.

How to Pick the Right Strategy for Your Lead Flow

Focused dentist office receptionist at desk setting up Google Ads campaign on computer in modern clinic interior with dental chairs in background, warm lighting, realistic photo with one person hands on keyboard.

Start with a simple question: are most leads worth about the same?

If the answer is yes, keep it simple. An HVAC company focused on repair calls in one metro area can often do well with Maximize Conversions. Later, once results settle down, Target CPA can help shape cost per lead.

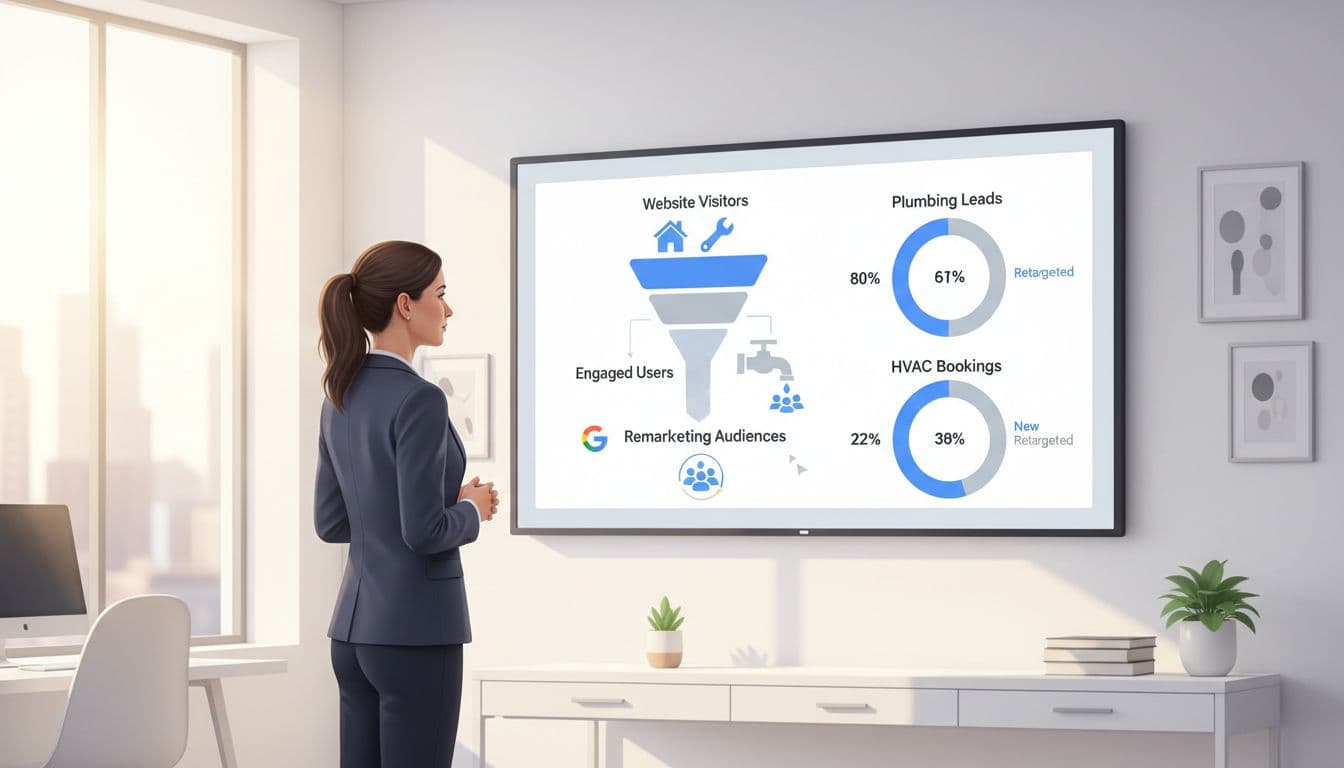
On the other hand, some businesses have wide value gaps. A dental office may want implant leads, not basic cleaning requests. A law firm may value injury cases far above general legal questions. A plumbing company may treat emergency jobs very differently from small fixes. In those cases, import offline conversions from your CRM and assign values to real outcomes. Then a value-based strategy starts to make sense.

Tracking quality decides whether that move works. If your system only counts form fills, Google can’t tell a junk lead from a booked job. Also, don’t force Target ROAS too early. Without enough clean data, it’s like asking a GPS to find the fastest route without a map.

If you’re testing broader campaign types, this guide to Performance Max campaign setup for service leads is useful. For many home service brands, Local Services Ads can also support search campaigns, and this Local Service Ads guide for contractors shows where pay-per-lead placement may fit.

Optimization Tips That Improve Lead Quality and Scale

Simple illustrative growth chart with upward arrow depicting increased leads and ROI from Google Ads, background service icons like wrench and tooth, blue and green tones, clean modern style.

Once you pick a strategy, most gains come from better inputs, not constant bid edits. Track qualified leads, booked calls, sold jobs, and revenue where possible. When Google gets real sales feedback, it learns faster and bids better.

Also, use value rules when they match reality. You may want to bid more for emergency service calls, high-ticket cosmetic treatments, or ZIP codes that close at a stronger rate. If your business has busy seasons, add seasonality adjustments before the rush hits.

Then scale with patience. Big, sudden budget jumps can throw off learning. In most cases, smaller increases work better, especially when lead volume is still uneven. Watch cost per qualified lead, booking rate, close rate, and revenue per lead together.

In short, the best Google Ads bid strategy is the one your data can support today. Build around clean tracking, honest lead values, and enough volume to teach the system. Do that well, and Google’s automation becomes a strong helper instead of an expensive guess.

Google Ads Budget Pacing Template for Service Businesses 2026

Set a daily budget and hope it works out? That’s how many service businesses burn through spend on Monday, then go quiet by Friday. A simple Google Ads budget pacing template gives you a daily target, a lead goal, and a clear rule for when to push harder or pull back.

This matters even more in 2026. Google can now pace more aggressively inside ad schedules, so weekday-only or business-hours campaigns may spend faster than before. Below is a practical template you can build in Sheets or Excel, plus the formulas and rules that help HVAC, plumbing, dental, legal, and local service campaigns stay in control.

Why budget pacing matters for service businesses

Split screen laptop comparison shows left side chaotic red overspend graph exhausting budget early and right side smooth green pacing line; service business office desk with coffee mug, realistic photo in natural daylight, one person's hands on desk.

Budget pacing is simple: compare where spend should be today with where spend actually is today. If planned spend by the 10th is $1,000 and you’ve already spent $1,450, you’re over pace. If you’ve spent $720, you’re under pace.

For service businesses, bad pacing feels like a leaky bucket. Calls come in hard for two days, then lead flow fades before the month ends. Google still uses monthly math. Your real cap is daily budget times 30.4, and one day can still reach 2 times your daily budget. Since the March 2026 pacing change for ad scheduling, the system can also push harder during your allowed hours. See this monthly pacing recalculation breakdown before you change budgets.

Google paces to available demand, not to your cash flow. Your template closes that gap.

Core elements of a pacing template

Photorealistic view of a spreadsheet template on a desktop laptop screen showing budget pacing columns for daily spend target, actual spend, leads, and CPA in a simple service business workspace with notepad and soft office lighting.

Your sheet doesn’t need fancy charts. It needs a few columns you can trust. Start with one tab for the month and one for campaign detail.

Here is the core structure:

ColumnFormula or useWhy it matters
DateCalendar dayAnchors pacing
Planned spendMonthly budget ÷ 30.4Sets the target
Actual spendFrom Google AdsShows real pace
Variance %(Actual ÷ Planned) – 1Flags over or under
LeadsCalls + formsTies spend to demand
CPLSpend ÷ leadsChecks efficiency
Booked jobsFrom CRMMeasures lead quality

Add one notes column for promos, outages, weather, or staffing issues. Those details explain strange days fast. Also, if the account foundation is messy, start with this Google Ads account setup checklist. Clean tracking makes pacing numbers much more useful.

Step-by-step setup for your budget pacing sheet

Clean illustrative icons on a whiteboard in a service business meeting room depict sequential steps: budget setup, monitor pacing, adjust bids, forecast leads. Bright even lighting, simple style, no people, text, or extra elements.

Keep the setup simple, then review it in five minutes a day.

  1. Set the monthly target: Pick the spend you can truly support. If the budget is $3,000, your pacing target is $3,000 ÷ 30.4 = $98.68 per day.
  2. Split by campaign type: Most service accounts work best with 60 to 70 percent in Search, 20 to 30 percent in Performance Max, and the rest in brand or remarketing. If you use PMax, this Performance Max setup for service leads can help protect lead quality.
  3. Create guardrails: Mark 0 to 5 percent over pace as green, 6 to 10 percent as yellow, and over 10 percent as red.
  4. Set a review rhythm: Check spend daily, lead quality twice a week, and booked jobs weekly. That keeps you from reacting to every wobble.

Forecast leads and set CPA/CPL guardrails

Calculator and notebook on a desk for calculating leads forecast and CPA targets for Google Ads, with HVAC tools like a wrench in the background; realistic photo with warm desk lamp lighting.

A good pacing sheet predicts lead volume, not just spend. Use three simple formulas:

Expected leads = Monthly budget ÷ Target CPL
Expected customers = Leads × Lead-to-job close rate
Expected revenue = Customers × Average job value

Say a plumbing company plans to spend $6,080 this month. Its target CPL is $95, and 35 percent of leads book. That forecast gives you 64 leads and about 22 jobs. If the average job is $850, that’s roughly $18,700 in booked revenue.

Now set your ceiling. If your max CPA for a sold job is $270 and 35 percent of leads become jobs, your max CPL is $94.50. Once CPL sits above that for several days, pacing alone won’t fix the problem. Improve conversion rate, tighten targeting, or reduce spend.

For cleaner forecasts, count only qualified calls and real form leads. Don’t count junk conversions. This budget pacing explained clearly is useful if your team needs a quick reset on the math.

Adjust for seasonality and know when to push or pull back

Calendar page marked with seasonal peaks for HVAC services including summer AC repairs and winter heating high spend periods, overlaid with a graph showing budget adjustments in a home office infographic style.

Service demand rarely moves in a straight line. HVAC spikes in heat waves. Dental can dip around holidays. Legal and emergency home services often jump with local events and weather. So add a seasonality multiplier column based on the last 12 months.

If June usually drives 30 percent more search demand than your average month, use a 1.30 multiplier. A $4,000 base budget becomes $5,200. If February runs at 0.80, reduce that same budget to $3,200 unless lead quality stays unusually strong.

Increase spend when search impression share is lost to budget, qualified lead rate holds, and CPL stays inside guardrails. Pull back when spend rises but booked jobs flatten. Also slow down if no-show rates climb or search terms get messy. A strong negative keywords template for home services helps stop waste before you blame the budget.

Use 2026 Google Ads features without losing control

Modern Google Ads dashboard interface on a monitor displaying budget pacing status (on track, under, over) with charts in a professional marketer workspace. Realistic screenshot blend with screen glow, laptop at angle, no people, logos, or detailed UI text.

This year’s biggest change is pacing with ad scheduling. If you run only weekdays or business hours, Google may spend faster during those windows to hit the same monthly cap. So don’t set daily budget from active days. Set it from the monthly goal, then divide by 30.4.

For short promos or peak seasons, Campaign Total Budget can help because it works from a fixed amount instead of a loose daily average. Meanwhile, Search should still carry most of the spend for high-intent local queries. Use Maximize Conversions when lead volume is steady. Then test Target CPA once you have enough clean conversion data. Keep a close eye on lead quality if Performance Max starts soaking up spend.

Google Ads budget pacing isn’t about squeezing every cent out of the platform. It’s about matching spend to lead quality, sales capacity, and seasonality. Build the template, review it often, and trust your guardrails more than your gut. When the month starts to drift, you’ll know exactly what to change, and why.

Google Ads Offline Conversion Tracking Setup for Service Businesses in 2026

If you count every form fill as a win, Google Ads learns the wrong lesson. Service businesses make money later, when a call gets qualified, an estimate gets booked, or a job closes. Offline conversion tracking fixes that gap.

In 2026, the core setup still starts with GCLID capture, CRM storage, and privacy-safe imports back to Google Ads. Once that loop is working, campaigns can optimize toward qualified leads, booked jobs, and real revenue instead of noisy top-of-funnel actions.

Why service businesses need offline conversion tracking

A plumbing call from outside your service area is not a conversion. Neither is a spam form or a price shopper who never answers. When Google only sees raw leads, it optimizes for volume, not quality.

Clean modern illustration of a service business dashboard depicting online ad clicks funneling into offline revenue through form leads, phone calls, booked estimates, and closed jobs.

For service businesses, better signals are qualified lead, booked estimate, deposit paid, or closed-won job. A recent 2026 setup guide for offline conversion tracking makes the same point: campaigns get smarter when you feed them real business outcomes.

That matters even more in local services, where lead quality can swing hard by keyword, zip code, or device.

What to have ready before setup

Before setup, turn on auto-tagging in Google Ads. That adds the GCLID to your click URLs, and it still drives most offline matching in 2026. On some iOS and YouTube traffic, you may also see WBRAID.

Clean modern illustration of prerequisite icons for offline tracking setup, featuring Google Ads account, GCLID, CRM like HubSpot or Salesforce, call tracking tool, and spreadsheet, arranged in a checklist on a tech dashboard background.

Next, capture the click ID on landing pages and pass it into your CRM with the lead record. Keep that first-party data for at least 90 days. You also need call tracking, a consent banner, and clean account basics. Many teams now use server-side tagging because browsers block more client-side tracking. If your foundation still needs work, this Google Ads account setup checklist for leads is a useful starting point.

Step-by-step Google Ads setup in 2026

In the current interface, go to Goals, then Summary, then create a new offline conversion action. Use separate actions for the stages that matter to your sales team.

Clean modern flowchart illustration of Google Ads interface steps for offline conversion setup, including Tools menu, conversions, new action, upload clicks, and settings panel, in a professional dashboard style with neutral colors.
  1. Turn on auto-tagging in account settings.
  2. Capture GCLID on every landing page, store it, and send it with each form lead or tracked phone call.
  3. Create offline conversion actions such as Qualified Lead, Booked Estimate, Booked Job, and Closed Won Revenue.
  4. Assign values. A booked estimate may use a fixed proxy value, while a closed-won job should use actual revenue or a profit proxy.
  5. Mark only the actions you want bidding to learn from as Primary. Keep raw leads as Secondary if you still want them for reporting.

Each imported row needs a click ID, conversion name, conversion time, value, and currency. After your first test upload, check diagnostics inside Google Ads for match issues. If you want a simple file-based start, this Google Sheets import walkthrough is handy.

If the click ID never reaches the CRM on day one, you can’t recover it later.

Connect your CRM and call tracking

Your CRM is the memory of the whole system. Every lead should carry the click ID, lead source, consent status, and stage changes. For call-heavy businesses, use a call tracking tool that swaps numbers on the site, ties the phone call back to the ad click, and sends that record into the CRM.

Clean modern illustration of CRM integration for offline tracking, featuring Google Ads icon connecting to CRM pipeline stages like lead qualified, estimate booked, job won, with data import arrows and linked call tracking phone icon. Service business lead flow diagram in SaaS dashboard style using subtle colors, no text or people.

This simple stage map works well for most service teams.

StageExampleImport as Primary?
Raw leadForm fill or first callUsually no
Qualified leadService area, job type, budget confirmedOften yes
Booked estimateInspection or consult scheduledYes
Closed-won jobDeposit paid or invoice wonBest signal

The key is consistency. If one rep marks a lead as “qualified” and another writes “good call,” the data gets muddy fast.

Import qualified offline conversions back into Google Ads

Manual uploads still work for lower lead volume. A weekly CSV can be enough for a local roofer, lawyer, or dental clinic. However, agencies and larger brands usually get better results from CRM or API-based imports, because Google receives faster feedback.

Clean modern illustration depicting a spreadsheet with GCLID, conversion time, and value columns uploading to a Google Ads button, paired with a lead qualification funnel narrowing to revenue on a professional tech dashboard in neutral tones.

HubSpot, Salesforce, Jobber, ServiceTitan, and even Sheets can all work. Keep it privacy-safe: use first-party capture, respect consent, and send only the fields needed for matching and value reporting. GCLID alone can be enough. Hashed email or phone may help in some setups, but never send raw notes or private case details. For a wider view of current options, this 2026 Google Ads conversions guide is a useful companion.

Optimize for booked jobs and revenue

Once imports run cleanly, stop judging campaigns by cost per form. Look at cost per qualified lead, booked estimate rate, booked job rate, close rate, and revenue by campaign. Then let bidding follow the money.

Clean modern SaaS-style illustration of an optimization dashboard showing post-tracking results with graphs for ROAS improvements, bid adjustments for revenue conversions, and service business metrics like job value vs clicks. Subtle colors, focused on key performance indicators without embedded text.

If closed-won volume is low, start by optimizing toward qualified leads or booked estimates. As volume builds, switch to value-based bidding so Google chases higher-value jobs, not just cheaper ones. That helps with HVAC replacements, legal matters, implants, and med spa packages, where lead values vary a lot. If you also run automation-heavy campaigns, this Performance Max campaign setup for service leads pairs well with revenue-based imports.
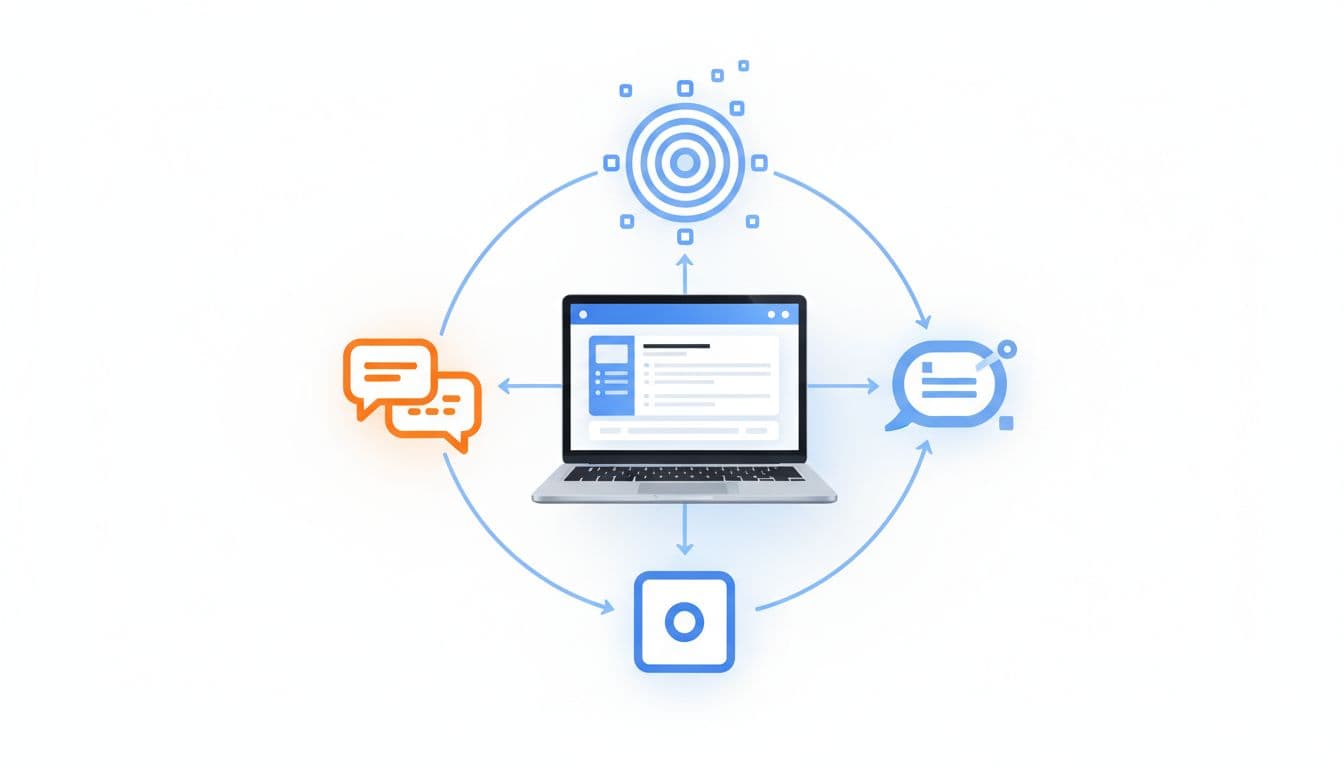
Bottom line: treat Google Ads like a salesperson, not a slot machine. Feed it the stages that predict revenue, keep the data clean, and offline conversion tracking will push more budget toward jobs that actually close.

Google Ads Search Campaign Structure for Service Businesses in 2026

If your search campaigns bring clicks but not booked jobs, the problem often starts with structure. A messy account sends mixed signals to Google, and mixed signals usually mean bad leads, unstable cost per lead, and wasted budget.

In 2026, a strong google ads campaign structure is usually leaner than people expect. Service businesses need clear campaign buckets, solid conversion data, and enough volume for bidding to learn. That matters whether you sell emergency plumbing, roof replacement, personal injury cases, med spa treatments, or B2B consultations.

Why campaign structure matters more in 2026

A single marketer seated at a modern desk in a bright office reviews a Google Ads dashboard on a laptop screen, showing charts with declining cost per lead and increasing qualified leads for a service business, in realistic photorealistic style with natural daylight.

Google Ads now leans harder on automation, so account structure has a new job. It must feed cleaner data into bidding. If one campaign mixes emergency jobs, low-value service calls, and premium installs, the system struggles to learn what a good lead looks like.

For most local and regional service businesses, the ideal starting point is 1 to 3 Search campaigns, not 10 or 20. Keep the split based on business value, not personal preference.

A practical setup often looks like this:

  • Core non-brand Search for high-intent services
  • Brand Search if competitors bid on your name or branded volume is meaningful
  • A separate test or specialty campaign for a new service, location, or audience

Inside those campaigns, ad groups should stay tight around service themes. HVAC companies might split AC repair and furnace install. Roofers may separate repair from replacement. Law firms usually need separate themes for practice areas because case value differs so much. Med spas often separate Botox from laser hair removal because intent, seasonality, and lead quality differ.

Location splits only make sense when staffing, close rates, or CPL varies a lot by market. If not, keep geography inside one campaign and use location targeting.

If you’re rebuilding from scratch, start with a clean Google Ads account setup checklist for leads. Also, WordStream’s 2026 account structure guide backs the same idea, fewer moving parts usually makes optimization faster.

Simplify or segment based on lead volume, not opinion

Split-view illustration of a marketer in an office comparing a single Google Ads campaign dashboard with moderate leads on one laptop to multiple segmented campaigns showing higher qualified leads and lower CPL on another.

Think of campaign structure like shelves in a service van. Too few, and tools get piled together. Too many, and your tech wastes time hunting for the wrench.

Simplify when volume is low. If you get under 30 conversions a month, have one main service line, or run a modest budget in one metro, keep it tight. One Search campaign with a few focused ad groups is often enough. That helps Smart Bidding learn faster, and it keeps reporting clear.

Segment when the business case is real. Split campaigns only if you would change budget, target CPA, ad copy, landing page, or schedule. Good reasons include emergency versus planned work, residential versus commercial, or premium services versus lower-ticket jobs.

For example, a plumber can keep drain cleaning and leak repair together early on. Once water heater installs start bringing higher-value leads, that service may deserve its own campaign. A law firm should often split personal injury from family law because the economics are totally different. Meanwhile, a B2B service provider may split by offer, such as managed IT versus cybersecurity assessments, when sales cycles and close rates differ.

More campaigns don’t create control. Better signals do.

Common mistakes still burn budget in 2026. Splitting match types into separate campaigns, cloning the same keywords across campaigns, breaking out every suburb, and treating every form fill as equal all create noise. So does over-segmentation before the account has enough data. As Elshorafa’s 2026 framework for service businesses notes, service accounts usually perform better when bottom-funnel intent gets most of the budget.

Automation now rewards clean signals, not busy accounts

A professional marketer relaxes at a modern desk, adjusting smart bidding settings for target CPA on the Google Ads interface on a laptop, with graphs displaying optimized bids and conversions, coffee nearby, in a naturally lit office.

In 2026, Google is pushing more AI-led Search features, including AI Max in more accounts. That means broader query matching, search themes, dynamic ad assembly, and less manual control. So the structure question has changed. You’re no longer organizing for neatness. You’re organizing for data quality.

For new campaigns, Maximize Conversions often works best until you have enough real leads. After roughly 20 to 30 solid conversions in 30 days, Target CPA can make sense. Still, low-volume niches may do better with Manual CPC for a while, especially for terms like emergency roofer, divorce lawyer, or commercial HVAC maintenance.

Automation doesn’t remove the need for search term management. It makes it more important. Review search terms often, then block junk fast. Home service accounts usually need negatives like jobs, salary, free, diy, parts, or training. Med spas may need negatives for school, certification, or wholesale. B2B services often need to exclude template, definition, or software if they sell done-for-you services.

First-party conversion data now has a much bigger impact on structure decisions. If Google optimizes to any lead, it will happily find more weak leads. Feed back booked calls, qualified forms, consultations that showed up, and closed revenue when possible. HVAC installers should value install calls above tune-ups. Law firms should separate signed cases from raw inquiries. B2B teams should import CRM stages, not just demo requests. A clean GA4 conversion tracking for lead gen sites setup helps keep those signals trustworthy.

If you also run broader campaign types, keep Search focused on bottom-funnel demand and manage expansion separately. This Performance Max campaign setup for service leads is a useful companion when Search and PMax both support lead generation.

The best structure in 2026 isn’t the most detailed account. It’s the one that helps Google find qualified leads without guessing. Start small, split only where the business model changes, and protect your budget with strong negatives and better conversion data. If lead quality feels shaky, fix the structure before you raise spend.

Negative Keywords Template for Home Service Google Ads in 2026

If your ads keep showing for “jobs,” “DIY,” or “supplies,” you’re buying curiosity instead of leads. A solid negative keywords template fixes that fast. In 2026, Google Ads matches searches more loosely, so home service campaigns need tighter filters to protect budget and improve call quality.

For plumbers, HVAC companies, roofers, electricians, cleaners, and pest control brands, the goal isn’t more clicks. It’s more local jobs. The template below gives you a clean starting point, plus category-specific ideas you can copy today.

Why negative keywords matter more in 2026

Clean professional marketing visual of a PPC dashboard showing negative keywords list blocking irrelevant home services searches like plumbing and HVAC, with red-highlighted wasted terms in search query reports using a blue-white-gray palette.

Google Ads can match you to a wider range of searches than many owners expect. That helps discovery, but it also opens the door to junk traffic. A plumber can pay for clicks from “plumbing school,” “pipe supply,” or “DIY sink repair” unless those terms are blocked.

Every bad click steals budget from high-intent searches like “emergency plumber near me.” As a result, lead quality often improves before click-through rate does. You may get fewer clicks, yet more calls worth answering.

If your account structure also needs work, this Google Ads setup checklist for leads helps tighten the basics. For a broader 2026 view, these Google Ads tips for home service businesses point to the same lesson: block poor-fit traffic early.

Bad searches don’t just waste spend, they teach the campaign to chase the wrong demand.

Build your core negative keywords template around search intent

Professional visualization of a search intent funnel for Google Ads, with broad irrelevant queries like 'jobs free' crossed out by negatives, narrowing to local service calls, home repair background, blue-white-gray tones, PPC dashboard elements, landscape editorial style.

Start with intent buckets. That’s easier than guessing random words one by one. Most home service accounts need the same core filters.

Use this starter table as your account-wide base list:

Intent bucketCopyable negativesWhy it helps
Jobs and trainingjobs, hiring, career, salary, apprenticeship, schoolBlocks job seekers
DIY and researchdiy, how to, tutorial, youtube, manual, pdfFilters non-buyers
Cheap/freefree, cheap, coupon, discountCuts low-value intent
Products and partsparts, supplies, tools, kit, wholesaleStops product shoppers
Mismatch termscommercial, residential, apartment, rvUse only if you don’t serve them
Out-of-areacity names, ZIPs, counties you don’t serveKeeps local intent tight

For multi-word blockers, phrase match usually gives better control. Keep exact match for one-off terms you know are bad. If you want more examples, this 2026 negative keyword guide is useful, and this complete 2026 negative keyword list can help expand your base list.

Copyable negative keyword ideas by home service category

Marketing visual showing home service categories like HVAC unit, plumbing pipe, roofing ladder, electrician tools arranged on a workbench, subtle overlay of negative keyword blocks like free cheap diy, blue white gray tones, professional digital ad style, landscape, sharp clean lines, no text, no people.

One template won’t cover every trade. Still, most wasted clicks fall into patterns. Use the ideas below as campaign-level add-ons.

CategoryAdd these negativesSearch intent blocked
HVACwindow unit, portable, manual, freon price, classretail, DIY, training
Plumbingsnake tool, pipe fittings, supply store, plumbing schooltools, parts, jobs
Roofingshingles for sale, metal sheets, roofing nails, diy roofmaterials, DIY
Electricalwire spool, outlet cover, electrician salary, code booksupplies, research, jobs
Cleaninghousekeeper jobs, mop, vacuum parts, free checklisthiring, products, info
Pest controlbug identifier, insect photo, spray bottle, home remedyresearch, retail, DIY
Landscapingmower parts, seed mix, landscaping jobs, design softwareproducts, jobs, research

Then add service mismatches. If you don’t do commercial work, block commercial. If you only handle repair, block installation. If you don’t offer 24-hour help, block emergency. Local intent matters just as much, so exclude towns outside your service area.

To match ad targeting with organic demand, a local SEO keyword research template can help map services to the places you actually want calls from.

How to add and organize the template in Google Ads

Step-by-step Google Ads interface screenshot for adding negative keywords, with shared library panel open showing home service list, clean modern blue-white-gray UI, screen at angle.

The best setup has two layers: an account-wide shared list, and trade-specific negatives at campaign level. That keeps core junk traffic out while leaving room for service nuance.

A simple workflow works well:

  1. Build one shared list for jobs, DIY, free, products, and out-of-area terms.
  2. Add campaign lists for each trade, such as HVAC, plumbing, or roofing.
  3. Check the search terms report every week, then add new blockers fast.
  4. Review matched cities and neighborhoods after major budget changes.

For example, a plumbing account might keep one shared list for jobs and DIY, then a campaign list blocking water heater parts, pipe sizes, and supply brands. Keep the list practical. Don’t block “near me.” Don’t block “emergency” unless you truly don’t offer it.

Your ads also need local trust after the click. A strong Google Business Profile optimization guide can support better lead flow in the same service areas.

Measure lead quality and keep the list fresh

Analytics chart displaying before-and-after ad performance improvements from negative keywords, featuring a drop in wasted spend and rise in lead quality for home services on a clean PPC metrics dashboard.

Lower cost per click sounds nice, but it isn’t the whole story. Watch what happens to call quality, form quality, and booked-job rate after you apply the template.

MetricWhat to look for
Search termsFewer DIY, jobs, and retail queries
Lead qualityMore calls with real service need
Cost per leadStable or lower after cleanup
Booked jobsHigher close rate from paid traffic
Geo fitMore leads from target towns

Set a recurring reminder, because search behavior shifts with season, weather, and promo periods. If the account still pulls weak traffic, your negatives may be too shallow, or your keywords may be too broad.

A good negative keywords template acts like a gatekeeper. It doesn’t create demand, but it keeps bad traffic from crowding out people ready to hire. Clean up the junk, protect local intent, and the right leads get more room to find you.

Performance Max for Service Leads: Campaign Setup Guide for 2026

A performance max service leads campaign can feel like handing the wheel to automation and hoping it takes the right road. Sometimes it does. Sometimes it drives straight into junk calls, weak forms, and wasted spend.

The fix is better setup, not blind trust. In 2026, Google Ads gives you more control than the early PMax years, including data exclusions, stronger negatives, placement visibility, and cleaner testing. If you feed the system strong signals, it can find real prospects across Search, Maps, YouTube, Display, Gmail, and Discover.

This guide walks through the setup that matters most for service businesses, especially if calls, quote requests, and booked jobs are your real goal.

Prepare Your Account Before Launch

A professional marketer at a modern desk with dual monitors showing Google Ads Performance Max campaign setup screen, soft lighting, keyboard and notebook nearby.

Start with structure. Don’t put plumbing, HVAC, roofing, and electrical into one campaign unless the leads have the same value and geography. PMax learns from patterns, so mixed services often muddy the signal.

Before you build anything, lock in three basics:

  1. Clear conversion goals, calls, forms, and booked jobs.
  2. Clean landing pages, one main service intent per page.
  3. Real budget logic, enough spend to generate learning data.

Google’s own lead generation guidance for Performance Max lines up with this approach. Also, if your team needs broader support, working with performance marketing experts can help tighten tracking before launch.

Build High-Quality Asset Groups

Close-up of a laptop screen displaying neatly arranged creative assets for Google Ads, including headlines, images of service professionals like a plumber at work, logos, and video thumbnails, in a modern workspace with bright natural light.

Treat asset groups like tightly themed ad sets. One asset group per service category usually works better than one giant catch-all. For example, “emergency plumber” and “drain cleaning” may sound close, but buyers often act differently.

Use real photos, short videos, and headlines that match the landing page promise. Custom creative matters more for service lead gen because trust drives the click. In 2026, short video assets still help PMax open more inventory, and custom videos often outperform auto-generated ones.

Keep the message simple: problem, proof, action. A broader PMax campaign handbook is useful, but the main rule is this, make each asset group easy for Google to understand.

Set Targeting and Audience Signals

Digital marketer in cozy home office reviewing audience signals and targeting options in Google Ads interface on computer screen, charts showing customer segments for service leads, realistic photo.

Audience signals don’t limit PMax, but they give it a smarter starting point. That matters when you want local service leads, not random clicks from broad traffic.

Upload first-party lists from your CRM, especially past customers, qualified leads, and repeat buyers. Then add custom segments based on high-intent searches, such as “same day AC repair” or “water heater install near me.” Keep the location settings tight around your actual service area.

Use URL controls carefully. For service campaigns, it’s safer to start narrow and test expansion later. Google’s 2026 experiment tools make that easier, so you can compare controlled traffic versus wider URL expansion without guessing.

Boost Lead Quality with 2026 Controls

Screenshot-like view of Google Ads settings panel on a tablet held in hands in a conference room, highlighting data exclusions, negative keywords, and spam prevention for Performance Max, natural daylight, clean modern style.

This is where most service campaigns win or lose.

In 2026, PMax gives advertisers better ways to filter bad traffic. Use campaign-level negative keywords to block junk intent like “free,” “DIY,” “jobs,” or “training.” Add brand exclusions when branded traffic belongs elsewhere. Review placement reports and cut low-quality app traffic if it sends weak leads.

Data exclusions are the big one. If old customer lists, spam leads, or bad remarketing pools keep getting pulled in, exclude them. You can also trim device or demographic segments that never become real jobs.

If Google learns from bad leads, it gets better at finding more bad leads.

For a useful outside view, see these Performance Max best practices in 2026. The theme is consistent, better controls lead to better lead quality.

Track Calls, Forms, and Offline Conversions

A marketer in a professional office sets up conversion tracking in Google Ads for calls, forms, and offline imports, surrounded by icons of phone calls, web forms, and CRM uploads on a central computer screen under soft lighting.

Don’t let PMax optimize to every hand-raise equally. A junk form and a booked job are not the same thing.

Set up call tracking through Google call assets or your call platform, then count only meaningful calls as primary conversions. For forms, filter spam before those leads train the campaign. If you use lead form assets, test them against landing pages instead of assuming they’re better.

This quick setup rule keeps the signal clean:

Conversion typeCount as primary when
Phone callIt lasts long enough to show real intent
Web formIt passes spam checks and required fields
Booked appointmentIt reaches a qualified CRM stage
Closed job or saleIt has real revenue value attached

Most importantly, import offline conversions from your CRM. When Google sees which leads turn into jobs, bidding gets much sharper.

Avoid These Common Setup Pitfalls

Visual metaphor of a splitting path with warning signs around Google Ads mistakes like spam leads and poor tracking, service van heading correctly in sunny suburban street, vibrant illustrative style.

A bad PMax launch usually comes from a few repeat mistakes.

Too many goals: If calls, chats, page views, and form opens all count, the campaign chases noise.
Loose geography: Service ads outside your real coverage area waste budget fast.
Weak landing pages: Slow pages and vague offers hurt both lead rate and lead quality.
No feedback loop: Without offline import, Google can’t tell a booked service from a dead lead.

Also, don’t judge performance too early. Give the campaign enough time to learn, but don’t ignore obvious spam. If you’re splitting budgets across platforms, this Google Ads vs Bing Ads comparison can help frame channel decisions.

A strong setup makes automation useful. A sloppy one makes it expensive.

When lead quality is the goal, build PMax like a filter, not a funnel with holes in it. Keep the campaign focused, feed it real outcomes, and block bad signals early. That’s how service businesses turn automation into booked jobs, not just busy dashboards.

Looker Studio Reporting Dashboard Template for Lead Gen Campaigns (2026)

If your lead gen reporting feels like cooking the same meal every day, you’re not alone. Most marketing teams still stitch together google ads, Meta, LinkedIn, GA4, and CRM numbers by hand, then argue about what’s “real.”

A reusable looker studio dashboard template fixes that, because it turns manual reporting into automated reporting. You’ll spend less time exporting CSVs and more time spotting where CPL is rising, which forms are converting, and whether those “leads” ever become MQLs and SQLs.

This guide walks through a practical 2026 template layout, with exact charts, fields, and build steps you can copy.

Why a Looker Studio dashboard template saves time (and reduces reporting fights)

Image prompt suggestion: A marketer reviewing a clean marketing dashboard on a laptop in a bright office, no readable text.

Professional marketer sitting relaxed at a modern desk with natural office window light, reviewing vibrant marketing dashboard on laptop displaying charts for lead metrics like total leads, CPL, and sources.

A Looker Studio dashboard template helps because it forces consistent definitions. “Leads” means one thing, not five. It also standardizes filters (date, channel, campaign, geo), so every stakeholder sees the same slice.

In 2026, the best setups blend paid media, google analytics 4 on-site conversions, and CRM stages. You can keep it light inside Looker Studio, a powerful data visualization tool, at first, then move to a warehouse later if you need more control. If you want inspiration for structure and layout, skim these Looker Studio dashboard examples or check out free Looker Studio templates to save even more time, and note how they separate exec KPIs from drill-down pages.

Gotcha: templates don’t fix messy tracking. If your form event fires twice, your pretty dashboard will double-count, too.

Key marketing metrics to track in your lead gen dashboard (the ones teams actually use)

Image prompt suggestion: A desk scene with a laptop showing KPI tiles for leads, CPL, MQL, SQL, plus trend lines, no readable text.

Close-up laptop screen in a bright workspace showing Looker Studio dashboard with KPI scorecards for total leads, cost per lead, conversion rate, MQLs, SQLs, bar chart for lead sources, and line chart trends; coffee mug and notebook nearby.

Start with metrics that lead to decisions. Keep vanity numbers (like impressions) available, but not center stage.

Use this as your “north star” set for tracking campaign performance:

KPIWhere it comes fromRecommended calculation
LeadsGA4 event or Ads platform lead objectiveCount of generate_lead or form_submit
CPLAds platformsSpend / Leads
Conversion rate (click to lead)Ads + GA4Leads / Clicks
MQL rateCRMMQLs / Leads
SQL rateCRMSQLs / MQLs
Cost per SQLAds + CRMSpend / SQLs

Build steps (field picks):

  • Use GA4 for on-site conversions (form submits, demo requests, click-to-call).
  • Use google ads, meta ads, linkedin ads connectors for spend, clicks, impressions.
  • Use CRM data (HubSpot, Salesforce, or a clean export in Sheets/bigquery) for lifecycle stages.

To avoid chaos, name metrics the same across charts (for example, “Leads (GA4)” vs “Leads (CRM)”) and show both when they differ.

Build the overview page step-by-step (one page your execs will open)

Image prompt suggestion: A laptop showing an overview dashboard with KPI tiles and a weekly trend chart, no readable text.

Laptop on a modern desk displaying Looker Studio overview page with large KPI tiles for leads and revenue, trend line chart for weekly performance, and top campaigns table in a relaxed office setting with plants and warm daylight lighting.

Think of the overview page, your marketing dashboard, like a car dashboard. It shouldn’t explain everything; it should show what needs attention.

Build steps (recommended components):

  1. Add a Date range control (default: last 28 days) and a Data control if you manage multiple accounts.
  2. Add 5 to 7 Scorecards: Spend (for budget tracking), Leads, CPL, MQLs, SQLs, Cost per SQL, and (if available) Pipeline value.
  3. Add a Time series chart: dimension = Date, metrics = Spend and Leads (dual-axis).
  4. Add a Table called “Top campaigns”: dimension = Campaign, metrics = Spend, Leads, CPL, MQLs, SQLs. Sort by SQLs (desc) for actionable insights.
  5. Add drill-down on the campaign table: Campaign -> Ad group -> Keyword (Google Ads) or Campaign -> Ad set -> Ad (Meta).

If your conversion setup is still evolving, use this internal guide to stabilize it: track website conversions in Google Analytics. For extra layout ideas, this collection of report templates is useful for page structure.

Lead sources and ad platform breakdown (where CPL rises first)

Image prompt suggestion: A marketer holding a tablet showing stacked bars for leads by channel and a CPL table, no readable text.

A single marketer in business casual holds a tablet displaying Looker Studio charts: a stacked bar graph for leads from Google Ads, Meta, and LinkedIn, plus a performance table with CPL by platform, set against a blurred office background with natural light.

This page analyzes cross-channel performance to answer a simple question: which channel is producing real leads at a sane cost?

Build steps (charts that work well):

  • Stacked bar chart: dimension = Week (or Date), breakdown dimension = Platform (Google Ads, Facebook Ads, Meta Ads, TikTok Ads, LinkedIn Ads), metric = Leads.
  • Bar chart: dimension = Campaign, metric = CPL (use a filter for min spend to avoid tiny-sample noise).
  • Scatter chart: X = CPL, Y = Leads, bubble size = Spend, dimension = Campaign (great for spotting waste).
  • Detail table: dimensions = Platform, Campaign, Landing page (if available), Instagram Insights; metrics = Spend, Clicks, Leads, CPL, GA4 CVR.

Add cross-filtering so clicking “Meta Ads” updates the whole page. Also include a landing page filter when you can, because one weak form page can make a good campaign look bad.

Blend CRM data for full-funnel tracking (MQL and SQL, not just form fills)

Image prompt suggestion: A desktop screen showing a funnel from clicks to form submits to MQL and SQL, no readable text.

Desktop screen displaying Looker Studio funnel visualization with horizontal bars tracking ad clicks to form submits (GA4), MQLs, and SQLs (CRM), alongside blended data charts. Modern desk setup includes keyboard, mouse, and one person's relaxed hands under soft lighting.

Ad platforms optimize to what you feed them. If you only report form fills, you’ll often buy more low-quality leads. This full-funnel approach is essential for both lead gen and ecommerce analytics.

Build steps (a clean join plan using data source connectors):

  1. In your CRM export, include: Lead ID, Created date, Stage (Lead, MQL, SQL), Source, Campaign, UTM fields, and click IDs (gclid, fbclid) when possible.
  2. In Google Analytics 4, capture a lead_id on submit (or a stable dedupe key like email hash), plus UTMs.
  3. In Looker Studio, blend data on Lead ID (best), or on Email (risky), or on Date + Campaign (least accurate).
  4. Build a funnel chart: metrics = Clicks (Ads), Leads (GA4), MQLs (CRM), SQLs (CRM).

For tracking hygiene that holds up over time, keep this bookmarked: GA4 lead tracking checklist for B2B.

Attribution caveat: CRM stages often happen days later. Use both “lead created date” and “stage change date,” then report with clear labels.

Quick implementation checklist (copy this and ship the template)

Image prompt suggestion: Simple icons showing connectors, charts, blends, and filters as a visual checklist, no readable text.

Abstract icons on a screen illustrating dashboard building steps including data connectors, chart additions, blend joins, and filter setups in a vibrant infographic style with blurred desk background.

This checklist helps data analysts create white-label report templates for clients.

Copy this checklist:

  • Define lead events in Google Analytics 4 (form_submit, demo_request, click_to_call) and test in DebugView.
  • Connect sources using data source connectors: Google Analytics 4, Google Ads, Google Search Console, Meta, Amazon Ads, LinkedIn, Shopify, and CRM (native connector or a clean Sheets export).
  • Build 3 pages: Overview, Source and Platform, CRM Funnel.
  • Add global controls: Date range, Platform, Campaign, Geo, Device.
  • Add drill-downs: Campaign -> Ad group -> Keyword (or Ad set -> Ad).
  • Data analysts should verify dedupe rules in CRM exports (one row per Lead ID, latest stage).
  • Label metrics clearly (Leads GA4 vs Leads CRM) and document definitions in a small text box.
  • Set refresh expectations (15 minutes to daily) based on data source speed.

If you prefer starting from an established layout, this campaign dashboard report template can help you compare page structure before you finalize yours.

Conclusion

A dependable looker studio dashboard template should do one job well: connect spend to pipeline for digital marketing performance. When you standardize KPIs, build a tight overview page, and blend CRM stages, reporting stops being a weekly debate and provides real-time insights for the team.

Set it up once, then improve it monthly. If you want help building a version that matches your exact ad mix and CRM workflow, skip generic free looker studio templates; start with ClickyOwl’s performance marketing agency team and make the dashboard part of the campaign process, not an afterthought.

Consent Mode v2 GA4 Setup Guide for 2026 (GTM, gtag, CMP, Testing)

Cookie consent for website visitors in 2026 feels like traffic lights at a busy junction. If the signals are wrong, everything still moves, but you can’t trust the counts.

Consent Mode v2 GA4 is the practical way to keep measurement useful while respecting user choice and ensuring GDPR compliance. It doesn’t replace your cookie banner, it connects it to Google tags so GA4 and Google Ads behave correctly.

This guide is a step-by-step, checklist-first setup for Google Tag Manager and gtag.js you can hand to a marketer, analyst, or developer, then QA with confidence.

What Consent Mode v2 GA4 is, and why it matters in 2026

Clean, modern landscape hero illustration for a 2026 technical guide, featuring a central shield with cookie icon, consent signals (analytics_storage, ad_storage, ad_user_data, ad_personalization) flowing via arrows to GA4 chart and Ads server icons, with a bottom consent banner in flat-isometric hybrid style.
An overview of how consent signals flow from a banner to GA4 and ad measurement, created with AI.

Consent Mode v2 is an API that tells Google tags what they’re allowed to do, based on the visitor’s consent choice. In practice, it controls whether GA4 and ads storage can write cookies, and whether ad data can be used for personalization.

In v2, you manage four consent signals:

  • analytics_storage (GA4 measurement cookies)
  • ad_storage (ad cookies)
  • ad_user_data (sending user data to Google for ads)
  • ad_personalization (remarketing and ad personalization)

Why it matters in 2026: for EU, European Economic Area (EEA), and UK traffic, Google has required advertisers to pass these consent signals to keep key ads features like Personalized advertising and Remarketing working since the March 2024 deadline, and that expectation continues. If you don’t implement it, you may lose parts of remarketing, conversion measurement, or personalization workflows. For a policy-level summary and what teams typically lose when consent signals are missing, see this Consent Mode v2 implementation guide on the EU user consent policy. This approach is essential for a Privacy-centric strategy.

Consent Mode has two behaviors you’ll hear a lot:

  • Basic Consent Mode: blocks tags until consent. If the user denies, you collect nothing.
  • Advanced Consent Mode: tags load, but behave safely when consent is denied (cookieless pings). Google can model gaps. Advanced Consent Mode enables Behavioral modeling and Conversion modeling to recover data.

The biggest win in 2026 is trend stability. With Advanced Consent Mode, your reporting doesn’t flatline when users say “no”.

Prerequisites checklist (before you touch GTM or code)

Clean, modern landscape hero illustration for the prerequisites section of a Google Consent Mode v2 setup guide for GA4, featuring checklist icons with checkmarks for GA4 property, GTM container, CMP banner, Measurement ID tag, and server, connected by data flow arrows with shield and cookie icons in a flat-isometric hybrid style.
The core items you need ready before implementation, created with AI.

Before setup, lock down the basics. Consent Mode problems often come from timing and duplicates, not the consent banner design.

Prerequisites you should confirm

  • A GA4 property and web data stream: you need the Measurement ID, and a clear plan for which domains you track. Google’s developer docs are a good reference point for the tagging side of GA4: Google Analytics for developers.
  • One tagging approach per site area: pick Google Tag Manager or hardcoded gtag.js for the main site experience. Avoid double installs (CMS plugin plus GTM).
  • A Consent Management Platform that can update Consent Mode v2: ideally a Google-certified CMP if you run Google Ads in regulated regions. This short overview helps explain why CMP choice matters: Certified CMP and reporting accuracy.
  • A consent decision model: decide what “Accept all”, “Reject all”, and “Save preferences” mean in your banner.
  • A rollback plan: publish changes in a versioned way (GTM workspace or release branch).

If your GA4 foundation is shaky, fix that first. This internal guide pairs well with consent work because it focuses on stable conversions and clean tags: GA4 lead tracking checklist.

Consent mapping you’ll implement

Set expectations with stakeholders using a simple mapping like this:

Banner choiceanalytics_storagead_storagead_user_dataad_personalization
Reject alldenieddenieddenieddenied
Accept allgrantedgrantedgrantedgranted
Analytics onlygranteddenieddenieddenied
Ads only (rare)deniedgrantedgrantedgranted

The takeaway: if your CMP offers category toggles, you must map them cleanly to the four core Consent signals.

Google Tag Manager implementation checklist (recommended for most teams)

Clean, modern hero illustration of GTM panel with consent configuration template, default denied settings, triggers to GA4 tag and CMP event, featuring cookie shield, checkmarks, and data flow icons in flat-isometric style.
Google Tag Manager handling default consent and tag firing rules, created with AI.

Google Tag Manager is usually the easiest way to control timing, because you can centralize consent defaults, tag sequencing, and debugging.

Step-by-step GTM setup

  1. Turn on GTM Consent Overview (Admin). This lets you see and manage consent requirements per tag.
  2. Set the Default consent state early using the Consent Initialization trigger. Your goal is “default denied before any Google tag runs.”
    • Default: analytics_storage=denied, ad_storage=denied, ad_user_data=denied, ad_personalization=denied.
  3. Configure your GA4 tags to respect consent.
    • GA4 Configuration and GA4 Event tags should require analytics_storage.
    • Google Ads tags should require ad_storage, plus the v2 signals as applicable.
  4. Listen for CMP events and update consent.
    • Most CMPs push an event or dataLayer state (for example, cmp_consent_update).
    • When the user accepts, use the “Update consent state” action to set to granted for the mapped signals.
  5. Choose Basic Consent Mode vs Advanced Consent Mode behavior intentionally.
    • If you use Advanced Consent Mode, you still set defaults to denied, but allow Google tags to load and send cookieless signals.
    • If you use Basic Consent Mode, block the tags entirely until consent.

Default denied vs granted (what “good” looks like)

  • Before choice: GA4 may send cookieless pings (Advanced Consent Mode), but it should not set analytics cookies when consent is denied.
  • After Accept all: GA4 can set cookies, enable full data collection, and measure normally, and ads signals can support remarketing and conversion measurement.

A common gotcha: teams set defaults inside a tag that fires after the GA4 config tag. That’s too late.

Treat consent defaults like a seatbelt. Put it on before you start the engine, not at the first turn.

gtag.js implementation checklist (when you can’t use GTM)

Clean, modern landscape hero illustration for gtag implementation in Google Consent Mode v2 setup for GA4, showing code snippets for consent default and update, GA4 config tag, arrows to browser and server, shield-protected cookie, checkmark, in flat isometric hybrid style with subtle gradients and Google-like accents.
A code-first setup where default consent and updates wrap GA4 tagging, created with AI.

If your site hardcodes tags, you can still implement Consent Mode v2 reliably with gtag.js. The key is placement and timing.

Step-by-step gtag setup (minimal, correct order)

  1. Load gtag.js as you normally do.
  2. Set the Default consent state immediately after the gtag init, before config calls. Use a single default call that sets all four signals to denied.
    • Example shape (keep yours exact): gtag('consent','default', {analytics_storage:'denied', ad_storage:'denied', ad_user_data:'denied', ad_personalization:'denied'});
  3. Fire GA4 config after defaults.
  4. On CMP choice, call consent update to provide the Update consent state using your mapping. Optionally add the wait_for_update parameter (like 'wait_for_update': 500) to improve data accuracy by delaying tags until consent processes.
    • Example shape: gtag('consent','update', {analytics_storage:'granted', ad_storage:'granted', ad_user_data:'granted', ad_personalization:'granted'});
  5. Avoid manual “resend hits” hacks. In Advanced mode, Google can reprocess hits on the same page after consent is granted. Simo Ahava explains this behavior clearly: Consent Mode v2 for Google tags.

Validation checklist (GTM or gtag)

Use two quick layers of checks, then one deeper check. Proper implementation prevents measurement loss in GA4.

  • Tag Assistant / GTM Preview: confirm consent state shows denied on first load, then flips after interaction.
  • GA4 DebugView: confirm events appear when expected, and don’t double-fire.
  • Network checks (browser dev tools): open requests to Google endpoints and verify consent parameters change after choice (look for the gcd parameter attached to requests).

Common errors and fixes (fast triage)

  • Default consent fires late: move the default call earlier, or fix GTM firing order.
  • Only two signals mapped: update your CMP mapping to include ad_user_data and ad_personalization.
  • Duplicate GA4 installs: remove the extra plugin or tag. Then re-test DebugView.
  • Consent never updates: your CMP event name or dataLayer keys don’t match. Confirm the exact event in the console.
  • Regions mis-handled: apply stricter defaults for EU/EEA/UK traffic if needed, but keep logic simple so you can test it.

What to expect in GA4 reporting, and how to monitor

After rollout, don’t panic when numbers shift. With more users declining cookies, observed sessions and conversions can drop. At the same time, trends often become smoother with modeling (more so in ads platforms).

Monitor like this:

  • Add an annotation date for the rollout.
  • Compare key events week over week, not day over day.
  • Watch audience sizes and conversion counts in both GA4 and Google Ads, and check for consent mode reporting gaps that may hide real performance.
  • Keep a single source of truth for conversions. This internal guide helps align GA4 events with business outcomes: track conversions in Google Analytics.

Conclusion

Consent Mode v2 GA4 is less about banners and more about signal quality. Set defaults to denied, map all four signals, and make updates fire instantly on choice. Then validate with Preview, DebugView, and a quick network check.

Once it’s stable, you can finally trust your GA4 trends again, even when consent rates swing. This setup ensures responsible data collection and helps businesses navigate the evolving privacy landscape.

Local Services Ads Setup Guide for Home Service Leads in 2026

When a homeowner searches “plumber near me” on the search results page (even via voice search) with water on the floor, Local Services Ads are what they see first. They’re not browsing. They’re hiring. Local services ads setup is still one of the fastest ways to get those high-intent phone calls in 2026, but it only works when your account is tight, verified, and responsive.

This guide is written for busy home services owners and managers. It covers what changed in 2026, the clean setup steps, and a simple playbook to improve lead quality (not just lead volume).

What changed with Local Services Ads in 2026 (and why it affects setup)

A confident plumber technician in realistic uniform stands next to a verification shield icon and business documents on a modern desk, with a branded service van visible through the window in a clean editorial style.
Verification and trust signals are central to LSA performance in 2026, created with AI.

In March 2026, the biggest shift is that Google is treating LSAs more like a trust and service experience than a simple ad unit. Verification is still required, and a background check along with screening and verification are being enforced more strictly. Small mismatches (business name, address format, owner details) can slow approvals or trigger re-checks.

A second change matters for new businesses: Google has removed the “customer reviews requirement” from the verification flow, so you can get verified and earn the Google Verified badge without hitting a minimum review count first. Reviews still matter for rank, but they’re no longer a setup gate.

Finally, responsiveness has become a ranking signal you can feel. If you miss calls, reply late to messages, or let leads age out, responsiveness affects your ad rank and visibility tends to slide.

Fast response isn’t just “good customer service” in 2026. It’s part of how you earn placement.

For Google’s official overview of how LSAs connect you with customers, keep Local Services Ads help documentation bookmarked.

Pre-setup checklist: eligibility, proof, and profile basics

A roofer technician optimizes their online profile on a propped phone screen featuring blurred generic interface with star ratings icons and photo uploads. Isometric elements like stars and frames, tools in the background, bright natural lighting, neutral background with green blue accents, clean modern style.
Profile completeness and real reviews support better lead quality, created with AI.

Before you touch bidding or budgets, start with an eligibility check and get your “proof stack” ready to create a strong business profile. Think of it like showing up to a jobsite with the right tools, you’ll finish faster and avoid rework.

Here’s the short checklist most home service businesses need:

  • Business identity consistency: Same legal name, DBA (if used), address, and phone everywhere (website, invoices, directory listings).
  • Licenses and insurance: Have current license and insurance documents ready to upload if your category requires professional licenses.
  • Ownership and staffing details: Use accurate owner/officer info, because background checks can validate it.
  • Hours and service types: Don’t claim 24/7 unless someone truly answers 24/7.
  • Photos that prove you’re real: Team shots, trucks, uniformed techs, before/after work (no stock photo vibes). These visuals serve as a trust badge for customers.

Also, don’t run LSAs in a vacuum. Pairing LSAs with Google Ads and strong local organic visibility makes your brand look “everywhere” in the same zip codes. If you want a real example of local visibility compounding results, see this boosted local rankings example.

For a broader third-party view of LSA requirements and how the channel has evolved, this LSA guide for 2026 is a solid reference.

Local Services Ads setup in 2026: the clean step-by-step flow

Subtle isometric view of a generic ad dashboard on a laptop screen at an angle with blurred details, HVAC technician's hand resting on desk nearby, coffee mug and notebook, clean modern editorial style with bright lighting.
LSA setup should be treated like a system build, not a quick toggle, created with AI.

Use this order so you don’t paint yourself into a corner later. The goal is simple: get verified, define what you want, then control lead quality.

  1. Choose the right business and category Pick the primary service category that matches your best jobs. Add secondary services later, after you’ve proven lead quality.
  2. Complete your profile like a “sales page” Use plain language. Describe what you do, where you do it, and what you won’t do. Add photos and confirm hours.
  3. Finish verification and background checks Expect stricter validation in 2026, including Google Guarantee checks. Keep documents handy, and don’t rush entries that must match legal records.
  4. Set lead types and contact routing Decide whether you want phone calls only, direct message, or both. Then route leads to a dispatcher, office line, or dedicated phone.
  5. Turn on lead tracking habits on day one Mark booked, completed, and unqualified leads consistently to manage leads. That data helps you spot patterns fast.
An isometric illustration of a plumber on a phone call receiving a lead dispatch from a happy diverse homeowner, with floating phone and notification icons, service van parked nearby, in a clean modern editorial style with bright lighting and yellow-green accents on white background.
Lead handling speed and routing affect outcomes as much as ad settings, created with AI.

One more 2026 note: if you still rely on call-only search ads outside LSAs, plan your shift. Google is sunsetting call-only ads by February 2027, so move to Responsive Search Ads with call assets for that part of your mix.

If you’re also running traditional PPC, a quick refresher on channel fit can help align spend. This comparison of Google Ads vs Bing Ads is useful when you’re deciding where LSAs sit in your lead stack.

Service areas and job types: the fastest way to improve lead quality

One electrician in realistic uniform adjusts the service area radius on a subtle isometric city map with pins and circle tool, tools and phone on wooden desk, clean modern editorial style with bright natural lighting.
Service area tightening reduces junk leads and improves close rates, created with AI.

A wide service area feels like more opportunity, but it often acts like a leak in your bucket. You get more calls, yet fewer good ones, because response time and travel time get ugly.

Start tighter than you think you should. Then expand only after you hit your answer-rate and booking targets.

Use “screenshots-style” thinking when you set this up: imagine a map view with a clear radius circle or zip code settings for your service area. Ask, “Can I get a tech to any point inside this circle fast, most days?” If not, shrink it.

Job type control matters just as much. Exclude work you don’t want (or can’t schedule quickly). The goal isn’t to be everything to everyone. It’s to be the obvious choice for the jobs you actually want. This targeting drives effective lead generation with better close rates.

For another modern walkthrough on Local Services Ads targeting and setup steps, this step-by-step LSA guide lays out additional examples.

Budget, bidding, and lead disputes in 2026 (simple rules that hold up)

A relaxed HVAC technician views subtle isometric bidding charts and budget graphs on a blurred laptop screen prop, with a mug and calculator on the desk, in a clean modern editorial style with bright natural lighting.
Budget control and consistent bidding habits keep LSAs stable week to week, created with AI.

Local Services Ads can feel “set and forget,” until spend jumps or lead quality dips. Operating on a pay per lead model, they result in a specific cost per lead that demands careful financial management. In 2026, treat budgeting like a thermostat. Make small changes, then wait long enough to see the effect.

A practical approach:

  • Set a weekly budget you can support for at least 2 to 3 weeks, while monitoring your monthly budget for overall accountability.
  • If you need more volume, expand hours first (if you can answer), then expand service area, then raise budget.
  • If quality is poor, tighten job types and geography before lowering budget.

Also, protect your ROI with disputes. When a lead is clearly wrong (outside your area, wrong service, spam), dispute charges quickly and keep notes. Several vendors track patterns and qualification workflows well, including this 2026-focused perspective on LSAs and disputes in LeadTruffle’s LSA guide.

Mini playbook: improve LSA lead quality (and ranking) in 30 days

Three diverse home service technicians in uniforms (HVAC in blue, plumber in gray, electrician in yellow) standing together near branded vans, with subtle isometric performance analytics dashboard in foreground, clean modern style.
Lead quality improves when ops, reviews, and targeting work together for Local Services Ads, created with AI.

If Local Services Ads are the faucet, operations are the water pressure. Here’s a simple 30-day rhythm that improves quality without fancy tricks, including steps to manage leads through screening and verification:

  • Service area tightening: Reduce coverage until your average arrival promise is realistic.
  • Job type exclusions: Remove low-margin work that clogs the schedule (and triggers price shoppers).
  • Responsiveness SLA: Aim to answer calls fast and return missed calls quickly. If you can’t, use a backup answering plan.
  • Customer reviews velocity: Ask for customer reviews from your best customers weekly, not in random bursts. Reply to customer reviews in a human tone.
  • Profile freshness: Add new photos monthly, especially real work and team shots.

If you want better leads, first build a system that answers, qualifies, and books fast.

To make this concrete, here are example settings you can start with and adjust after two weeks while tracking booked jobs as a key metric:

TradeService area starting point“Yes” job types (examples)“No” job types (examples)Response SLA targetWeekly budget starting point
HVAC10 to 15-mile radius around dispatchNo-cool, no-heat, maintenance, system replacement estimatesWindow units, handyman work, long-distance service callsAnswer live or call back within 5 minutesSet to what you can sustain for 2 to 3 weeks
Plumbing8 to 12-mile radius, tighter in traffic-heavy metrosLeak repair, water heater, drain clearing, sewer diagnostics“Quote shopping,” out-of-area emergencies, small fixture installs (if low-margin)Answer live or call back within 5 minutesStart stable, then scale after quality holds
Electrician10-mile radius plus specific nearby zip codesPanel upgrades, troubleshooting, EV charger installsLow-cost “swap a bulb” calls, out-of-scope low-voltage jobsAnswer live or call back within 10 minutesHold steady, adjust after 14 days

If you’d rather have a team handle the full paid and organic mix, including Local Services Ads tracking, Google Ads, lead generation, and landing-page support, see ClickyOwl’s PPC management services.

Conclusion

In 2026, local services ads setup is less about pushing buttons and more about proving trust with the Google Verified badge, controlling coverage, and answering fast. Start with clean verification, tighten service areas, exclude the wrong jobs, and commit to a response SLA you can actually hit. Then track lead quality like you track callbacks and warranties. The best LSA accounts don’t chase every lead; they build a system that earns the right ones for effective lead generation in Local Services Ads.

Call Tracking Setup Guide for Lead Gen Websites in 2026

If you spend money to get leads, website call tracking means phone calls no longer have to be a mystery. Yet many teams still see “Calls” as a single bucket, with no source, no quality signal, and no clear owner.

A solid call tracking setup fixes that. You’ll know which Google Ads, marketing campaigns, pages, and keywords drive qualified conversations, not just dials. You’ll also stay on the right side of privacy rules that got stricter again in 2026.

Below is a practitioner-focused setup you can ship, test, and maintain.

The 2026 call tracking architecture (what you’re building)

Flat-isometric view of call tracking architecture: lead-gen website with dynamic number insertion swapping phone numbers, connecting via server to call tracking dashboard, GA4 charts, and CRM icons. Clean modern professional SaaS aesthetic with navy teal violet accents on white background.
An architecture view of how dynamic numbers, Google Analytics, and CRM attribution connect, created with AI.

Think of call tracking like a “return address” on every phone lead. The site shows a number, a visitor calls it, and the system maps that call back to the session that saw the number, delivering visitor-level insights.

At a minimum, your stack needs five parts:

  • Number inventory (local and toll-free numbers), with a plan for static and dynamic use.
  • DNI script (dynamic number insertion) to swap numbers per visitor.
  • Attribution storage to hold UTMs, gclid, landing page, and referrer.
  • Event output into GA4 (and ad platforms), plus offline conversion sync if you can.
  • CRM handoff so sales outcomes feed back into “qualified call” reporting.

In 2026, measurement breaks most often at the seams. For example, your landing page is on one domain, scheduling is on another, and the call happens after a return visit. So the real goal is not “track a call.” It’s stitch identity and intent across the customer journey without collecting risky data to boost marketing ROI.

Gotcha: if you only report “calls,” you’ll optimize for spam and wrong numbers. Track qualified calls as the primary conversion, and raw calls as a diagnostic metric.

DNI vs Static Call Tracking, Plus Pool Sizing Math That Won’t Burn You

Flat-isometric split-view diagram comparing Dynamic Number Insertion (DNI) dynamic numbers with static numbers for call tracking on lead-gen websites, featuring number pool rotation for PPC/organic sources and pool sizing math icons.
DNI versus static number use cases, including number pool sizing concepts, created with AI.

Use static call tracking with static numbers when you don’t need per-visitor attribution. Good examples are Google Business Profile (using Google forwarding numbers or the phone snippet), billboards, or a specific partner page.

Use DNI (dynamic call tracking) when you need source, campaign, keyword, landing page, and returning-visitor mapping with a unique tracking number. That typically means PPC landing pages and high-intent SEO pages.

Pool sizing is where teams stumble. If the pool is too small, two visitors can share one tracking number. Attribution becomes random.

A practical way to size the pool is to plan for concurrency:

Pool size (minimum) ≈ peak concurrent sessions eligible to see DNI × safety factor

“Eligible” means sessions where you display the swapped number (often all sessions on key pages). Use a safety factor of 1.5 to 2.0 until you’ve observed collisions.

Here’s a quick example to calibrate:

Traffic pattern (example)Peak concurrent eligible sessionsSafety factorSuggested pool size
Low-volume local service81.512
Mid-volume PPC burst251.845
High-volume multi-campaign602.0120

Recommended defaults that work for most lead gen sites:

  • DNI cookie duration: 30 days (match your sales cycle if longer).
  • Session hold time for a number: 30 to 60 minutes.
  • Separate pools for brand PPC vs non-brand PPC marketing campaigns, if budget allows.
  • Fallback static number if the script fails or consent blocks DNI.

Common pitfall: using one static number site-wide, then hoping GA4 “source” explains calls. It won’t, because the phone system can’t see the session.

Call tracking setup in GTM and GA4 (including SPAs and cross-domain)

Clean, modern flat-isometric illustration of step-by-step GTM call tracking setup for lead-gen websites, featuring tags, triggers, dataLayer events, and phone icons flowing to GA4 on a tilted GTM interface.
How GTM tags and events flow into GA4 for call tracking, created with AI.

Your call tracking vendor handles DNI, but you still need clean analytics events. The simplest model is: send “call events” to Google Analytics, then send “qualified call” as offline conversions later from the CRM.

Start with a clear event map for conversion tracking:

  • click_to_call (user taps a tel link)
  • call_start (vendor detects an inbound call)
  • call_connected (optional, answered call)
  • call_qualified (conversion action sent later from CRM based on outcome)

Implementation steps (ship in this order):

  1. Define attribution fields you care about: utm_source, utm_campaign, gclid, landing page, referrer, plus a lead_id.
  2. Enable cross-domain in GA4 if any step uses another domain (scheduler, payment, subdomain). For GA4 hygiene, keep a reference like this GA4 lead tracking checklist.
  3. Persist UTMs and gclid in a first-party cookie (or localStorage if allowed). Refresh on each landing.
  4. SPA support: trigger DNI swaps on route changes, not just initial load. In Google Tag Manager, that usually means a History Change trigger plus a DOM-ready guard.
  5. Push events to the dataLayer so Google Tags don’t depend on fragile CSS selectors.

Example dataLayer push patterns for conversion tracking (keep them small and consistent):

  • dataLayer.push({event:'click_to_call', placement:'sticky_header'})
  • dataLayer.push({event:'call_start', call_id:'<vendor_id>', source:'dni'})
  • dataLayer.push({event:'call_qualified', call_id:'<vendor_id>', reason:'sales_accepted'})

Then, in Google Tag Manager:

  • Create a GA4 Event tag for each event name.
  • Use Custom Event triggers that match click_to_call, call_start, and so on.
  • Pass only non-sensitive parameters (never send phone numbers to GA4).

For more conversion wiring patterns, this guide on how to track conversions in Google Analytics is a useful cross-check.

On server-side tagging: if you run a tagging server, forward call events server-to-server (or via Measurement Protocol). That reduces loss from blockers and gives better control over identifiers.

Recording, transcription, AI spam filtering, and lead scoring workflows

Flat-isometric illustration featuring icons for consent banners, first-party cookies, server-side tagging, privacy shields, and spam filter AI, arranged in a table-like grid highlighting compliance pitfalls for lead-gen websites.
Privacy, retention, and quality controls that often surround call tracking, created with AI.

Call recordings boost coaching and dispute handling, but they also raise risk. In 2026, treat them like sensitive data by default.

Practical compliance basics:

  • Disclose recording at call start (and respect two-party consent regions).
  • Set retention to the shortest window that still supports operations (often 30 to 90 days).
  • Avoid collecting PCI or PHI in recordings. If payments happen by phone, use pause or stop recording.
  • Restrict access by role, and log exports.
Transcription helps, but don’t store more than you need. Many teams store:

  • A short summary,
  • Intent category (sales, support, wrong number),
  • Qualification fields (budget, timeline, service fit),
  • A spam flag.

For AI-powered spam filtering and lead scoring, a reliable workflow looks like this:

  1. Run basic filters first (repeat callers, very short duration, known spam patterns).
  2. Transcribe, then classify intent and sentiment.
  3. Assign a lead score based on lead quality and handle call routing in the CRM (sales queue vs nurture).
  4. Mark qualified calls only after a human outcome, not just a model guess, and feed outcomes back through CRM integration to refine the scoring model.

QA test cases and a troubleshooting matrix you can hand to a team

Clean, modern 2026-style flat-isometric illustration of a QA test dashboard for call tracking on lead-gen websites, showing charts for test calls from different sources, attribution models, and conversion windows on a single monitor with white background and navy teal violet accents.
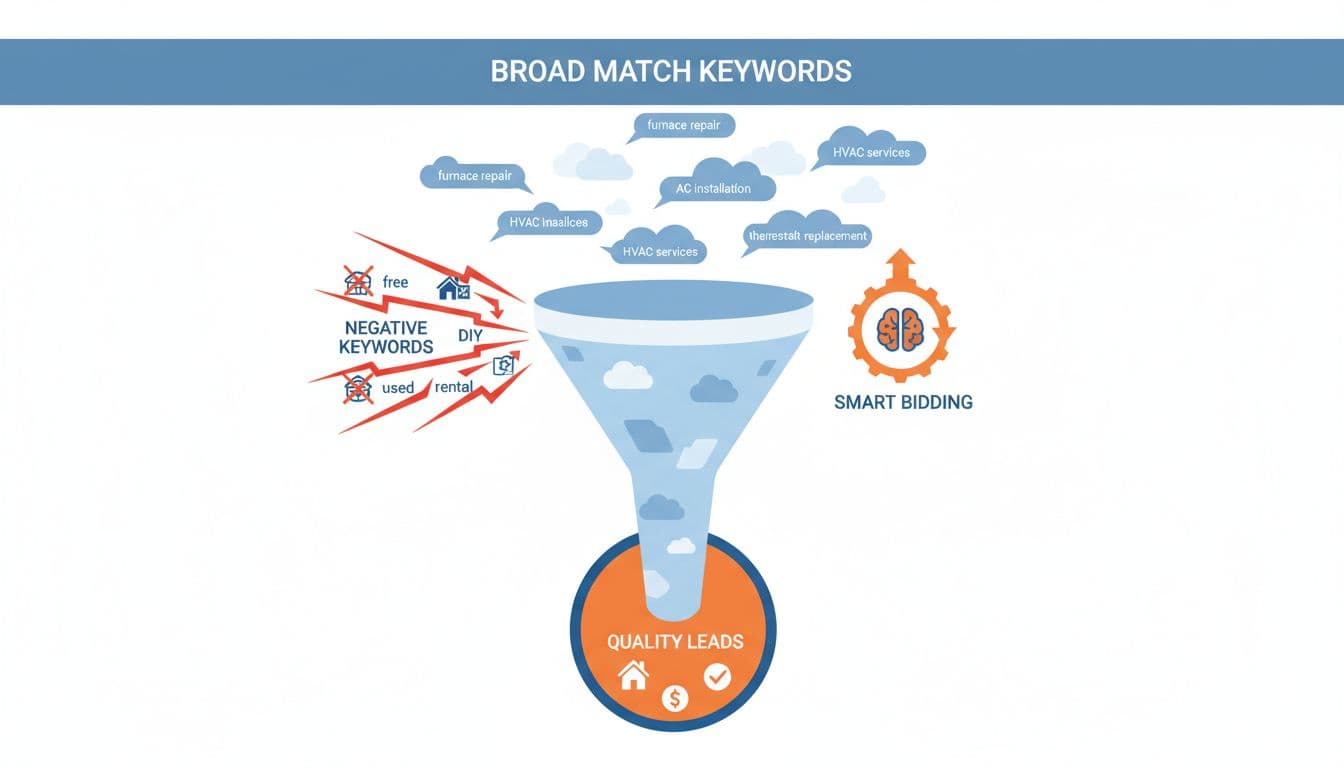
QA checks across channels, windows, and attribution outcomes, created with AI.

Run QA like you’re testing a checkout. Small tracking bugs become expensive fast.

High-value test cases (do these on desktop and mobile):

  • Google Ads call-only ads with gclid: number swaps, call maps to the correct campaign.
  • Google Ads call extensions: number swaps, call maps to the correct campaign.
  • GMB call tracking: calls from local sources map to the correct listing.
  • UTM-only visit: no gclid, still attributes to source and campaign.
  • Return visit within 7 days: same visitor sees a number and attribution holds.
  • SPA route change: number stays correct after navigation, no flicker to fallback.
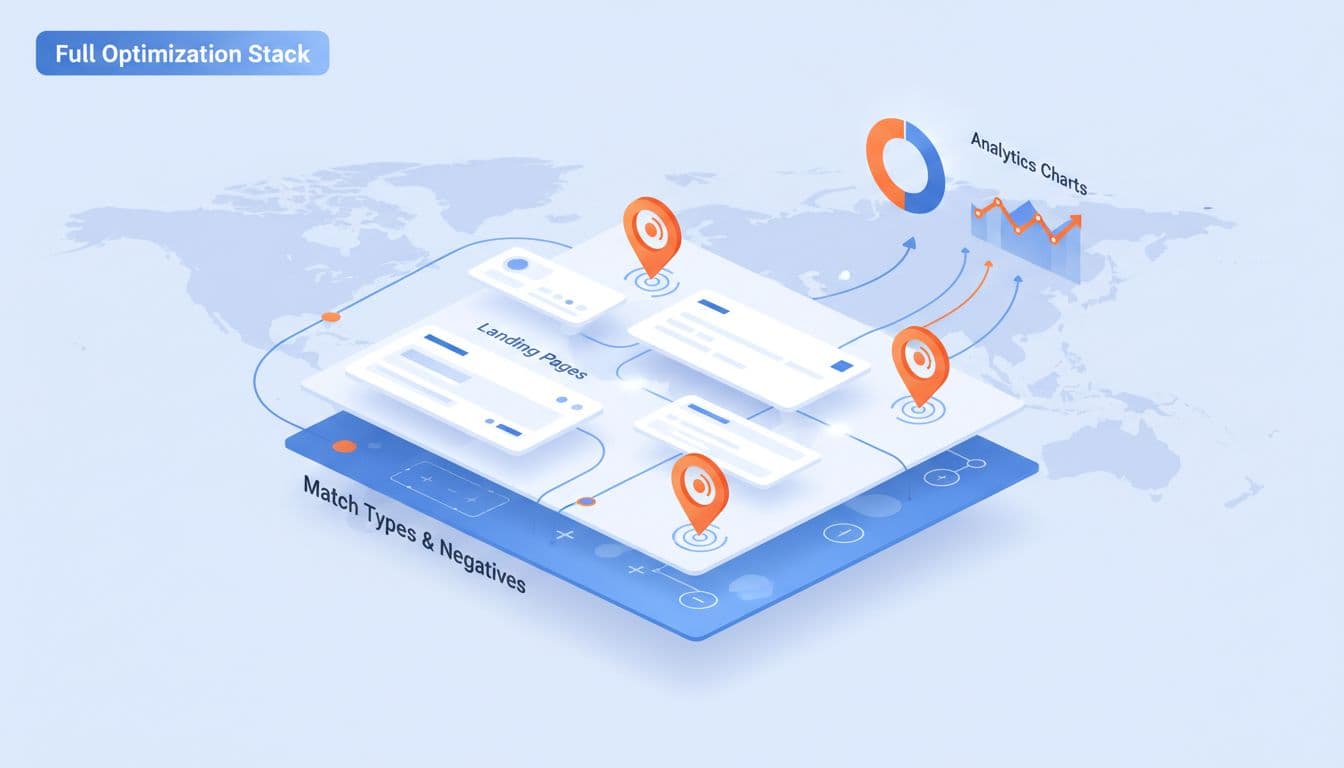
  • Cross-domain hop: user goes to scheduler domain, comes back, then calls.
  • Consent denied: site shows fallback number, analytics does not fire blocked tags.
  • Qualified outcome: CRM marks the call qualified, GA4 receives call_qualified.

Use this troubleshooting matrix when something looks off:

SymptomLikely causeFast fix
Tracking calls show as “direct”UTMs not persisted, or cross-domain breaks sessionStore UTMs first-party, add GA4 cross-domain linker
Wrong campaign on conversion trackingPool too small, number collisionsIncrease pool, shorten session hold time, add safety factor
DNI doesn’t work on SPA pagesSwap runs only on page loadAdd History Change trigger, re-run swap on route updates
GA4 events double-fireMultiple tags or triggers overlapAdd once-per-page guards, tighten trigger conditions
Recording missing or partialConsent flow or IVR step blocks recordingVerify recording settings, add disclosure timing check

Conclusion

A modern call tracking setup is part analytics, part operations, and part compliance. When you size the DNI pool correctly, support SPAs and cross-domain journeys, and optimize your marketing efforts for qualified calls, attribution stops being a debate, even for high-volume Google Ads campaigns.

If your next Google Ads campaign doubles traffic tomorrow, will your call tracking still hold up, or will it blur phone call leads into noise?